用 Plex 打造家裡的電影伺服器


在前一篇文章提到搭了家裡的 home lab Kubernetes 集群,還有一個目的就是搭設一個可以在區域網路看電影的伺服器,這樣用手機也能順暢存取伺服器上的電影隨時看。
 烤雞堡的筆記
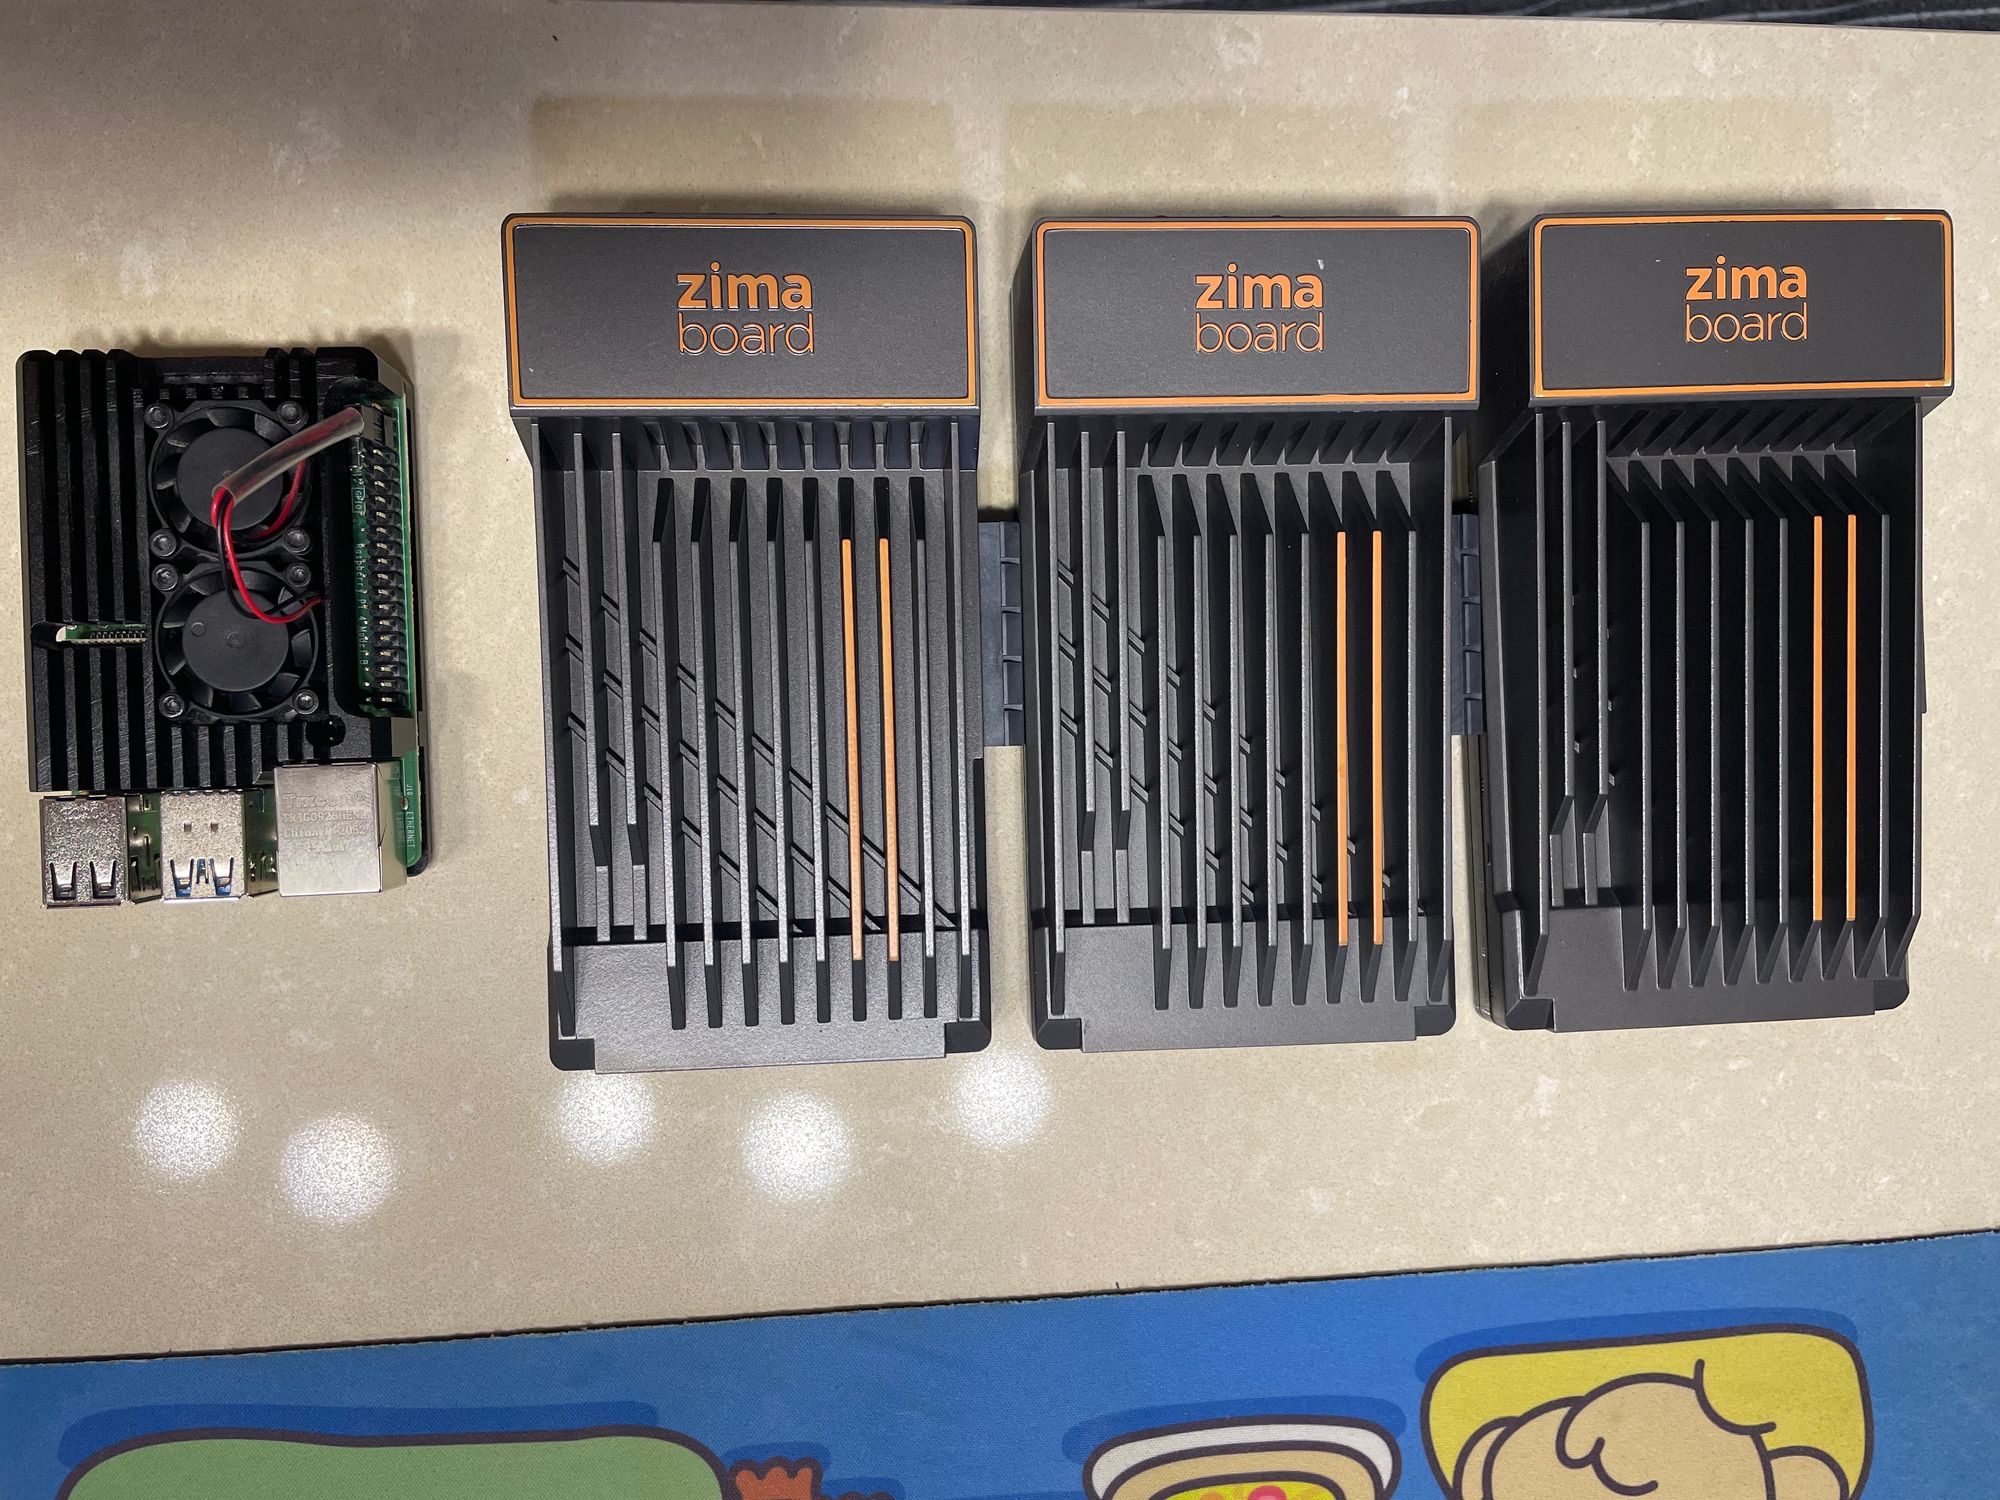
Plex 是什麼?
Plex 是一個整合媒體播放器跟媒體伺服器的軟體,可以讓使用者整理音樂、影片、照片等內容,並提供 Android、IOS 平台 APP 讓使用者在行動裝置上能存取媒體伺服器的內容。
 Plex
Plex
當然,如果你只是想快速的把桌上型電腦的影片內容,架設伺服器分享出去,那可以到下面的連結,官方有提供 Windows 版本的伺服器安裝程式可以直接用。那今天主要就是來介紹如何安裝媒體伺服器在 Kubernetes 的集群上。
Plex
註冊帳號
首先到官網註冊一下帳號。
然後就這樣,可以開始安裝了。
集群設定
硬體
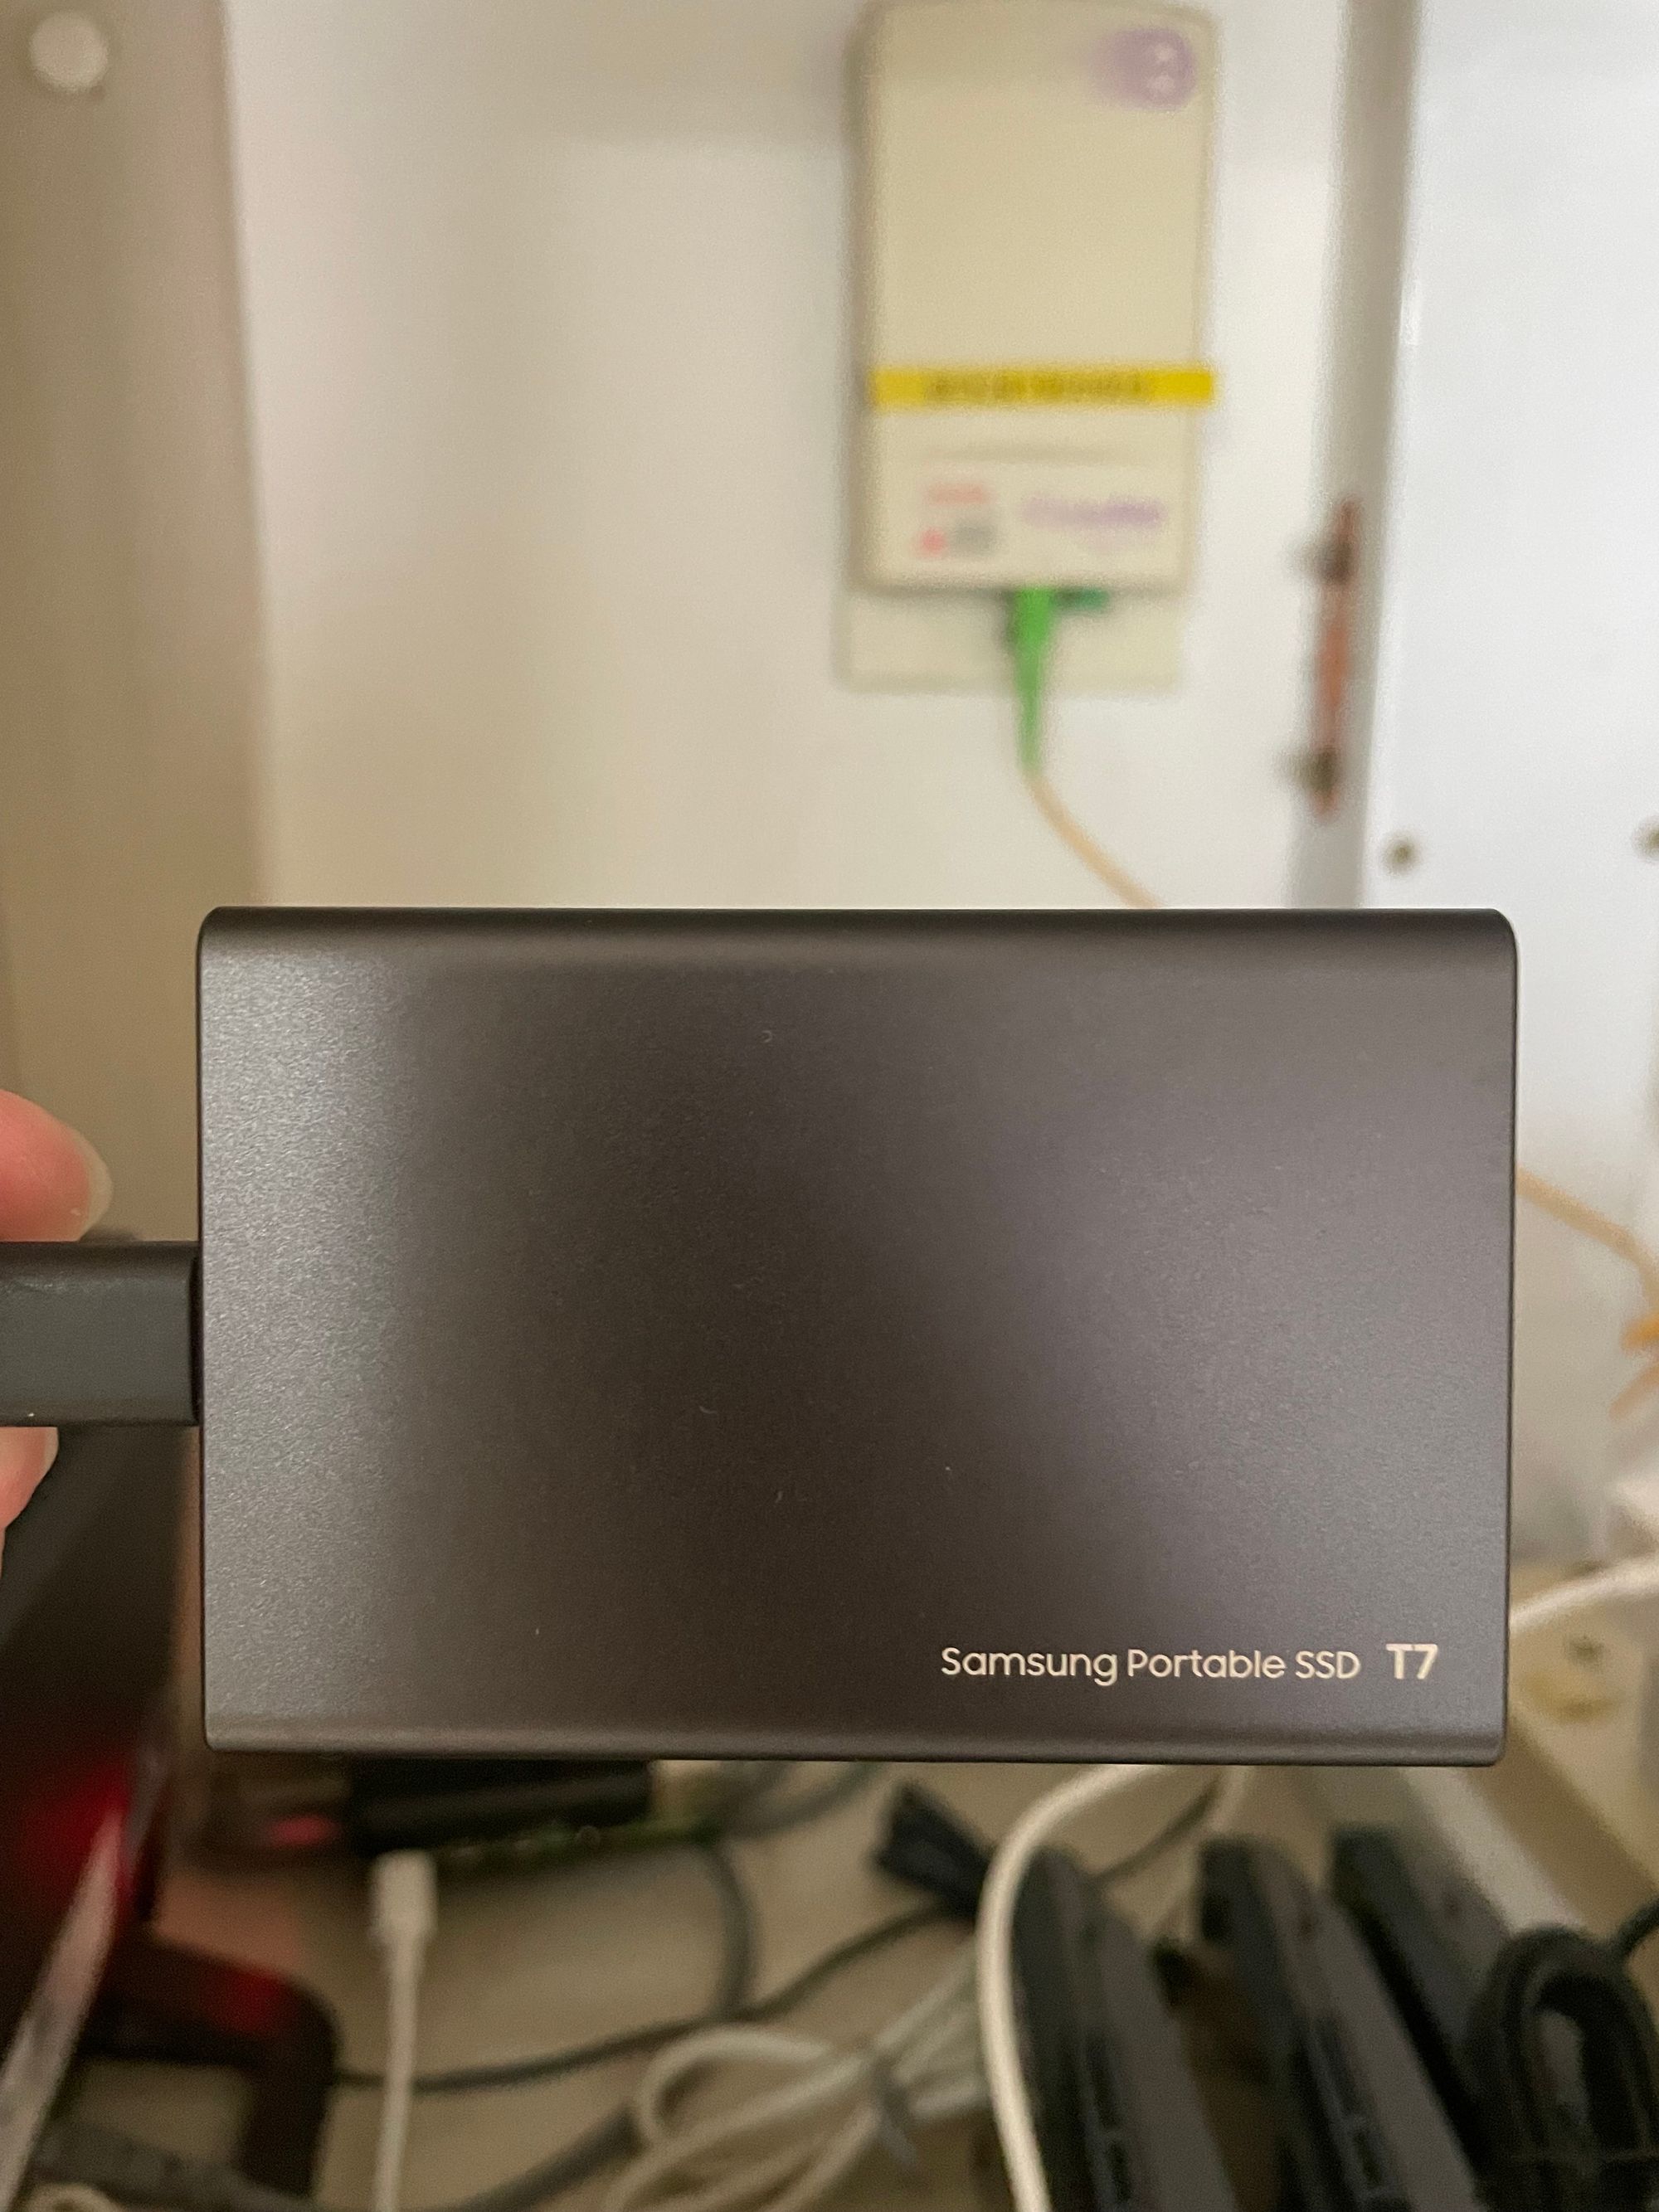
這一次會挑一台 Kubernetes 的 Worker Node 接上這個行動硬碟,已經格式化成 NTFS 格式,並預先放好影片檔案到裡面,來當作媒體伺服器的儲存裝置。
設定開機自動掛載行動硬碟
首先登入到插好行動硬碟的 Worker Node 下,然後先創建要掛載行動硬碟的目錄。
sudo mkdir /media/PSSD_T7
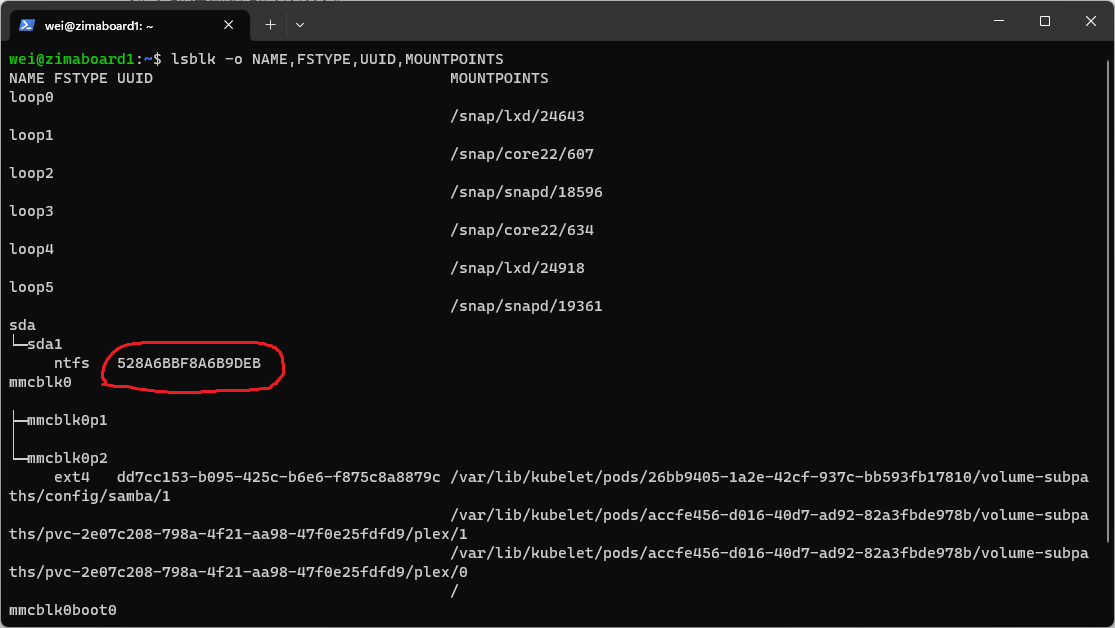
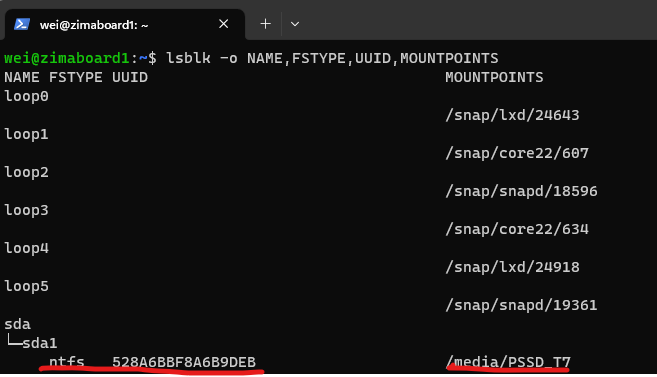
接著取得硬碟的 UUID。
lsblk -o NAME,FSTYPE,UUID,MOUNTPOINTS
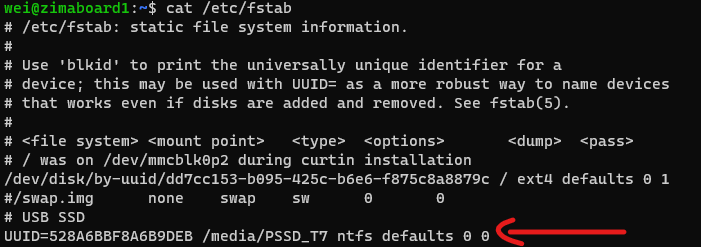
接著編輯 /etc/fstab 檔案。
sudo nano /etc/fstab
在最後一行後添加以下內容。
UUID=<UUID> <PATH_TO_MOUNT> <DRIVE_TYPE> defaults 0 0
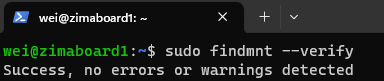
最後跑一下這個指令檢查設定正確性。
sudo findmnt --verify
然後重開機,再次執行下列指令確認掛載成功就可以。
lsblk -o NAME,FSTYPE,UUID,MOUNTPOINTS
安裝 Kubernetes Intel Device Plugin
由於我購買的 ZimaBoard 單板電腦 CPU Intel N3450 是有內顯的,所以可以安裝 Intel 的 Device plugin 讓 Pod 裡可以存取到主機上的內顯裝置,可以讓影片轉檔或是解碼的效能更好。
 Kubernetes
安裝步驟可以照這份文件的教學來做。
 GitHub
首先先執行以下命令確認當前 Kernal 有支援內顯的 Driver,且顯卡裝置有被主機偵測到。
grep i915 /sys/class/drm/card?/device/uevent
lspci | grep -e VGA -e Display | grep Intel


接著執行下面的指令安裝 Device Plugin。
最後的版本號可以到 Release 頁面看一下最新是第幾版。
kubectl apply -k 'https://github.com/intel/intel-device-plugins-for-kubernetes/deployments/gpu_plugin?ref=v0.27.0'
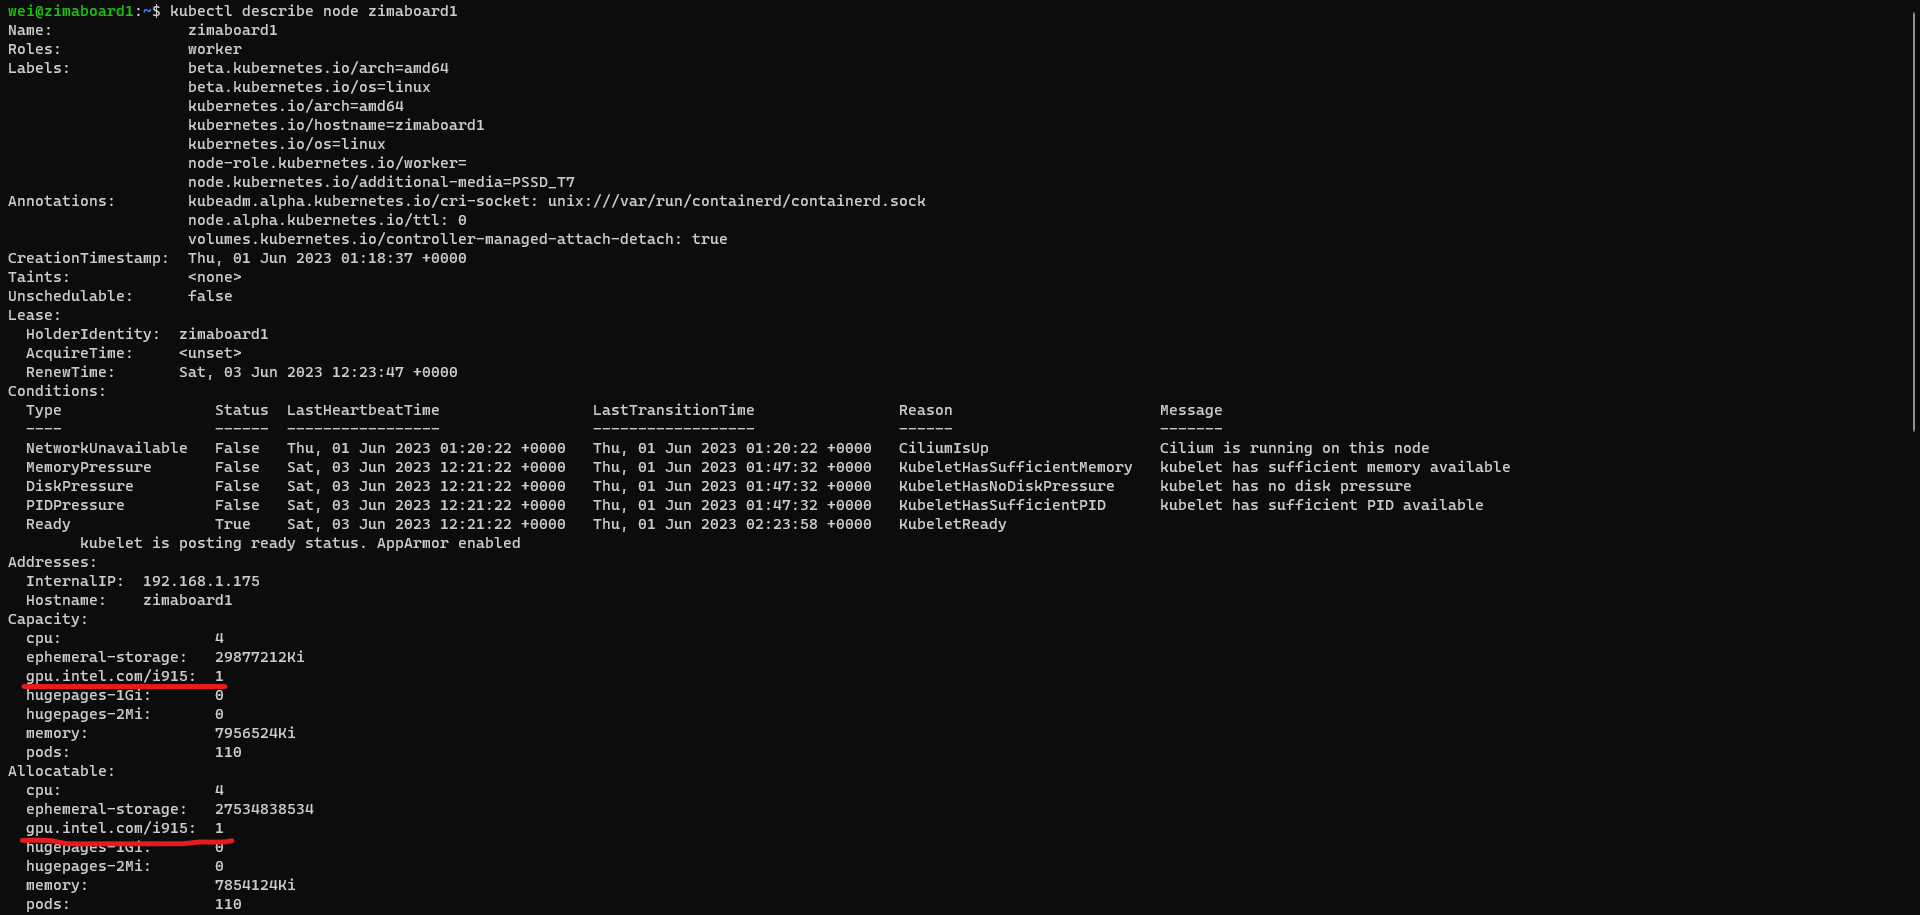
安裝成功之後,執行以下的指令確定 Device Plugin 有安裝成功。
kubectl describe node {NODE NAME}
安裝 Plex Media Server
Plex 官方有提供 Docker 版本的 Media Server 可以用。
GitHub首先來寫一下部屬用的 yaml 檔案,想偷懶的朋友文章最後會有完整的安裝清單可以下載。
首先建立這樣的目錄結構跟檔案。
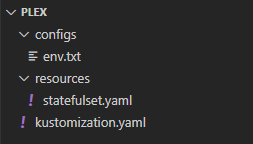
resources/statefulset.yaml 的內容為部屬 Plex Media Server 的設定。
apiVersion: apps/v1
kind: StatefulSet
metadata:
  name: plex
spec:
  replicas: 1
  selector:
    matchLabels:
      app.kubernetes.io/name: plex
  volumeClaimTemplates:
  - metadata: # 存放 Plex Media Server 本身設定的持久捲
      name: data
    spec:
      accessModes:
      - ReadWriteOnce
      storageClassName: local-path
      resources:
        requests:
          storage: 5Gi
  template:
    metadata:
      labels:
        app.kubernetes.io/name: plex
    spec:
      enableServiceLinks: false
      hostNetwork: true # 如同官方 Docker 部屬範例需要用 hostNetwork 模式部署
      nodeSelector:
        node.kubernetes.io/additional-media: PSSD_T7 # 指定在有掛載行動硬碟的 Node 跑
      volumes:
      - name: video # 掛載 Node 上行動硬碟的資料夾
        hostPath:
          type: Directory
          path: /media/PSSD_T7/Video
      containers:
      - name: plex
        image: plexinc/pms-docker
        imagePullPolicy: IfNotPresent
        envFrom:
        - secretRef:
            name: env
        resources:
          limits:
            cpu: "3"
            memory: 3Gi
            gpu.intel.com/i915: 1 # 設定需要使用 GPU 裝置
          requests:
            cpu: 100m
            memory: 128Mi
            gpu.intel.com/i915: 1
        ports:
        - name: http
          protocol: TCP
          containerPort: 32400
        readinessProbe:
          httpGet:
            port: http
            path: /identity
        livenessProbe:
          httpGet:
            port: http
            path: /identity
        volumeMounts:
        - name: data
          mountPath: /config
          subPath: config
        - name: data
          mountPath: /transcode
          subPath: transcode
        - name: video
          mountPath: /Video
configs/env.txt 是要掛載進容器的環境變數列表,內容如下:
TZ 是時區容易理解,PLEX_CLAIM 是伺服器啟動時用來認證帳號的 Token,到下面的網址去取得一把。
Plex
TZ=Asia/Taipei
PLEX_CLAIM=claim-xxxxxxxxxxxxxxxxxxxx
最後是 kustomization.yaml 的檔案內容。
Image 的 Tag 可以到這個頁面取得最新版的版號。
apiVersion: kustomize.config.k8s.io/v1beta1
kind: Kustomization
resources:
- ./resources/statefulset.yaml
secretGenerator:
- name: env
  envs:
  - ./configs/env.txt
images:
- name: plexinc/pms-docker
  newTag: 1.32.2.7100-248a2daf0
最後執行這個指令來安裝。
kubectl apply -n plex -k .

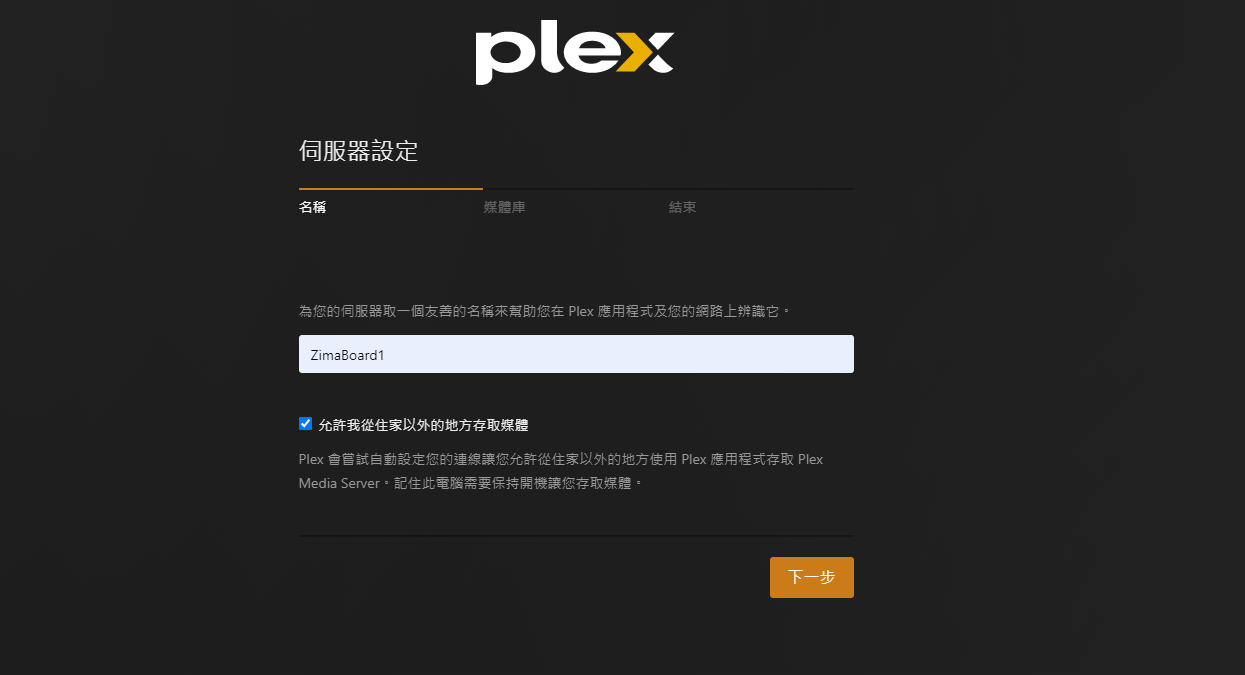
設定 Plex Media Server
等待 Pod 都就緒之後,透過安裝 Plex Media Server 的主機位置連上
http://{NODE IP}:32400/web/index.html
設定伺服器名稱,以及看你的需求有沒有要讓伺服器在網際網路上能連上。
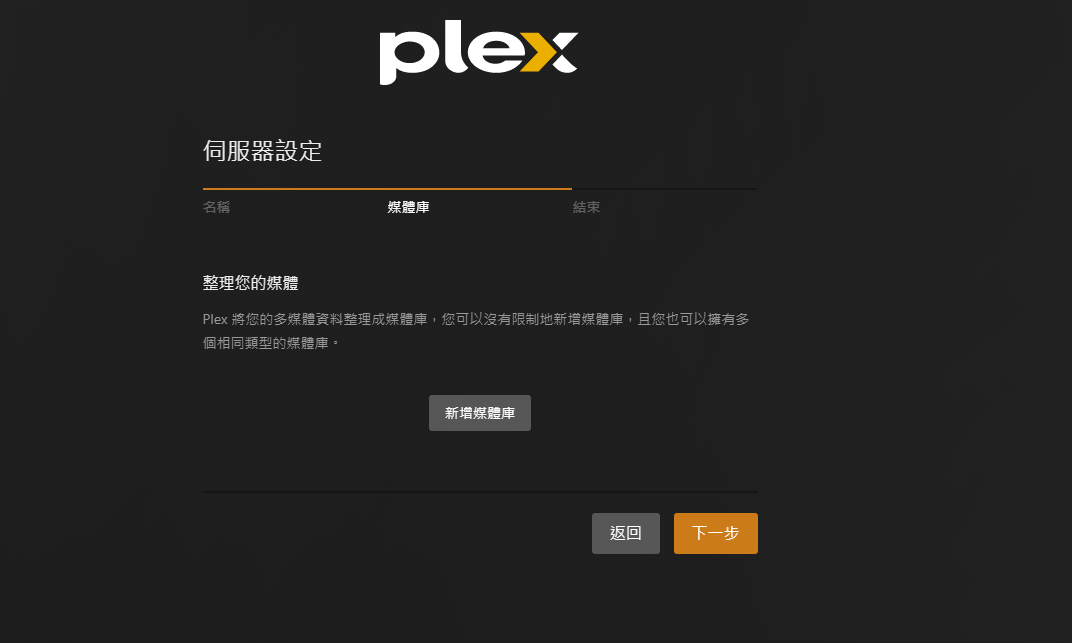
新增掛載到 Pod 內的行動碟的目錄成媒體庫目錄。
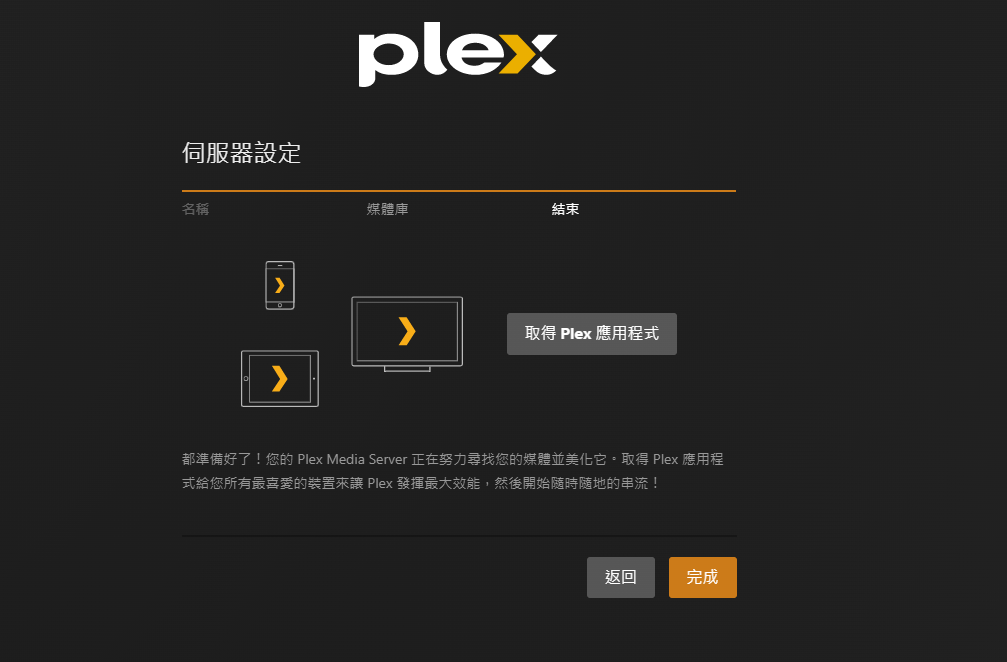
最後可以去手機上下載 Plex APP 登入帳號,等待媒體伺服器掃描完影片後就能看了。


安裝 Samba Server
安裝完 Plex Media Server 之後,眼下還有一個問題,我如果下載了新的影片,難道我每次去拔行動硬碟嗎?
當然不是,所以我們需要來安裝一個 Samba Server 讓我在 Windows 電腦的檔案總管,就能直接簡單的複製檔案。
關於 Samba Server 可以看鳥歌的文章裏面有介紹這是一個什麼東西。
這次要拿來安裝的,是下面這個 Samba Server 的 Docker 版本。
GitHub我們在安裝的清單中 resources/statefulset.yaml 再加上下面的內容。
---
apiVersion: apps/v1
kind: StatefulSet
metadata:
  name: samba
spec:
  replicas: 1
  selector:
    matchLabels:
      app.kubernetes.io/name: samba
  template:
    metadata:
      labels:
        app.kubernetes.io/name: samba
    spec:
      enableServiceLinks: false
      hostNetwork: true # 同樣需要 hostNetwork 模式才能工作
      nodeSelector:
        node.kubernetes.io/additional-media: PSSD_T7 # 指定在有掛載行動硬碟的 Node 跑
      volumes:
      - name: pssd-t7 # 掛載 Node 上行動硬碟的資料夾
        hostPath:
          type: Directory
          path: /media/PSSD_T7
      - name: config
        configMap:
          name: samba
      containers:
      - name: samba
        image: dperson/samba
        imagePullPolicy: IfNotPresent
        env:
        - name: TZ # 設定伺服器時區
          value: Asia/Taipei
        - name: RECYCLE # 關閉資源回收桶功能
          value: "false"
        resources:
          limits:
            cpu: 500m
            memory: 1Gi
          requests:
            cpu: 100m
            memory: 128Mi
        ports:
        - name: samba-legacy
          protocol: TCP
          containerPort: 139
        - name: samba
          protocol: TCP
          containerPort: 445
        readinessProbe:
          tcpSocket:
            port: 445
        livenessProbe:
          tcpSocket:
            port: 445
        volumeMounts:
        - name: pssd-t7
          mountPath: /media/PSSD_T7
        - name: config
          mountPath: /etc/samba/smb.conf
          subPath: smb.conf
          readOnly: true
接著新增 configs/smb.conf 檔案添加以下內容。
# This is the main Samba configuration file. You should read the
# smb.conf(5) manual page in order to understand the options listed
# here. Samba has a huge number of configurable options (perhaps too
# many!) most of which are not shown in this example
#
# For a step to step guide on installing, configuring and using samba,
# read the Samba-HOWTO-Collection. This may be obtained from:
#  http://www.samba.org/samba/docs/Samba-HOWTO-Collection.pdf
#
# Many working examples of smb.conf files can be found in the
# Samba-Guide which is generated daily and can be downloaded from:
#  http://www.samba.org/samba/docs/Samba-Guide.pdf
#
# Any line which starts with a ; (semi-colon) or a # (hash)
# is a comment and is ignored. In this example we will use a #
# for commentry and a ; for parts of the config file that you
# may wish to enable
#
# NOTE: Whenever you modify this file you should run the command "testparm"
# to check that you have not made any basic syntactic errors.
#
#======================= Global Settings =====================================
[global]

# workgroup = NT-Domain-Name or Workgroup-Name, eg: MIDEARTH
   workgroup = MYGROUP

# server string is the equivalent of the NT Description field
   server string = Samba Server

# Server role. Defines in which mode Samba will operate. Possible
# values are "standalone server", "member server", "classic primary
# domain controller", "classic backup domain controller", "active
# directory domain controller".
#
# Most people will want "standalone server" or "member server".
# Running as "active directory domain controller" will require first
# running "samba-tool domain provision" to wipe databases and create a
# new domain.
   server role = standalone server

# This option is important for security. It allows you to restrict
# connections to machines which are on your local network. The
# following example restricts access to two C class networks and
# the "loopback" interface. For more examples of the syntax see
# the smb.conf man page
;   hosts allow = 192.168.1. 192.168.2. 127.

# Uncomment this if you want a guest account, you must add this to /etc/passwd
# otherwise the user "nobody" is used
;  guest account = pcguest

# this tells Samba to use a separate log file for each machine
# that connects
   log file = /dev/stdout

# Put a capping on the size of the log files (in Kb).
   max log size = 50

# Specifies the Kerberos or Active Directory realm the host is part of
;   realm = MY_REALM

# Backend to store user information in. New installations should
# use either tdbsam or ldapsam. smbpasswd is available for backwards
# compatibility. tdbsam requires no further configuration.
;   passdb backend = tdbsam

# Using the following line enables you to customise your configuration
# on a per machine basis. The %m gets replaced with the netbios name
# of the machine that is connecting.
# Note: Consider carefully the location in the configuration file of
#       this line.  The included file is read at that point.
;   include = /usr/local/samba/lib/smb.conf.%m

# Configure Samba to use multiple interfaces
# If you have multiple network interfaces then you must list them
# here. See the man page for details.
;   interfaces = 192.168.12.2/24 192.168.13.2/24

# Where to store roving profiles (only for Win95 and WinNT)
#        %L substitutes for this servers netbios name, %U is username
#        You must uncomment the [Profiles] share below
;   logon path = \\%L\Profiles\%U

# Windows Internet Name Serving Support Section:
# WINS Support - Tells the NMBD component of Samba to enable it's WINS Server
;   wins support = yes

# WINS Server - Tells the NMBD components of Samba to be a WINS Client
#       Note: Samba can be either a WINS Server, or a WINS Client, but NOT both
;   wins server = w.x.y.z

# WINS Proxy - Tells Samba to answer name resolution queries on
# behalf of a non WINS capable client, for this to work there must be
# at least one  WINS Server on the network. The default is NO.
;   wins proxy = yes

# DNS Proxy - tells Samba whether or not to try to resolve NetBIOS names
# via DNS nslookups. The default is NO.
   dns proxy = no

# These scripts are used on a domain controller or stand-alone
# machine to add or delete corresponding unix accounts
;  add user script = /usr/sbin/useradd %u
;  add group script = /usr/sbin/groupadd %g
;  add machine script = /usr/sbin/adduser -n -g machines -c Machine -d /dev/null -s /bin/false %u
;  delete user script = /usr/sbin/userdel %u
;  delete user from group script = /usr/sbin/deluser %u %g
;  delete group script = /usr/sbin/groupdel %g


   pam password change = yes
   map to guest = bad user
   usershare allow guests = yes
   create mask = 0664
   force create mode = 0664
   directory mask = 0775
   force directory mode = 0775
   force user = smbuser
   force group = smb
   follow symlinks = yes
   load printers = no
   printing = bsd
   printcap name = /dev/null
   disable spoolss = yes
   strict locking = no
   aio read size = 0
   aio write size = 0
   vfs objects = catia fruit streams_xattr

   # Security
   client ipc max protocol = SMB3
   client ipc min protocol = SMB2_10
   client max protocol = SMB3
   client min protocol = SMB2_10
   server max protocol = SMB3
   server min protocol = SMB2_10

   # Time Machine
   fruit:delete_empty_adfiles = yes
   fruit:time machine = yes
   fruit:veto_appledouble = no
   fruit:wipe_intentionally_left_blank_rfork = yes

[PSSD_T7] # 掛載行動硬碟的相關設定
   path = /media/PSSD_T7 # Pod 中的路徑
   browsable = yes # 目錄可以被瀏覽
   read only = no # 目錄受否唯讀
   guest ok = yes # 匿名使用者是否可以存取
   veto files = /.apdisk/.DS_Store/.TemporaryItems/.Trashes/desktop.ini/ehthumbs.db/Network Trash Folder/Temporary Items/Thumbs.db/ # 禁止寫入的檔案
   delete veto files = yes # 刪除禁止寫入的檔案
   hide files = /System Volume Information/$RECYCLE.BIN/ # 隱藏檔案,這兩個是 Windows 的系統資料夾,直接隱藏避免誤刪
最後 kustomization.yaml 增加內容最後如下:
apiVersion: kustomize.config.k8s.io/v1beta1
kind: Kustomization
resources:
- ./resources/statefulset.yaml
configMapGenerator: # 新增掛載 Samba Server 設定檔
- name: samba
  files:
  - smb.conf=./configs/smb.conf
secretGenerator:
- name: env
  envs:
  - ./configs/env.txt
images:
- name: plexinc/pms-docker
  newTag: 1.32.2.7100-248a2daf0
最後執行這個指令來安裝。
kubectl apply -n plex -k .

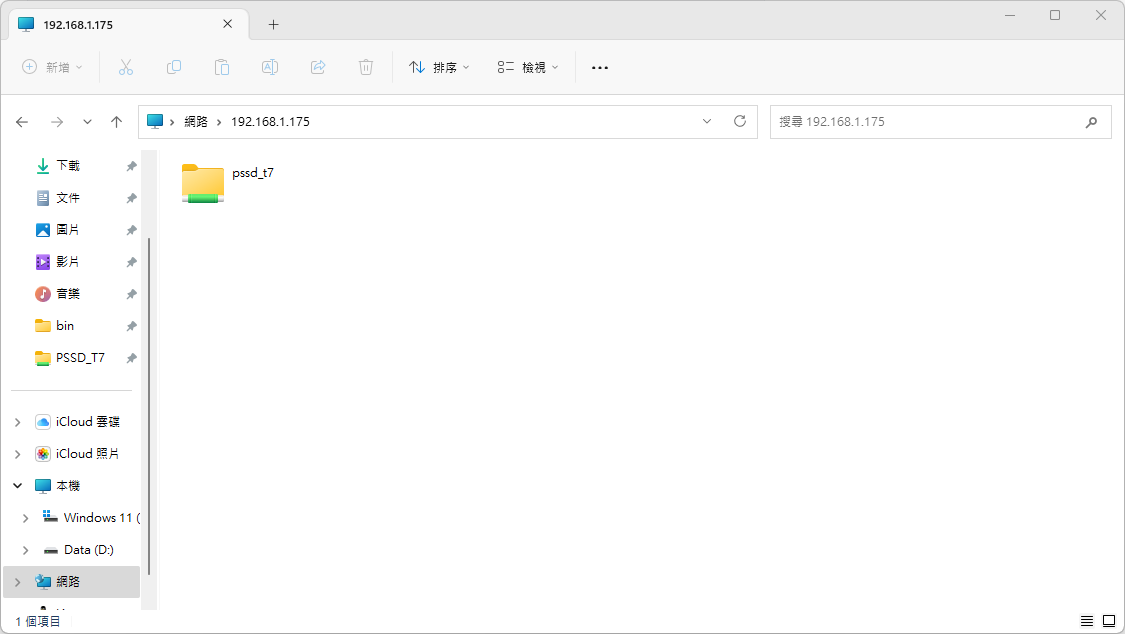
安裝完成後,到檔案總管,用 NODE IP 就能看到分享出來的資料夾,透過檔案總管就能輕鬆的新增影片到伺服器上。
最後
到這邊,Plex Media Server 算是架完了,也有 Samba Server 可以方便的新增影片檔案,那就祝大家看得愉快了。