home-lab 2.0 part 3 核心服務篇 2


各位大家好,這篇文章來介紹上一篇文章還沒介紹完的一些要安裝在 LXC 跟 VM 上的核心服務。
 Wan, Jiun-Wei
PVE Scripts Local (LXC)
 Bram Suurd
前面我們在 Proxmox 安裝完成後,會到這個網站去找一些系統設定優化的腳本來跑,這個網站還有出一個可以自己安裝的版本,它除了可以看有哪些腳本之外,還可以直接把每一台 Proxmox 主機加到清單中直接一鍵安裝任何你想要的軟體。
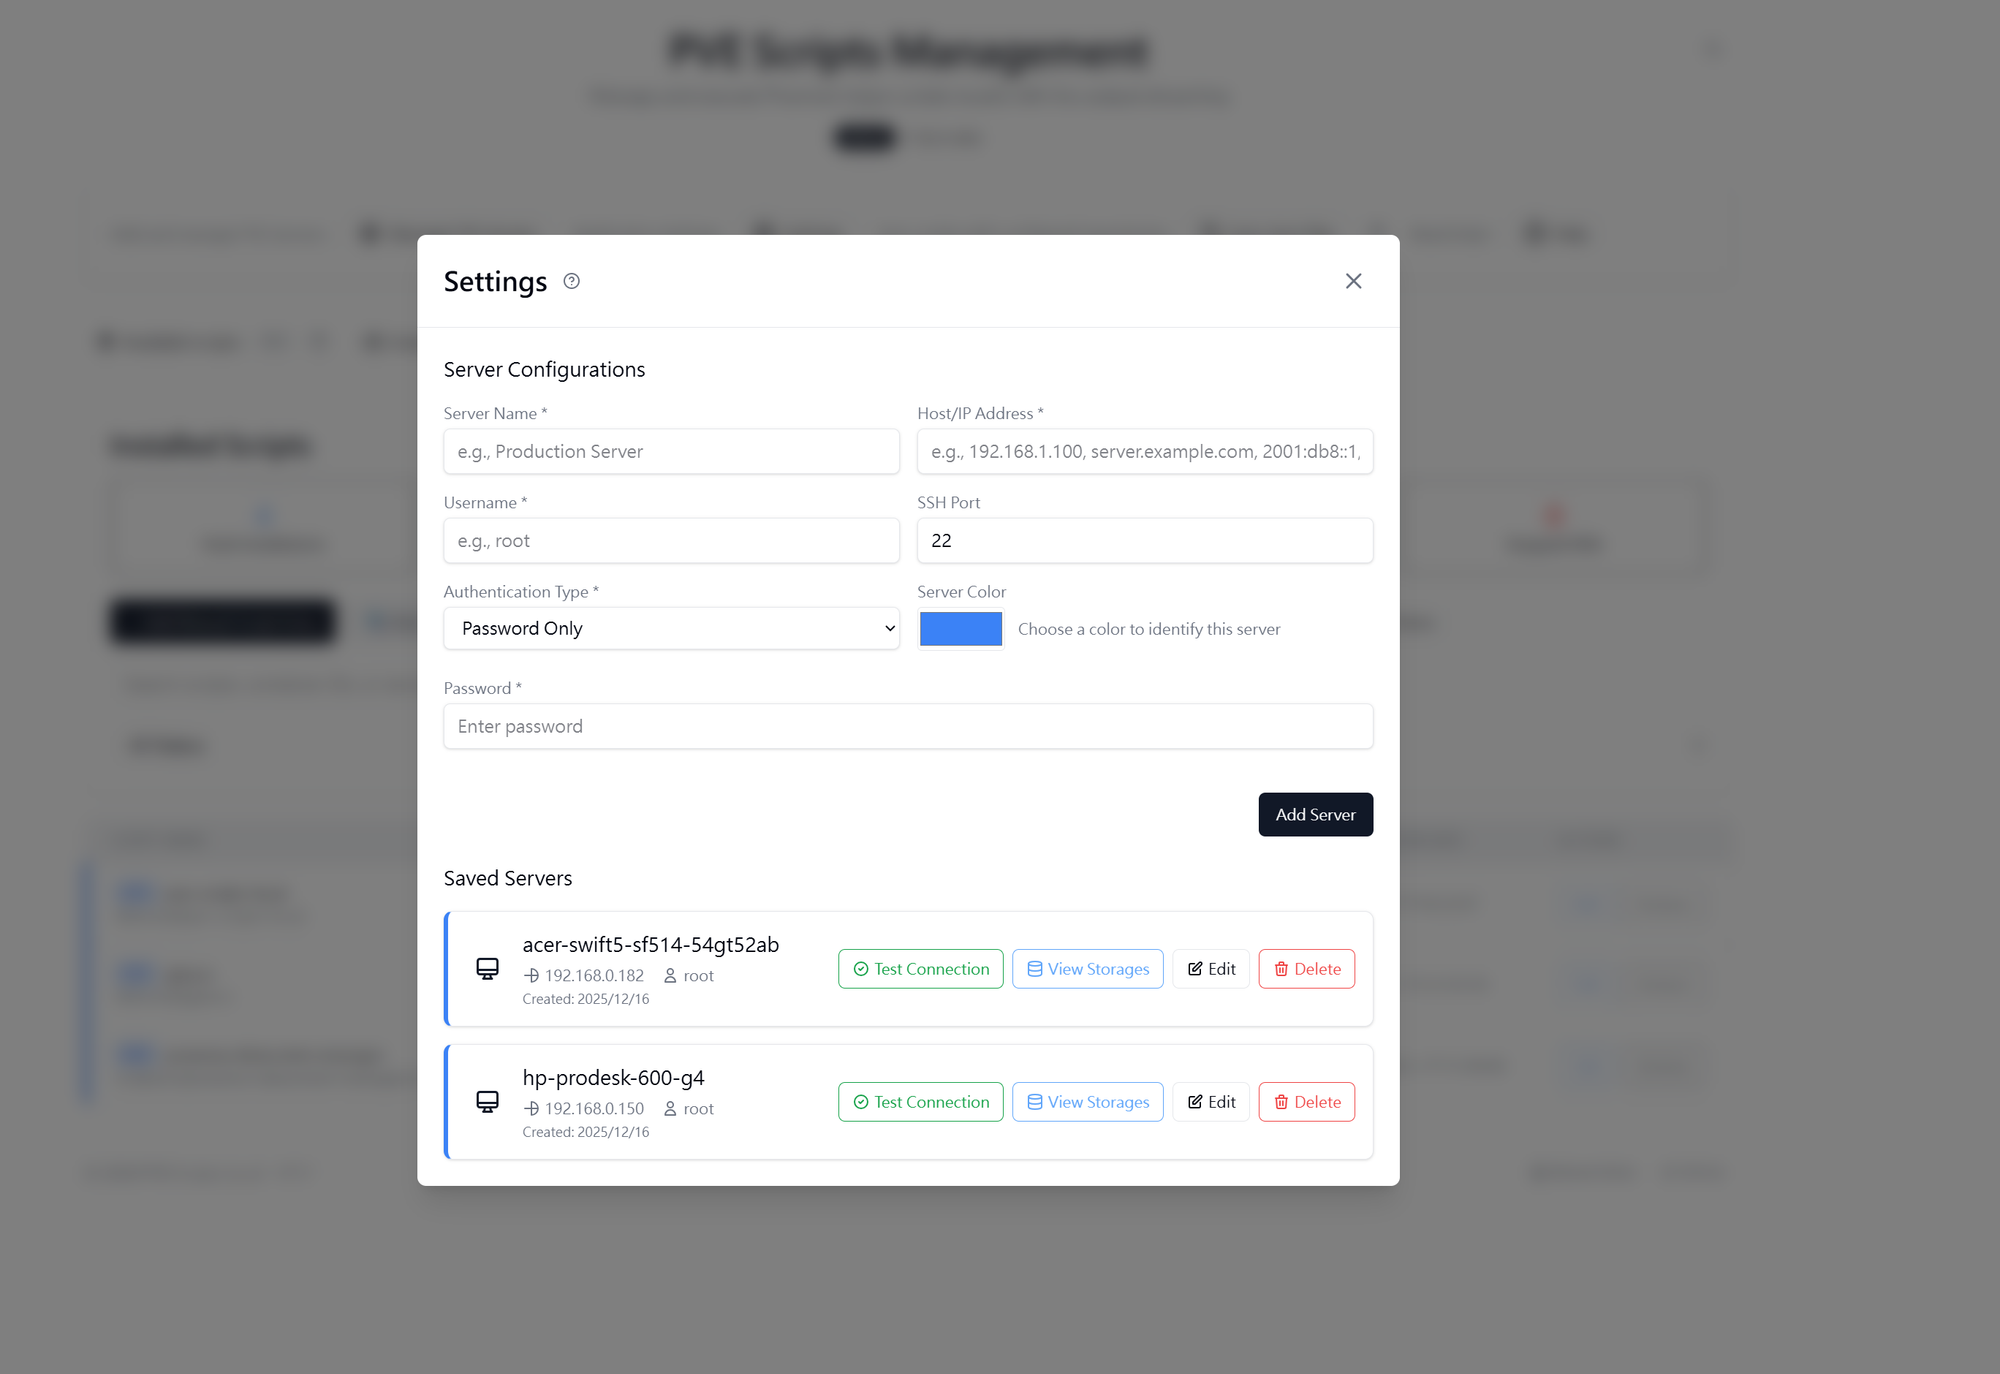
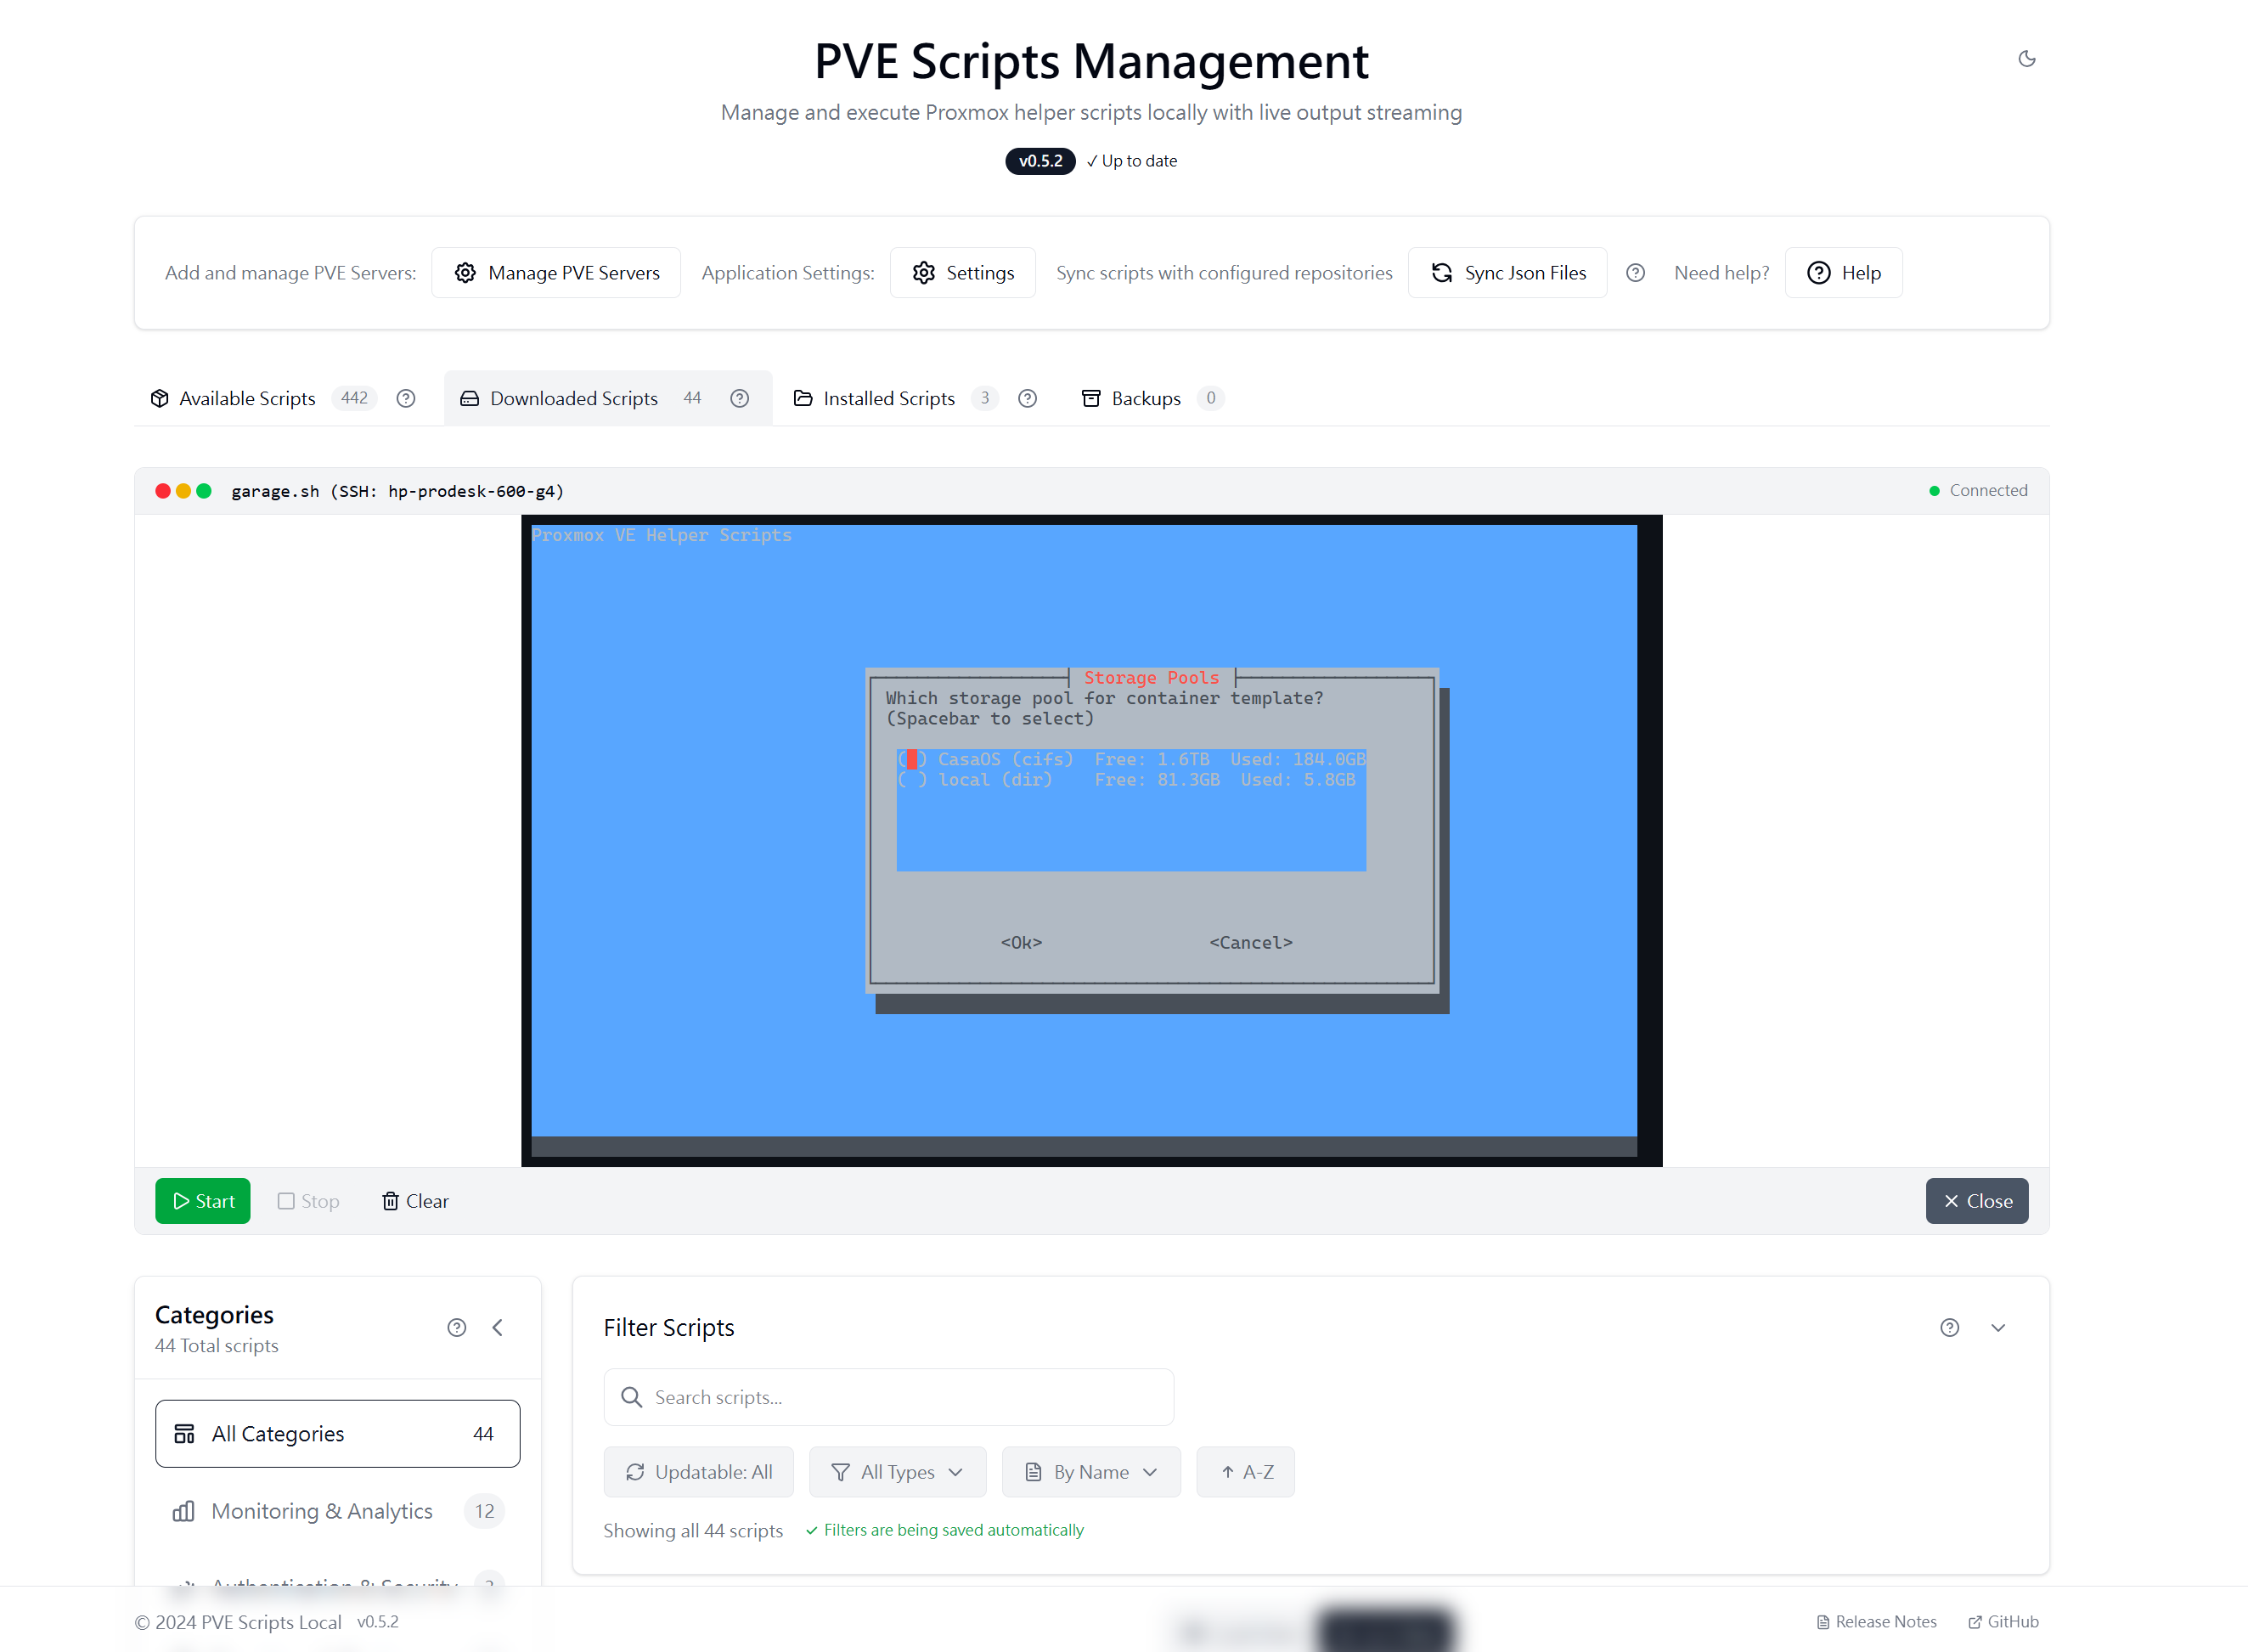
安裝腳本在這裡可以找到,找一台機器在 Proxmox 命令列直接貼上然後都用預設設定等他跑完就好了。
 Bram Suurd
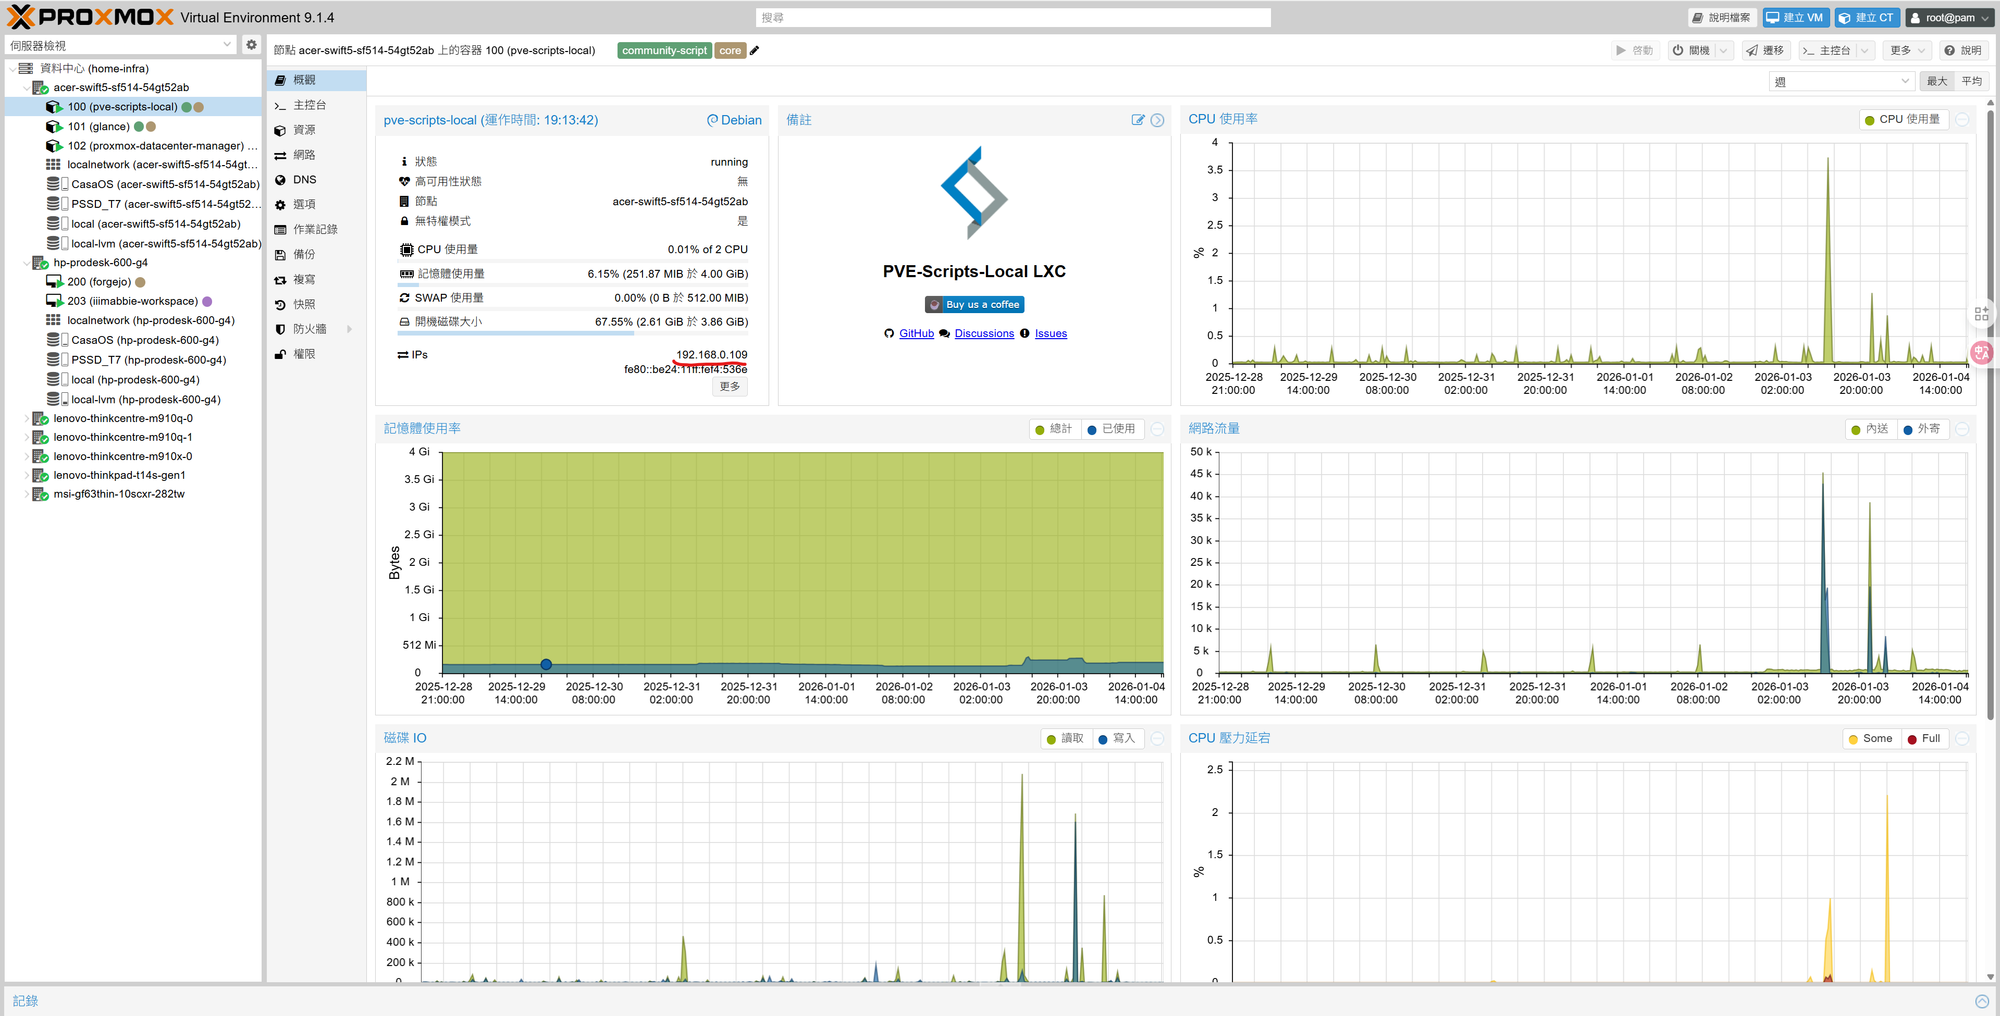
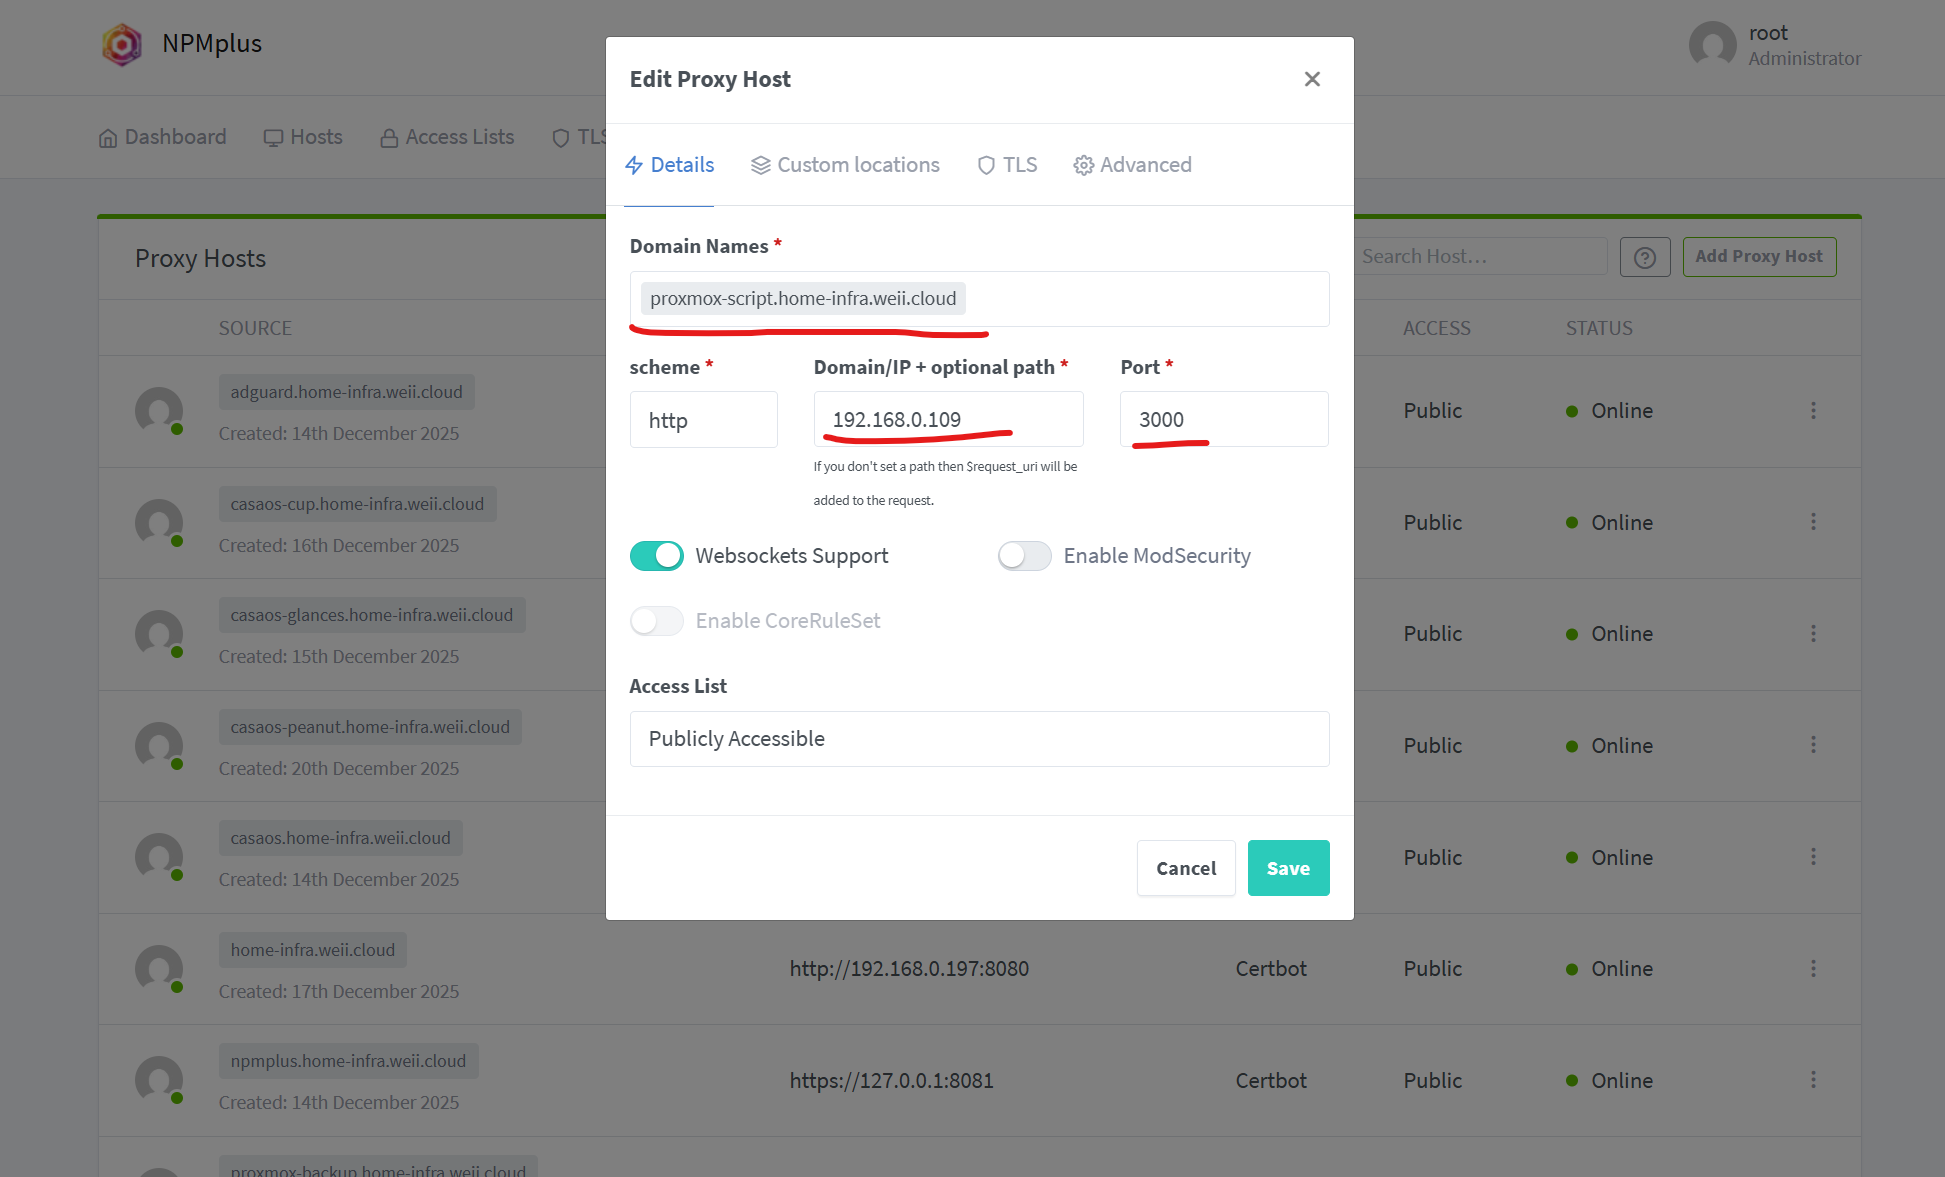
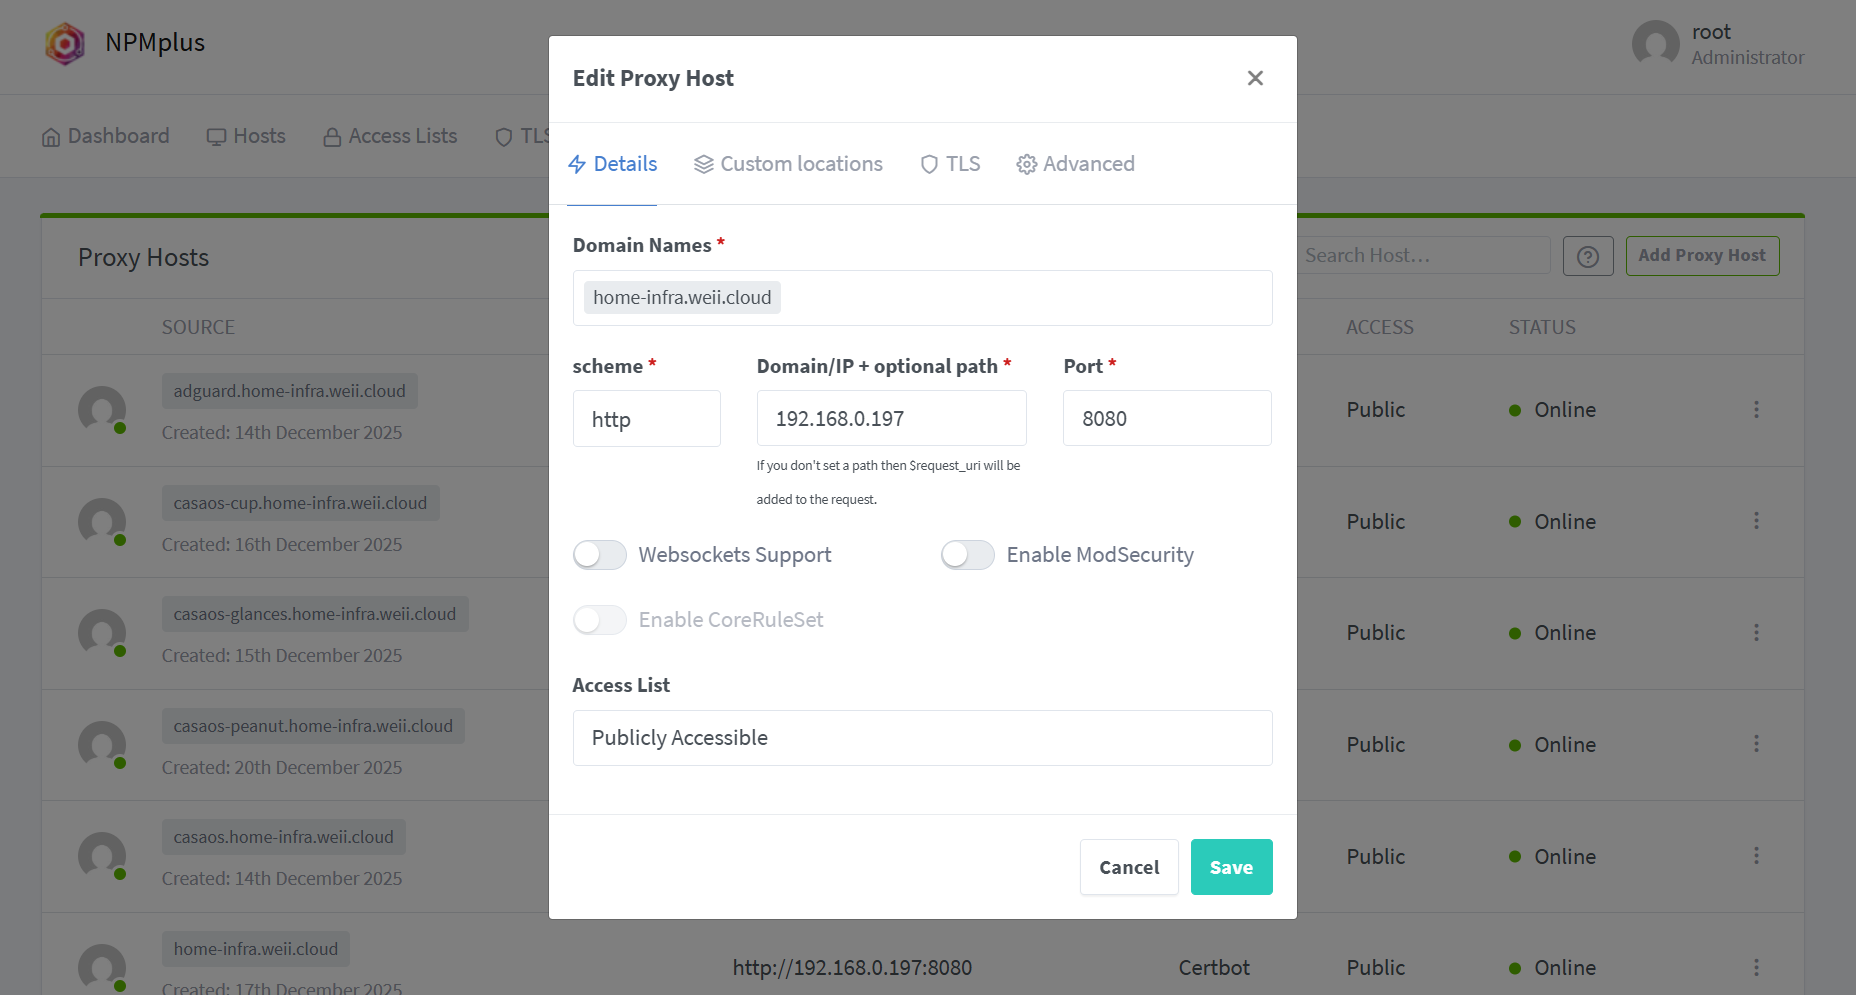
安裝完之後到 NPMplus 上設定好一個域名指向 LXC 的 IP:Port 。
Forgejo (VM)
接下來是安裝放 Source Code 的地方,最早我是用 Gitea 把這種平台架在 Kubernetes 內,但是發現 Image 也會從這裡拉,等於如果 Kubernetes 出問題,剛好出問題的東西又依賴自己打包的 Image,就直接變成循環依賴,很難修復,所以這一次就決定這個東西要獨立佈署。


Forgejo 是 Gitea 的一個分支版本,主要是由社群治理且非營利組織託管的 Gitea 分支,旨在確保開發決策不受商業利益干預並維護軟體自由。
它比 Gitea 更強調 ActivityPub 聯邦化、隱私保護與去中心化,致力於為使用者提供一個完全自主且無 Telemetry 追蹤的託管環境。
官方網站有一頁在說明他們的差異,如果有興趣可以看看,功能上基本的原始碼管理、issue 追蹤、Actions 以及可以存放 Docker Image 這些都有,算是有滿足我的需要,Actions 寫法也基本上不用改太多就可以從 Gitea 或是 GitHub 遷移過來。
環境準備
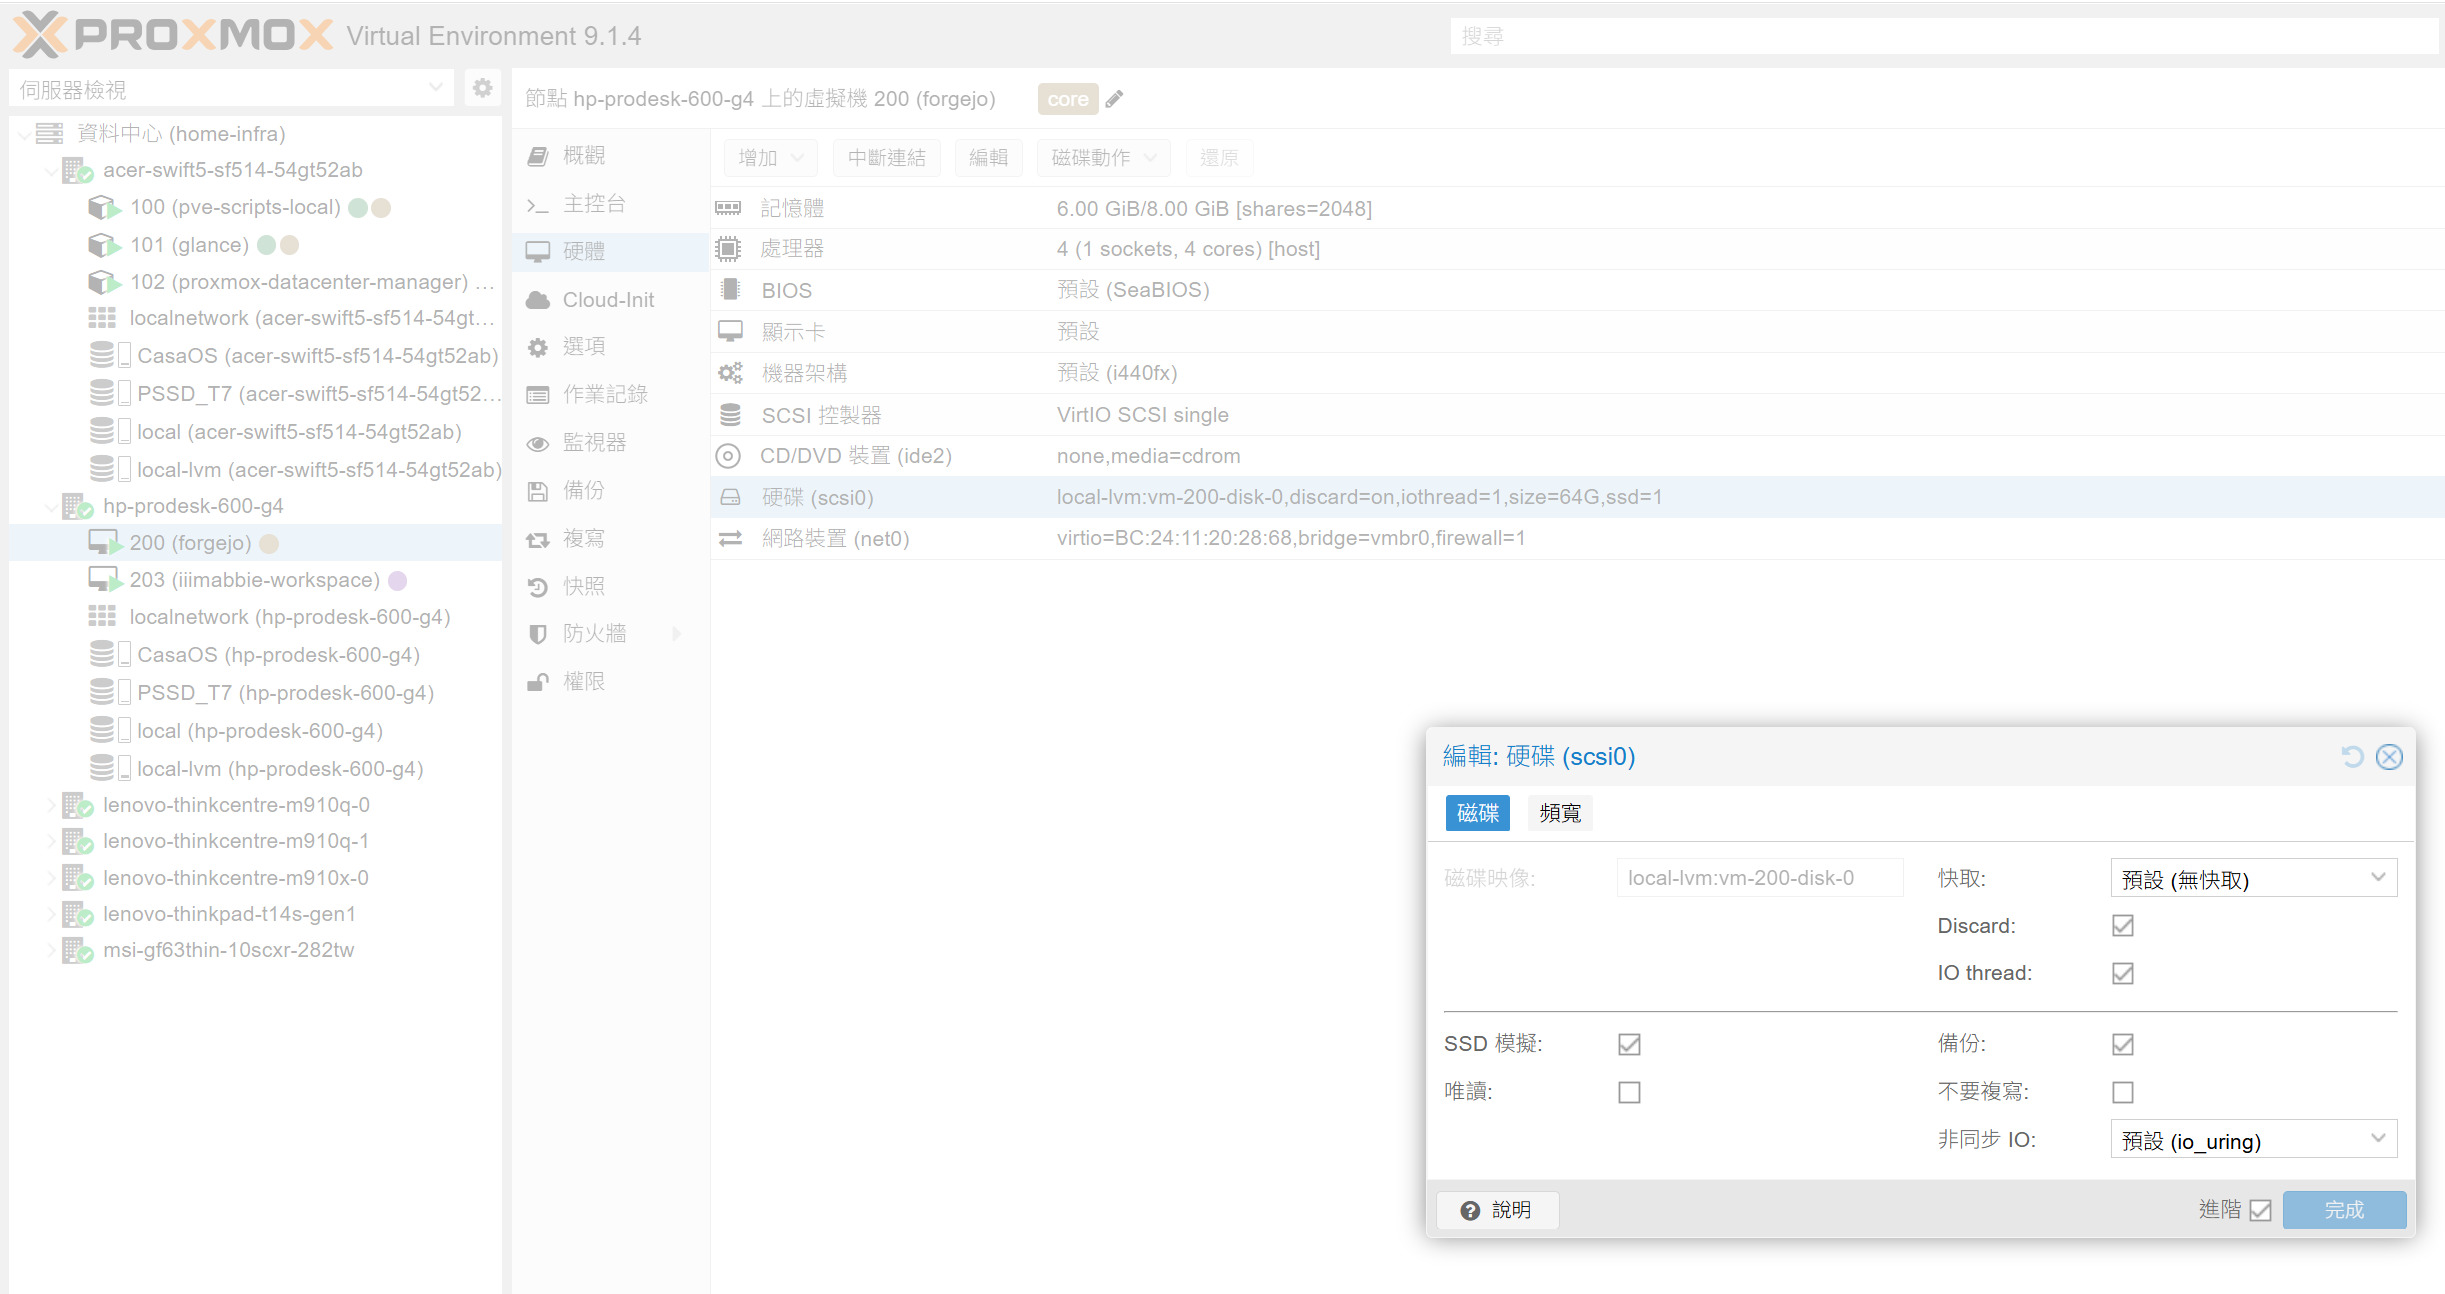
首先建立要佈署用的虛擬機,下面是我機器的設定,OS 我是安裝 Fedora Server 43,主要平常都沒在用 Red Hat 系列發行版,裝來熟悉一下,安裝過程應該蠻簡單的就不多贅述了,主要圖形介面不需要裝省點資源,然後內建的 Podman 不用裝,後續打算使用 Docker 來跑 Actions,剩下就照官方文件安裝完成之後更新系統以及開防火牆就好。




接下來,更新系統並安裝一些基礎工具。我習慣使用 eza (ls 的替代品)、ripgrep 與 btop 來輔助管理,當然你也可以只安裝核心套件。
# 更新系統
sudo dnf update -y

# 安裝基礎工具 (Git, Nano, 監控工具等)
sudo dnf install -y git nano btop ripgrep

sudo dnf install -y eza
# 或者手動下載最新版 binary (如 history 中所示)
wget https://github.com/eza-community/eza/releases/download/v0.23.4/eza_x86_64-unknown-linux-gnu.zip
unzip eza_x86_64-unknown-linux-gnu.zip
sudo mv eza /usr/local/bin/
sudo chmod 755 /usr/local/bin/eza
sudo chown root:root /usr/local/bin/eza
資料庫安裝與組態 (PostgreSQL 18)


Forgejo 支援 SQLite、MySQL 和 PostgreSQL。這裡我們選擇效能與穩定性較佳的 PostgreSQL。由於 Fedora 預設版本可能較舊,我們使用官方 Repo 安裝最新的 PostgreSQL 18。


安裝 PostgreSQL
# 安裝 PostgreSQL 官方 Repo
sudo dnf install -y https://download.postgresql.org/pub/repos/yum/reporpms/F-43-x86_64/pgdg-fedora-repo-latest.noarch.rpm

# 安裝 PostgreSQL 18 Server
sudo dnf install -y postgresql18-server

# 初始化資料庫
sudo /usr/pgsql-18/bin/postgresql-18-setup initdb

# 啟動並設定開機自啟
sudo systemctl enable postgresql-18
sudo systemctl start postgresql-18
建立 Forgejo 專用使用者與資料庫
sudo -i -u postgres psql在 SQL 介面中執行
-- 建立使用者 forgejo 並設定密碼 (請將 'your_secure_password' 替換為你的密碼)
CREATE ROLE forgejo WITH LOGIN PASSWORD 'your_secure_password';

-- 建立資料庫
CREATE DATABASE forgejo WITH OWNER forgejo TEMPLATE template0 ENCODING UTF8 LC_COLLATE 'en_US.UTF-8' LC_CTYPE 'en_US.UTF-8';

-- 離開
\q
修改 pg_hba.conf 權限
為了讓 Forgejo 能透過 scram-sha-256 驗證連線,我們需要修改設定檔。sudo nano /var/lib/pgsql/18/data/pg_hba.conf請在檔案後方加入(或修改)以下內容,確保 forgejo 使用者可以從本機連線# Forgejo configuration
# TYPE DATABASE USER ADDRESS METHOD
local forgejo forgejo scram-sha-256
host forgejo forgejo 127.0.0.1/32 scram-sha-256
host forgejo forgejo ::1/128 scram-sha-256修改完成後,重啟資料庫
# 離開 postgres user
exit

# 重啟 postgresql
sudo systemctl restart postgresql-18

# 測試連線
psql -U forgejo -d forgejo -h localhost
安裝 Forgejo 本體
這裡參照官方文件安裝教學來直接從 binary 安裝。


建立系統使用者
為了安全起見,我們建立一個名為 git 的系統使用者來執行 Forgejosudo groupadd --system git
sudo useradd --system --shell /bin/bash --comment 'Git Version Control' \
--gid git --home-dir /home/git --create-home git下載 Binary 檔案
前往Forgejo Releases下載適合的版本
# 下載 Binary
wget -O forgejo https://codeberg.org/forgejo/forgejo/releases/download/v13.0.3/forgejo-13.0.3-linux-amd64

# 移動到系統路徑並賦予執行權限
sudo mv forgejo /usr/local/bin/forgejo
sudo chmod 755 /usr/local/bin/forgejo
sudo chown root:root /usr/local/bin/forgejo
建立目錄結構
# 建立資料存放目錄
sudo mkdir -p /var/lib/forgejo
sudo chown git:git /var/lib/forgejo
sudo chmod 750 /var/lib/forgejo

# 建立設定檔目錄
sudo mkdir -p /etc/forgejo
sudo chown root:git /etc/forgejo
sudo chmod 770 /etc/forgejo
設定 Systemd 服務
下載官方提供的 service 範本並安裝
sudo wget -O /etc/systemd/system/forgejo.service https://codeberg.org/forgejo/forgejo/raw/branch/forgejo/contrib/systemd/forgejo.service

# 重新載入 daemon 並啟動服務
sudo systemctl daemon-reload
sudo systemctl enable --now forgejo
此時,Forgejo 應該已經在 http://localhost:3000 運行了,然後先透過虛擬機 IP 連上 Cockpit 管理介面先把防火牆設定 3000、80、443 都先放行。
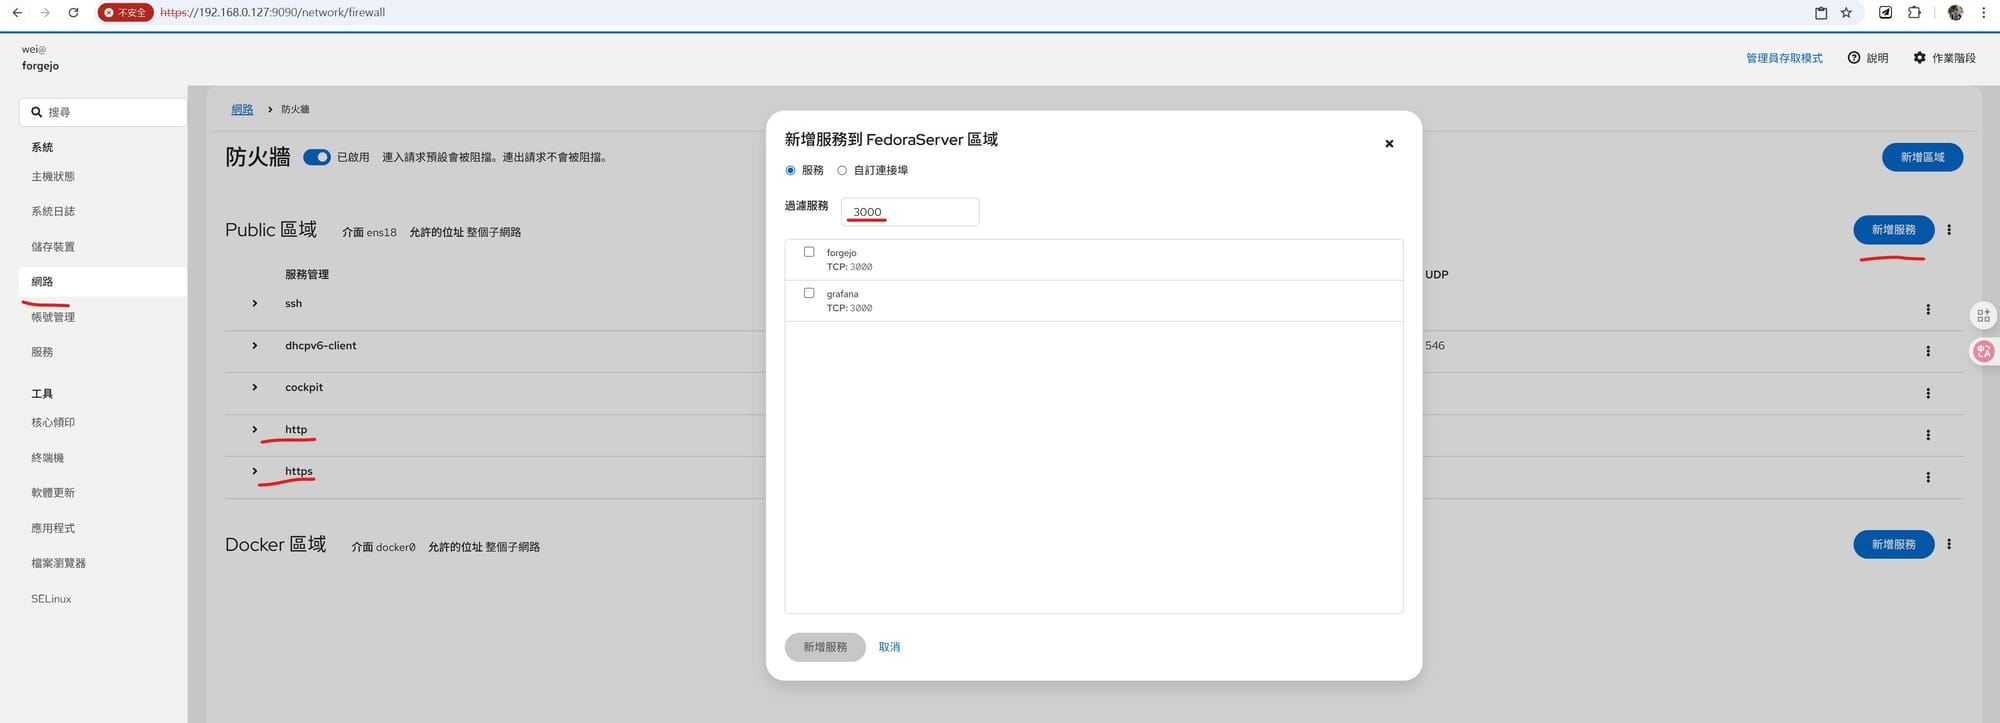
接著就可以先透過虛擬機 IP 連上 Forgejo 網頁介面進行初始化設定。
設定 Nginx 反向代理與 SSL (Cloudflare DNS)
為了透過 HTTPS 存取,我們使用 Nginx 搭配 Certbot。
這裡使用 Cloudflare DNS plugin 來申請憑證,這裡不使用 NPMplus 是希望關鍵服務要盡量減少對其他主機的依賴,避免級聯故障。
安裝 Nginx 與 Certbot
sudo dnf install -y nginx certbot python3-certbot-dns-cloudflare
sudo systemctl enable nginx --now
sudo systemctl enable certbot-renew.timer --now
建立 DNS 紀錄跟 API_TOKEN
Certbot DNS Challenge 需要驗證你擁有該 DNS 紀錄,並且會需要建立對應的 TXT Record 來驗證,可以透過 Terraform 來建立相關的 Cloudflare 資源。
resource "cloudflare_account_token" "forgejo_certbot" {
  account_id = var.ACCOUNT_ID
  name       = "Forgejo Certbot"
  policies = [
    {
      effect = "allow"
      permission_groups = [
        for group in data.cloudflare_account_api_token_permission_groups_list.all.result : group if group.name == "DNS Write"
      ]
      resources = jsonencode({
        "com.cloudflare.api.account.${var.ACCOUNT_ID}" = {
          "com.cloudflare.api.account.zone.*" = "*"
        }
      })
    }
  ]
}

// terragrunt output -raw account_token_forgejo_certbot
output "account_token_forgejo_certbot" {
  value     = <<EOT
dns_cloudflare_api_token=${cloudflare_account_token.forgejo_certbot.value}
EOT
  sensitive = true
}

resource "cloudflare_dns_record" "forgejo_home_infra_weii_cloud" {
  zone_id = local.zone_id["weii.cloud"]
  name    = "forgejo.home-infra.weii.cloud"
  type    = "A"
  ttl     = 1
  content = "192.168.0.127"
}

resource "cloudflare_dns_record" "registry_forgejo_home_infra_weii_cloud" {
  zone_id = local.zone_id["weii.cloud"]
  name    = "registry-forgejo.home-infra.weii.cloud"
  type    = "CNAME"
  ttl     = 1
  content = "forgejo.home-infra.weii.cloud"
}
申請 SSL 憑證 (DNS Challenge)
建立 Cloudflare 認證檔 /etc/certbot/cloudflare.ini# /etc/certbot/cloudflare.ini
dns_cloudflare_api_token=你的_CLOUDFLARE_API_TOKEN設定權限並申請憑證
sudo chmod 600 /etc/certbot/cloudflare.ini
sudo certbot certonly --dns-cloudflare \
    --dns-cloudflare-credentials /etc/certbot/cloudflare.ini \
    --dns-cloudflare-propagation-seconds 60 \
    -d "forgejo.home-infra.weii.cloud"
sudo certbot certonly --dns-cloudflare \
    --dns-cloudflare-credentials /etc/certbot/cloudflare.ini \
    --dns-cloudflare-propagation-seconds 60 \
    -d "registry-forgejo.home-infra.weii.cloud"
建立 Nginx 設定
 # /etc/nginx/conf.d/forgejo.conf

 server {
    listen 80;
    listen [::]:80;

    server_name forgejo.home-infra.weii.cloud;
    server_tokens off;

    return 301 https://$host$request_uri;
}

server {
    listen 443 ssl;
    listen [::]:443 ssl;
    http2 on;

    server_name forgejo.home-infra.weii.cloud;
    server_tokens off;

    ssl_certificate /etc/letsencrypt/live/forgejo.home-infra.weii.cloud/fullchain.pem;
    ssl_certificate_key /etc/letsencrypt/live/forgejo.home-infra.weii.cloud/privkey.pem;
    ssl_protocols TLSv1.2 TLSv1.3;
    ssl_ciphers HIGH:!aNULL:!MD5;

    location / {
        proxy_pass http://127.0.0.1:3000;

        proxy_set_header Connection $http_connection;
        proxy_set_header Upgrade $http_upgrade;
        proxy_set_header Host $host;
        proxy_set_header X-Real-IP $remote_addr;
        proxy_set_header X-Forwarded-For $proxy_add_x_forwarded_for;
        proxy_set_header X-Forwarded-Proto $scheme;

        client_max_body_size 512M;
    }

    gzip_types text/css text/scss text/plain text/xml application/xml application/json application/javascript;
    gzip on;
}

server {
    listen 80;
    listen [::]:80;

    server_name registry-forgejo.home-infra.weii.cloud;
    server_tokens off;

    return 301 https://$host$request_uri;
}

server {
    listen 443 ssl;
    listen [::]:443 ssl;
    http2 on;

    server_name registry-forgejo.home-infra.weii.cloud;
    server_tokens off;

    ssl_certificate /etc/letsencrypt/live/registry-forgejo.home-infra.weii.cloud/fullchain.pem;
    ssl_certificate_key /etc/letsencrypt/live/registry-forgejo.home-infra.weii.cloud/privkey.pem;
    ssl_protocols TLSv1.2 TLSv1.3;
    ssl_ciphers HIGH:!aNULL:!MD5;

    location / {
        proxy_pass http://127.0.0.1:3000;

        proxy_set_header Connection $http_connection;
        proxy_set_header Upgrade $http_upgrade;
        proxy_set_header Host $host;
        proxy_set_header X-Real-IP $remote_addr;
        proxy_set_header X-Forwarded-For $proxy_add_x_forwarded_for;
        proxy_set_header X-Forwarded-Proto $scheme;

        client_max_body_size 512M;
    }

    gzip_types text/css text/scss text/plain text/xml application/xml application/json application/javascript;
    gzip on;
}
解決 SELinux 權限問題 (重要!)
在 Fedora 上,預設的 SELinux 策略會阻止 Nginx 連線到其他網路連接埠(如 3000)。必須執行以下指令,否則會出現 502 Bad Gateway
sudo setsebool -P httpd_can_network_connect 1最後重啟 Nginx,現在你可以透過瀏覽器以 https 訪問 Forgejo。
sudo systemctl restart nginxForgejo 設定最佳實踐
官方文件有一份設定檔的完整參考,我這邊也調整一些我習慣的設定大家可以參考看看。
[mailer]
ENABLED = true
SMTP_ADDR = smtp.gmail.com
SMTP_PORT = 465
FROM = "Forgejo Git" <[email protected]>
USER = [email protected]
# 這裡填入 Google 應用程式密碼 https://support.google.com/accounts/answer/185833?hl=zh-Hant
PASSWD = xxxxxx

[service]
REGISTER_EMAIL_CONFIRM = false
ENABLE_NOTIFY_MAIL = true
DISABLE_REGISTRATION = true
ENABLE_REVERSE_PROXY_AUTHENTICATION = true
ALLOW_ONLY_EXTERNAL_REGISTRATION = false
ALLOW_ONLY_INTERNAL_REGISTRATION = true
ENABLE_CAPTCHA = false
REQUIRE_SIGNIN_VIEW = false
DEFAULT_KEEP_EMAIL_PRIVATE = false
DEFAULT_ALLOW_CREATE_ORGANIZATION = true
DEFAULT_ENABLE_TIMETRACKING = true
NO_REPLY_ADDRESS = forgejo.home-infra.weii.cloud

[cron]
ENABLED = true
NOTICE_ON_SUCCESS = true

[cron.update_checker]
ENABLED = true

[cron.gc_lfs]
ENABLED = true

[security]
INSTALL_LOCK = true
PASSWORD_COMPLEXITY = spec

[session]
PROVIDER = db

[time]
DEFAULT_UI_LOCATION = Asia/Taipei

[webhook]
ALLOWED_HOST_LIST = "*"
SKIP_TLS_VERIFY = true

[repository]
ROOT = /var/lib/forgejo/data/repositories
DEFAULT_REPO_UNITS = repo.code,repo.releases,repo.issues,repo.pulls,repo.packages,repo.actions
DEFAULT_MIRROR_REPO_UNITS = repo.code,repo.releases,repo.issues,repo.packages

[repository.pull-request]
DEFAULT_MERGE_STYLE = squash

[repository.signing]
DEFAULT_TRUST_MODEL = committer

[migrations]
ALLOWED_DOMAINS = *

[ui]
DEFAULT_SHOW_FULL_NAME = true

[actions]
# 使用 GitHub 的 Actions Marketplace 相容模式
DEFAULT_ACTIONS_URL = https://github.com
修改完成後記得重啟服務
sudo systemctl restart forgejo安裝 Forgejo Actions (CI/CD Runner)
Forgejo 內建了類似 GitHub Actions 的 CI/CD 功能,但需要自行架設 Runner。
安裝 Docker


Runner 需要 Docker 來執行 Job,我們這裡使用 Docker 官方源來安裝
# 移除舊版或衝突套件
sudo dnf remove docker \
                  docker-client \
                  docker-client-latest \
                  docker-common \
                  docker-latest \
                  docker-latest-logrotate \
                  docker-logrotate \
                  docker-selinux \
                  docker-engine-selinux \
                  docker-engine

# 新增 Repo 並安裝
sudo dnf config-manager addrepo --from-repofile https://download.docker.com/linux/fedora/docker-ce.repo
sudo dnf install docker-ce docker-ce-cli containerd.io docker-buildx-plugin docker-compose-plugin

# 啟動 Docker
sudo systemctl enable --now docker

# 設定不用 sudo 就能操作 docker 指令
sudo groupadd docker
sudo usermod -aG docker $USER
安裝 Forgejo Runner


接著按照 Forgejo 官方文件安裝 Actions
# 下載最新版 Runner (自動抓取版本號)
export ARCH=$(uname -m | sed 's/x86_64/amd64/;s/aarch64/arm64/')
export RUNNER_VERSION=$(curl -X 'GET' https://data.forgejo.org/api/v1/repos/forgejo/runner/releases/latest | jq .name -r | cut -c 2-)
export FORGEJO_URL="https://code.forgejo.org/forgejo/runner/releases/download/v${RUNNER_VERSION}/forgejo-runner-${RUNNER_VERSION}-linux-${ARCH}"
wget -O forgejo-runner ${FORGEJO_URL}

wget -O forgejo-runner ${FORGEJO_URL}
sudo mv forgejo-runner /usr/local/bin/
sudo chown root:root /usr/local/bin/forgejo-runner
sudo chmod 755 /usr/local/bin/forgejo-runner
建立 Runner 使用者與設定
# 建立專用使用者
sudo useradd --create-home forgejo-runner

# 將使用者加入 docker 群組 (重要!這樣 Runner 才能操作 Docker)
sudo usermod -aG docker forgejo-runner

# 建立設定檔目錄
sudo mkdir -p /etc/forgejo-runner

# 產生預設設定檔
forgejo-runner generate-config > config.yml
sudo mv config.yaml /etc/forgejo-runner/config.yaml
sudo chown forgejo-runner:forgejo-runner /etc/forgejo-runner/config.yaml
sudo chmod 640 /etc/forgejo-runner/config.yaml
以下是我的設定檔,主要設定了 docker buildx 的 cache 以及使用有更多工具的 catthehacker/ubuntu 的 Image。
 catthehacker
# /etc/forgejo-runner/config.yaml

log:
  level: info
  job_level: info

runner:
  file: .runner
  capacity: 3
  envs:
  env_file: .env
  timeout: 6h
  shutdown_timeout: 3h
  insecure: false
  fetch_timeout: 5s
  fetch_interval: 2s
  report_interval: 1s
  labels:
    - ubuntu-latest:docker://ghcr.io/catthehacker/ubuntu:act-latest
    - ubuntu-24.04:docker://ghcr.io/catthehacker/ubuntu:act-24.04
    - ubuntu-22.04:docker://ghcr.io/catthehacker/ubuntu:act-22.04
    - ubuntu-latest-full:docker://ghcr.io/catthehacker/ubuntu:full-latest
    - ubuntu-24.04-full:docker://ghcr.io/catthehacker/ubuntu:full-24.04
    - ubuntu-22.04-full:docker://ghcr.io/catthehacker/ubuntu:full-22.04

cache:
  enabled: true
  port: 0
  dir: ""
  external_server: ""
  secret: ""
  host: ""
  proxy_port: 0
  actions_cache_url_override: ""

container:
  network: ""
  enable_ipv6: false
  privileged: false
  options: |
    -v /home/forgejo-runner/.cache/buildx:/buildx-cache
    -e "DOCKER_BUILDX_CACHE_PATH=/buildx-cache"
  workdir_parent:
  valid_volumes:
   - /home/forgejo-runner/.cache/buildx
  docker_host: automount
  force_pull: false
  force_rebuild: false

host:
  workdir_parent:
註冊 Runner


進入 Forgejo 網站:管理後台 (Site Administration) -> Actions -> Runners -> Create new Runner
取得 Registration Token > 在伺服器上執行註冊
# 執行註冊 (互動式,貼上你的 Forgejo URL 和 Token)
sudo -u forgejo-runner forgejo-runner register
設定 Runner Systemd 服務
建立 /etc/systemd/system/forgejo-runner.service[Unit]
Description=Forgejo Runner
Documentation=https://forgejo.org/docs/latest/admin/actions/
After=docker.service
[Service]
ExecStart=/usr/local/bin/forgejo-runner daemon --config=/etc/forgejo-runner/config.yaml
ExecReload=/bin/kill -s HUP $MAINPID
# This user and working directory must already exist
User=forgejo-runner
WorkingDirectory=/home/forgejo-runner
Restart=on-failure
TimeoutSec=0
RestartSec=10
[Install]
WantedBy=multi-user.target啟動 Runner
sudo systemctl enable forgejo-runner --now至此,你已經成功在 Fedora Server 43 上建立了一套完整的 DevOps 平台。這套環境包含了:
- PostgreSQL 18 作為高效能資料庫後端。
- Forgejo 作為去中心化的 Git 託管服務。
- Nginx + Certbot + Cloudflare SSL 提供安全的 HTTPS 存取。
- Forgejo Actions 支援自動化建置與部署。
現在你可以馬上在 Forgejo 建立一個測試 Repository 然後在 .forgejo/workflows 建立這樣的 pipeline 測試功能是否正常。
name: Forgejo Actions Demo

run-name: ${{ forgejo.actor }} is testing out Forgejo Actions 🚀

on:
  push:
    branches:
      - main
  pull_request:
    branches:
      - main

jobs:
  demo:
    runs-on: ubuntu-latest
    steps:
      - run: echo "🎉 The job was automatically triggered by a ${{ forgejo.event_name }} event."
      - run: echo "🐧 This job is now running on a ${{ runner.os }} server hosted by Forgejo!"
      - run: echo "🔎 The name of your branch is ${{ forgejo.ref }} and your repository is ${{ forgejo.repository }}."
      - name: Checkout repository
        uses: actions/[email protected]
      - run: echo "💡 The ${{ forgejo.repository }} repository has been cloned to the runner."
      - run: echo "🖥️ The workflow is now ready to test your code on the runner."
      - name: List environment variables
        run: |
          env
      - name: List files in the repository
        run: |
          ls ${{ forgejo.workspace }}
      - run: echo "🍏 This job's status is ${{ job.status }}."
Glance (LXC)
 glanceapp
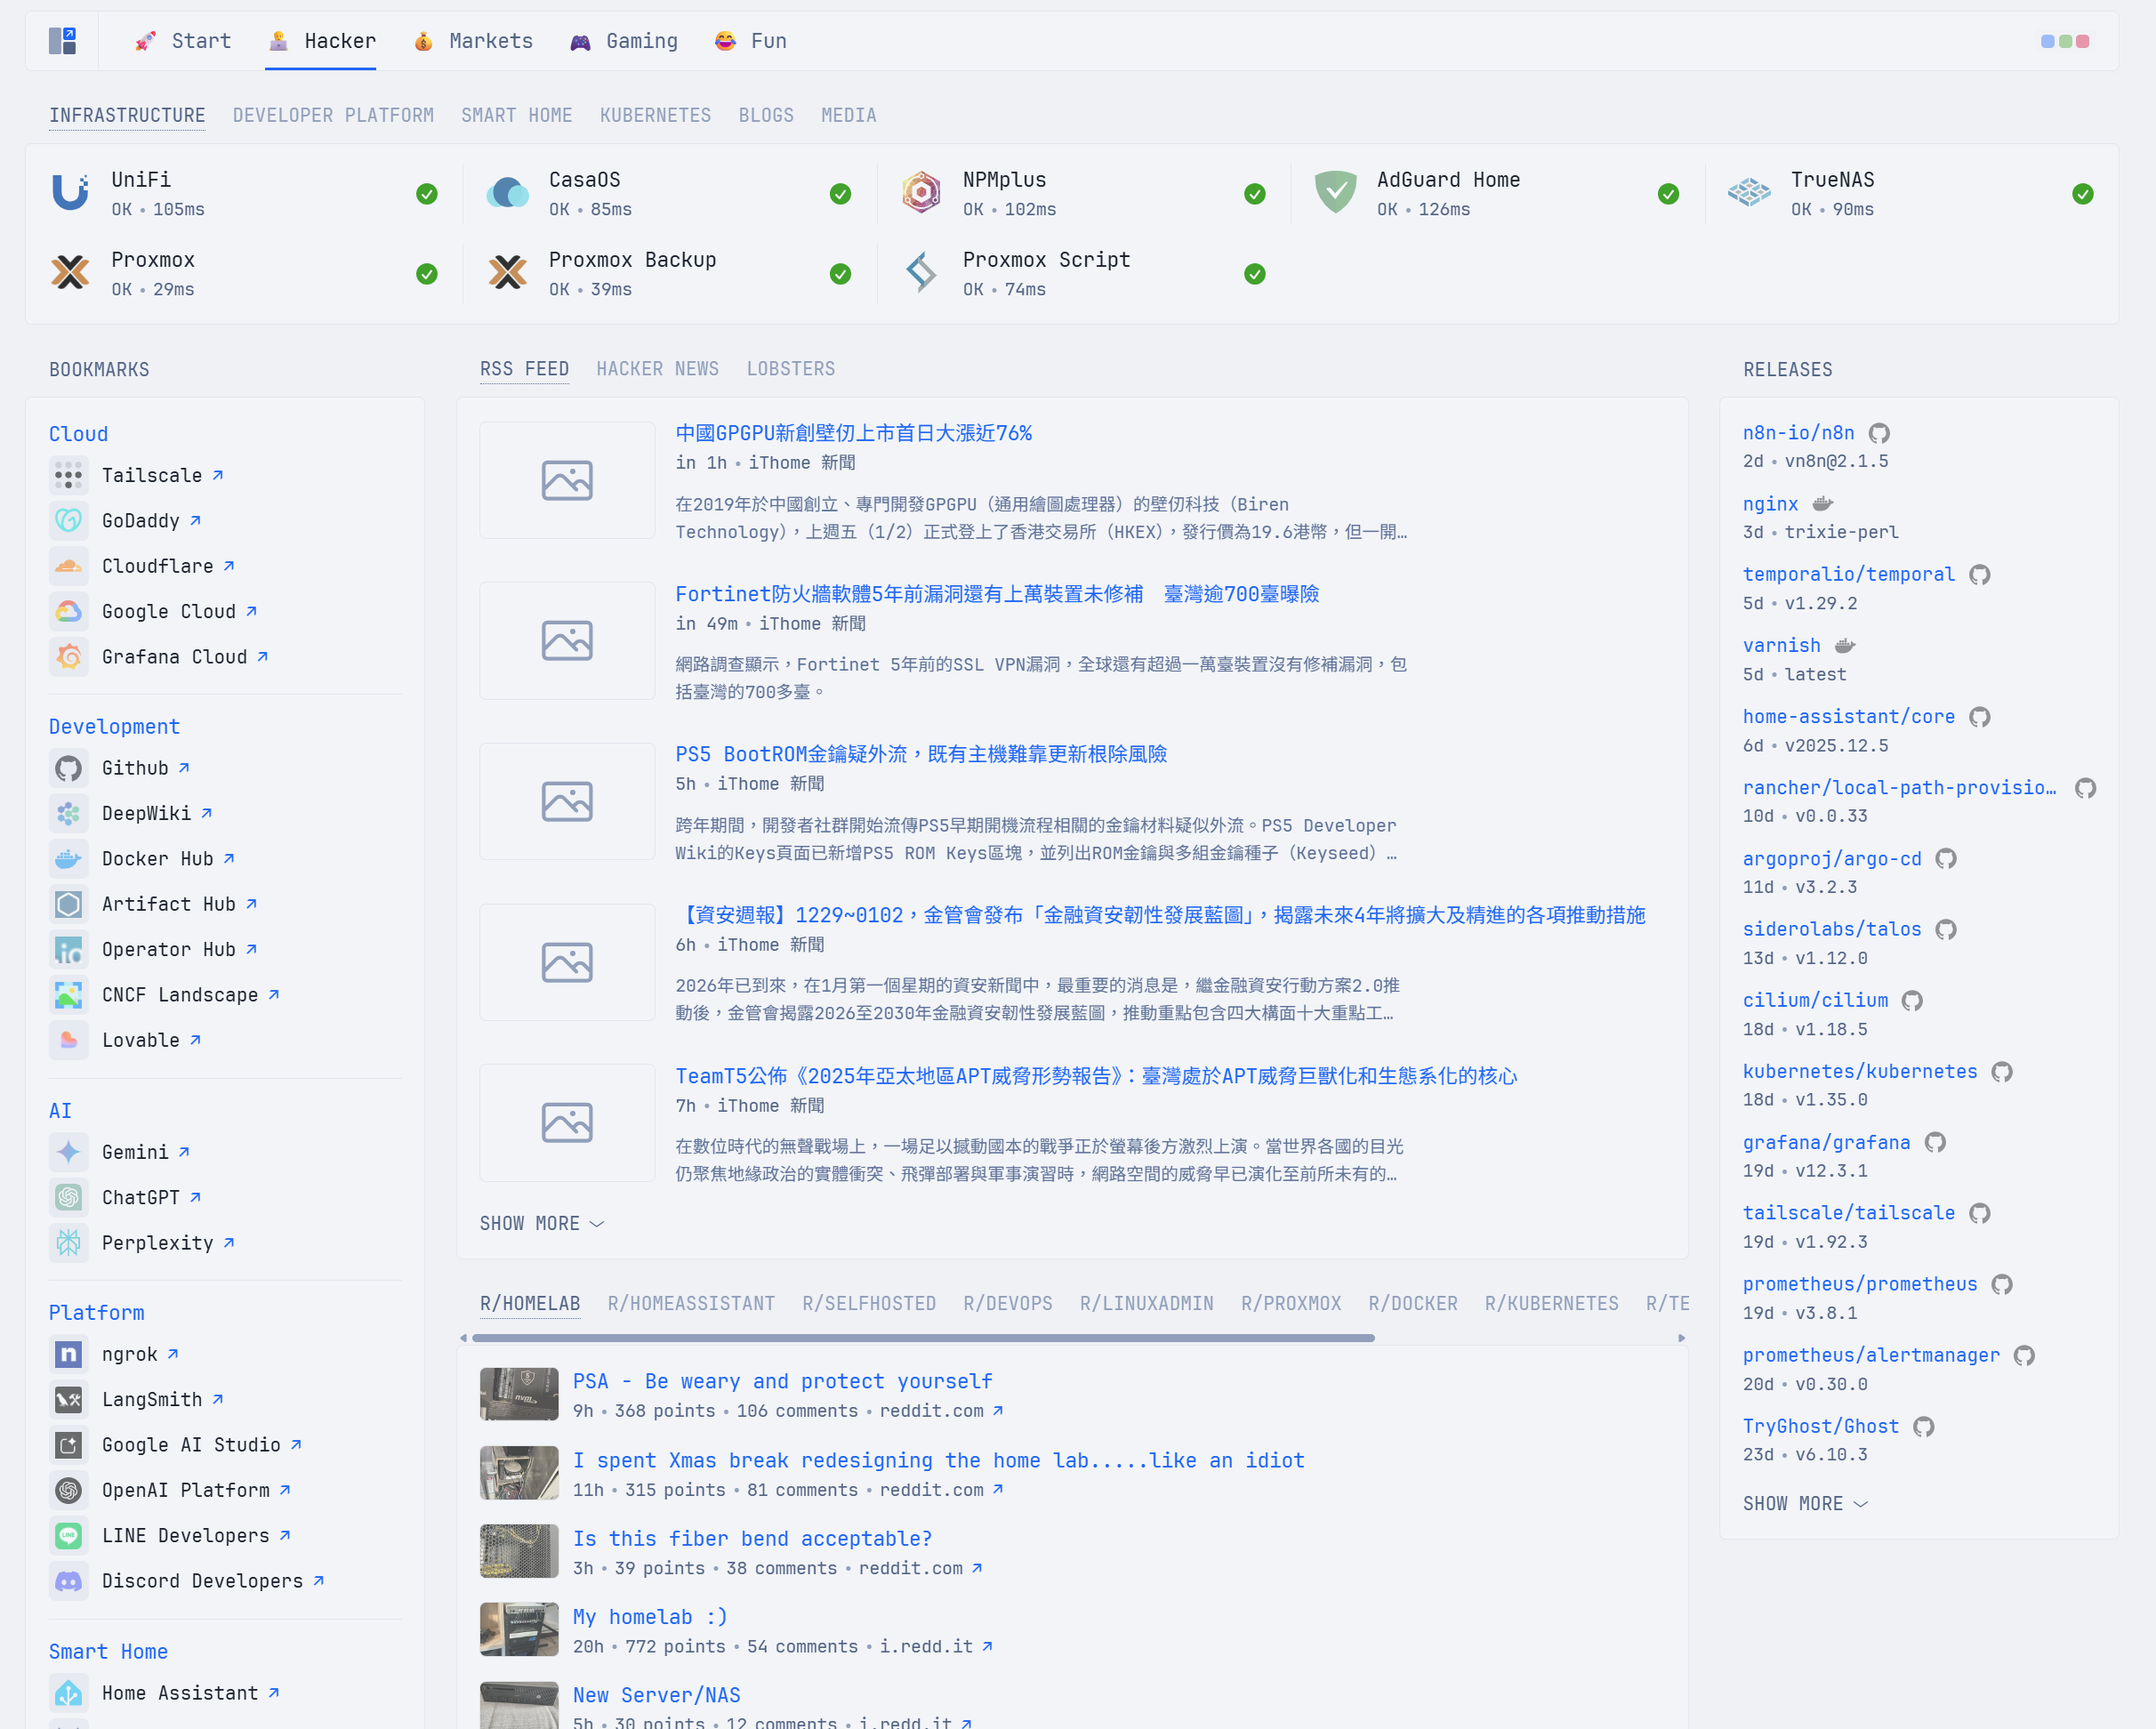
最後一個要安裝的服務是 Glance,一個輕量級、高度可自訂的儀表板,以美觀簡潔的介面展示你的家庭實驗室所有資訊,還有所有你關心的資訊;最大好處是他是用 yaml 來設定儀表板,因此可以很好的備份你的設定。
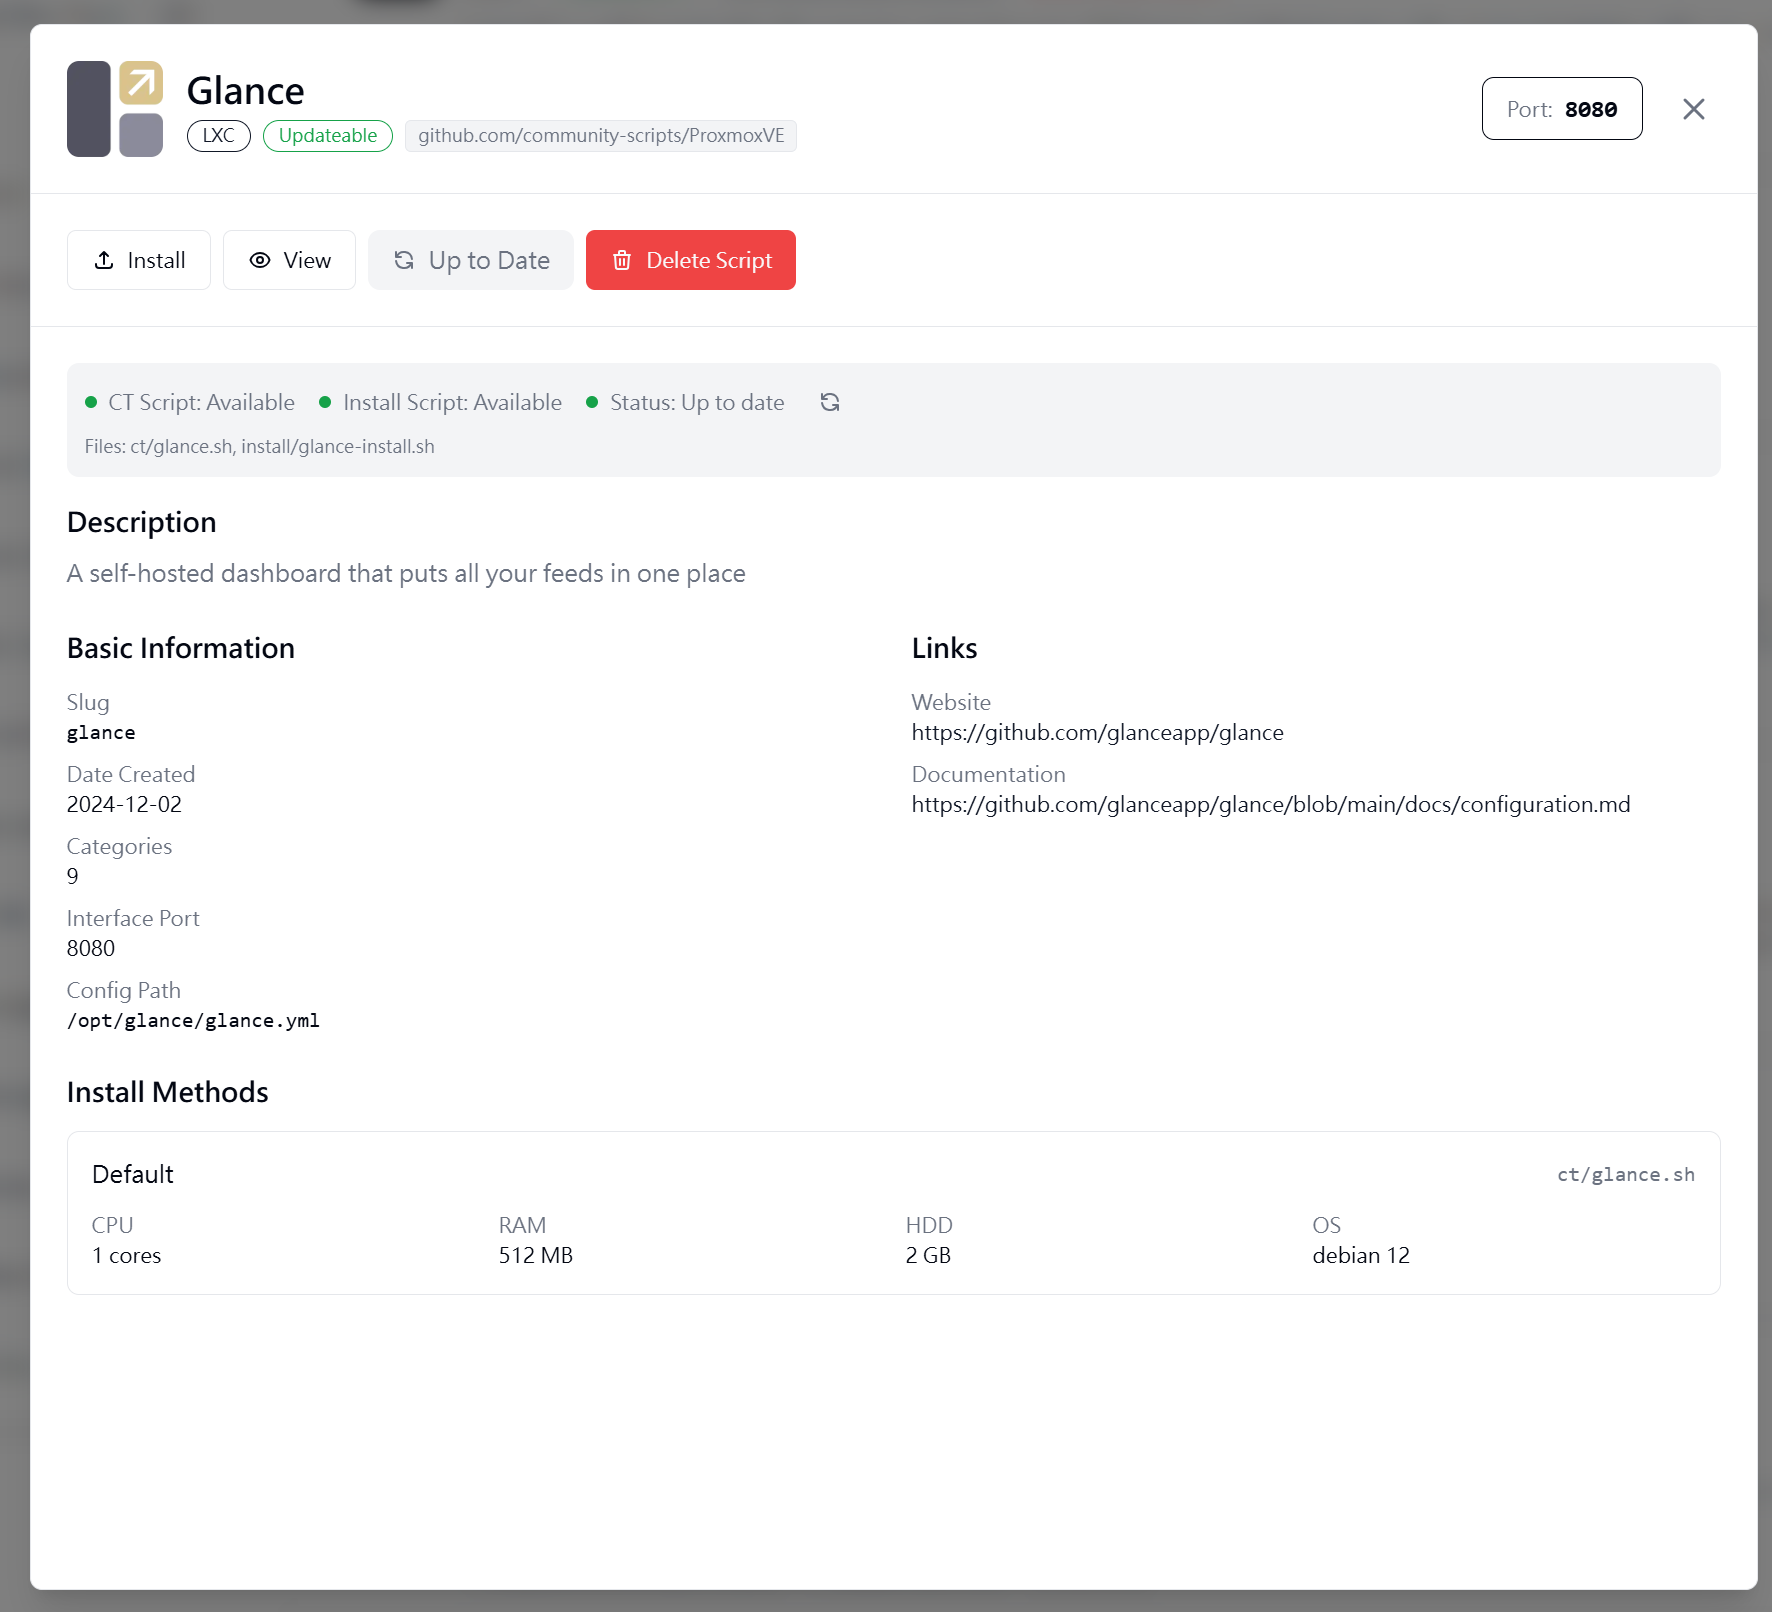
要快速安裝的話可以打開前面安裝的 PVE Scripts Local 找到這個應用程式直接安裝,然後在 NPMplus 設定好路由就好了。
客製化需求
在預設的 Todo 小工具裡,代辦事項是存在瀏覽器的 local storage 中,因此我如果在電腦紀錄的事項用手機打開就看不到了。
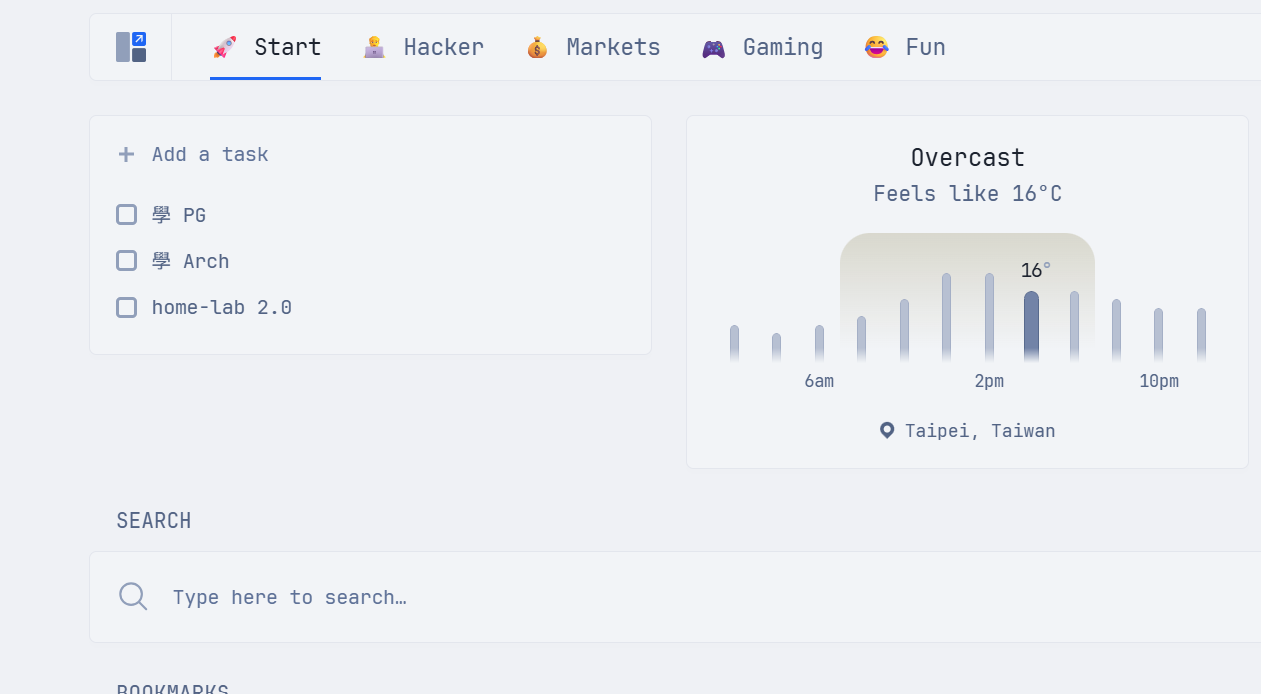
為了解決這個問題,我提交了一個 pull request 來新增一個功能,把待辦事項存在伺服器端,在 PR 合併前需要先從自己的 repo 編譯然後佈署;為了達成這個需求,我利用 Forgejo Actions 以及 Ansible 來達成這個事情,下面是設定的過程。
建立 LXC 容器
首先在 Proxmox CT 範本中先下載 ubuntu CT 範本。
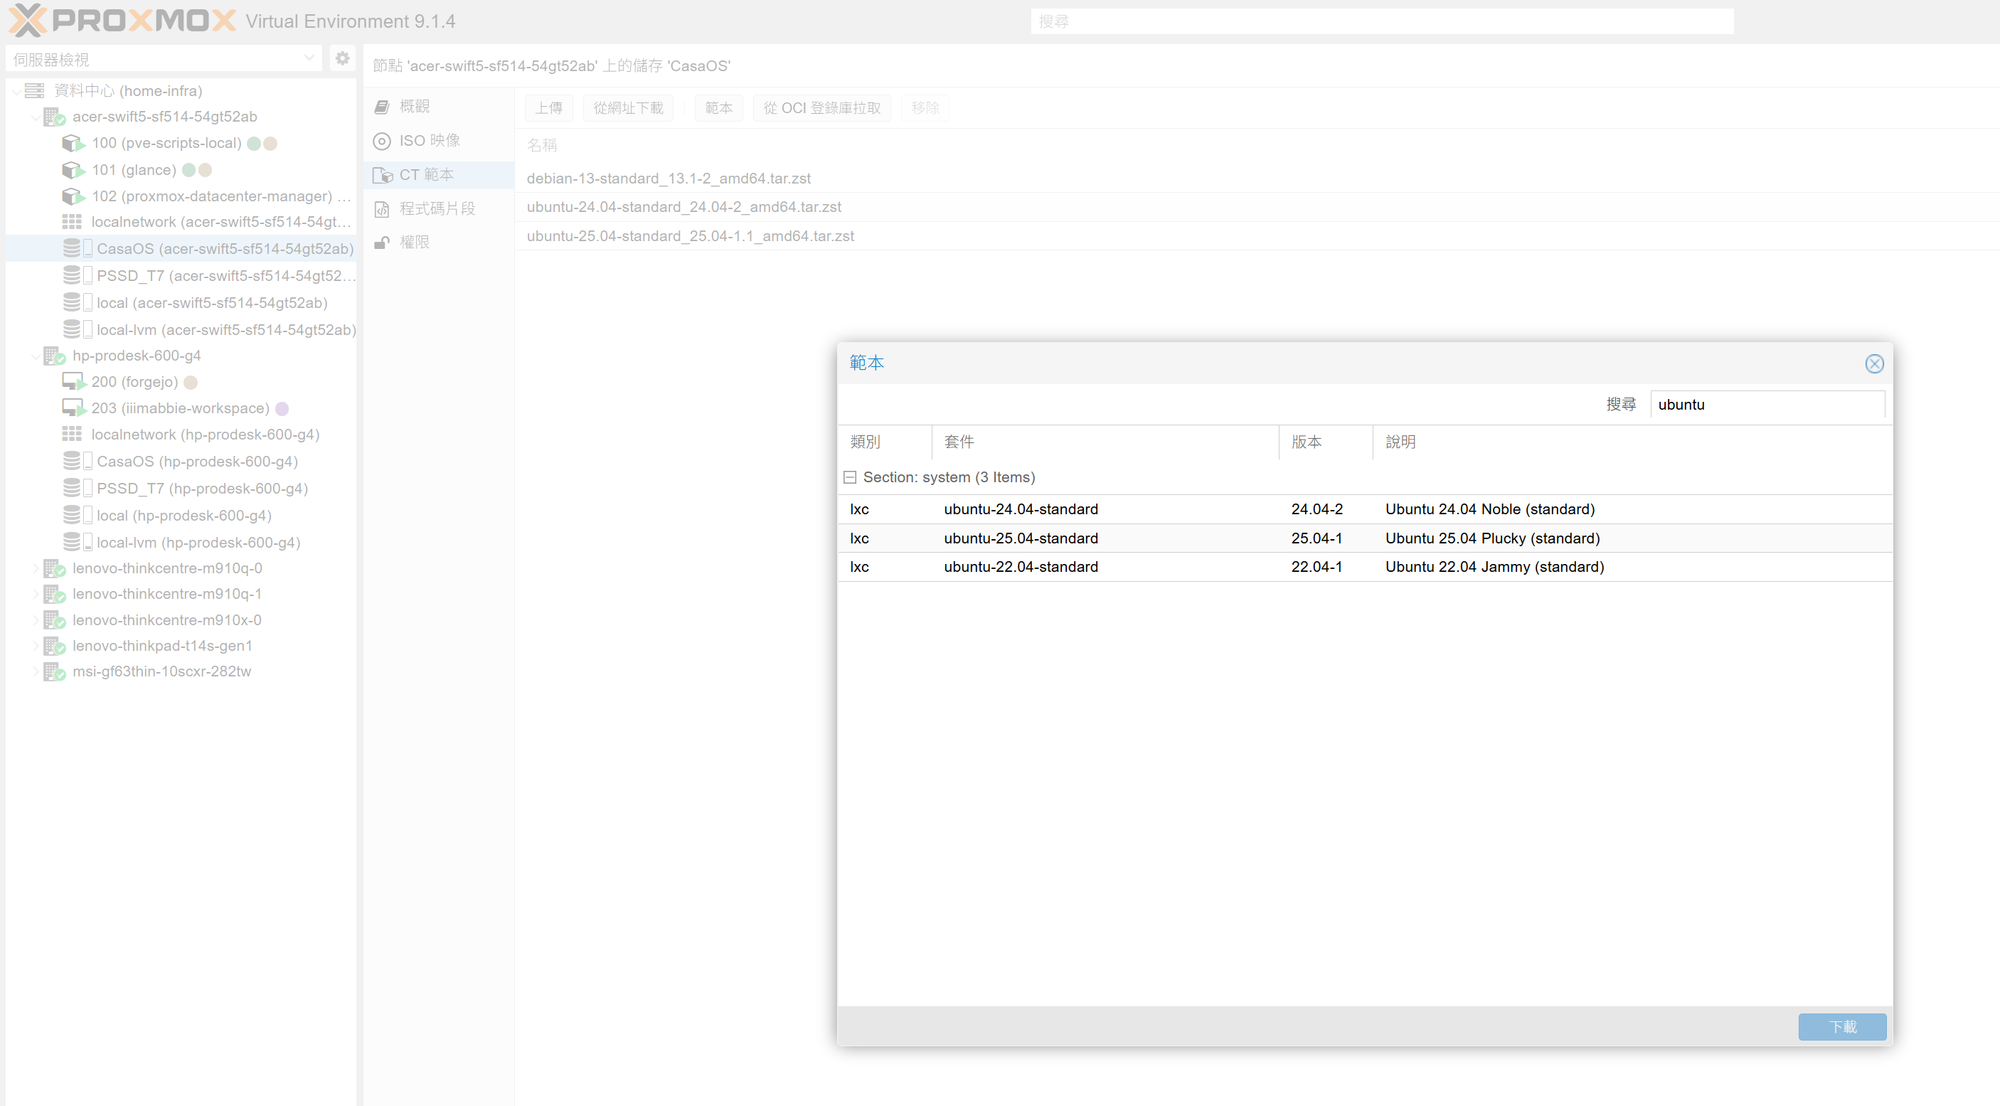
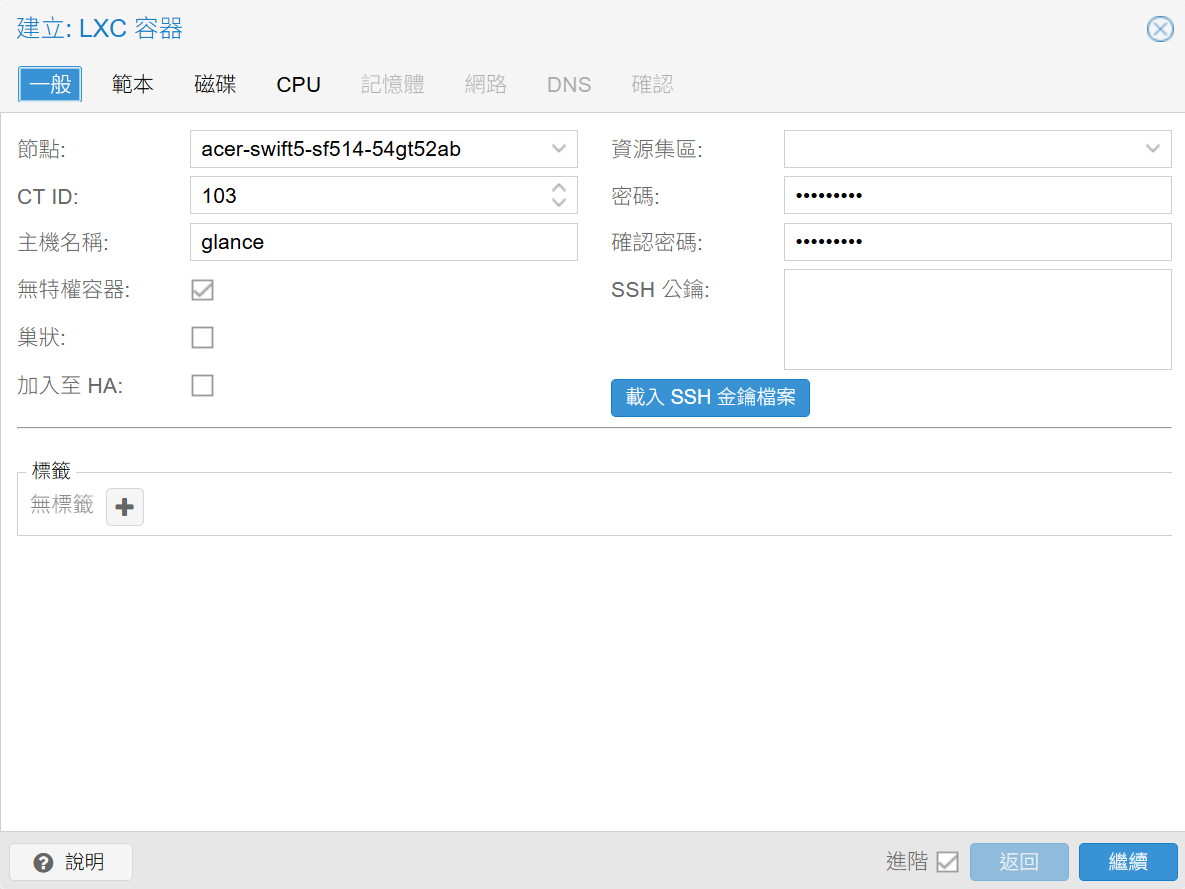
接著建立 LXC 容器,這裡設定好 root 密碼,然後在本地電腦用 ssh-keygen 生成一組後續用來給 Ansible 佈署用的,並用建立 LXC 容器的 root 密碼登入後把公鑰放到 /root/.ssh/authorized_keys 文件中。
編譯執行檔並佈署
在編譯執行檔,我們會沿用 glance 專案本身就在使用的工具,GoReleaser,但會做一些小改動,首先會把打包 Docker 的工作轉移到 Forgejo Actions 來做,所以會把這段去掉。

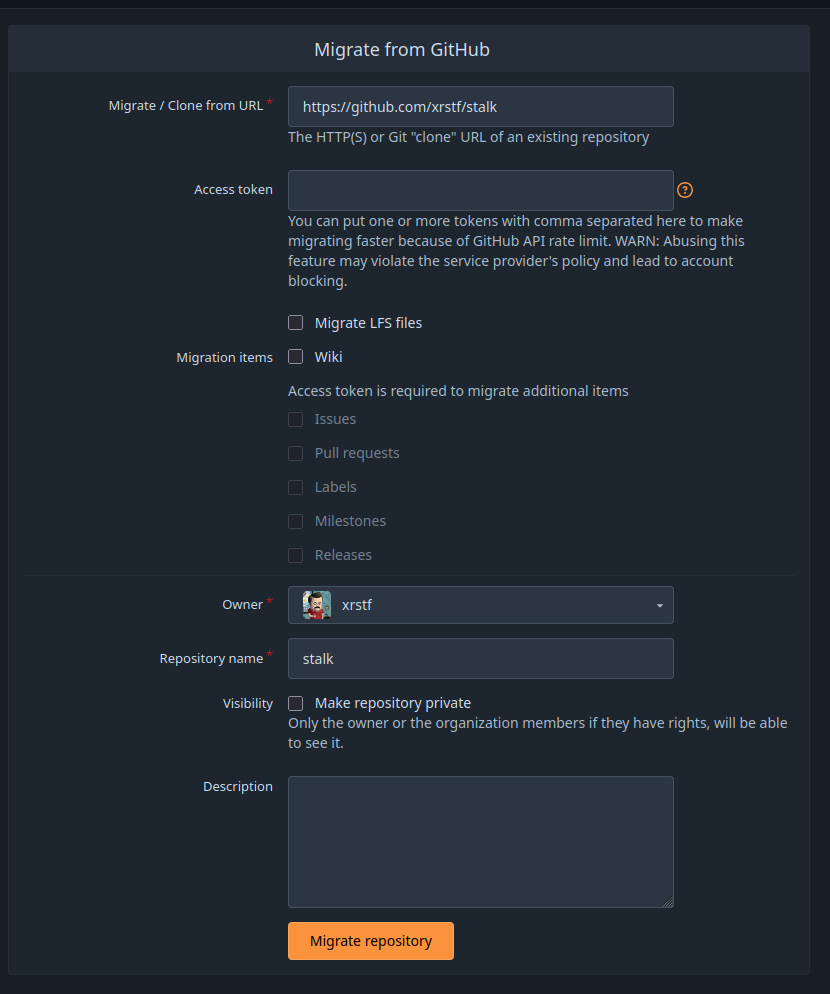
然後我參考這篇文章,需要在.goreleaser.yaml 加上 gitea_urls 的設定,最後完整的設定檔會長下面這樣:
version: 2

# 主要添加這一段
gitea_urls:
  api: https://forgejo.home-infra.weii.cloud/api/v1
  download: https://forgejo.home-infra.weii.cloud

project_name: glanceapp/glance

checksum:
  disable: true

builds:
  - binary: glance
    env:
      - CGO_ENABLED=0
    goos:
      - linux
      - windows
      - darwin
    goarch:
      - amd64
      - arm64
      - arm
    goarm:
      - 7
    ldflags:
      - -s -w -X github.com/glanceapp/glance/internal/glance.buildVersion={{ .Tag }}

archives:
  - name_template: glance-{{ .Os }}-{{ .Arch }}{{ with .Arm }}v{{ . }}{{ end }}
    format: tar.gz
    format_overrides:
      - goos: windows
        format: zip

changelog:
  sort: asc
  filters:
    exclude:
      - "^docs:"
      - "^test:"

release:
  footer: >

    ---

    Released by [GoReleaser](https://github.com/goreleaser/goreleaser).
最後再新增一個 .forgejo/workflows/ansible.yml 檔案,用來佈署,主要有兩個情況;每次 local 分支被推送代表我可能有改 glance 的設定檔,這時候就用 rsync 來同步設定;另一個情況是,local 分支被打 tag 時代表我有改原始碼加了新功能,所以需要編譯並佈署執行檔,這裡就用 if: startsWith(forgejo.ref, 'refs/tags/') 來區分這兩種情況。
name: Ansible

on:
  push:
    branches:
      - local
    tags:
      - "*.*.*"
  pull_request:
    branches:
      - local

jobs:
  Deploy:
    runs-on: ubuntu-latest
    steps:
      - name: Checkout repository
        uses: actions/[email protected]

      - name: Install Go
        if: startsWith(forgejo.ref, 'refs/tags/')
        uses: actions/[email protected]
        with:
          go-version: 1.25.5
          cache-dependency-path: "**/*.sum"

      - name: Build artifacts
        if: startsWith(forgejo.ref, 'refs/tags/')
        uses: goreleaser/[email protected]
        with:
          distribution: goreleaser
          version: ~> v2
          args: build --single-target

      - name: Install Ansible
        uses: alex-oleshkevich/[email protected]
        with:
          version: 13.2.0

      - name: Install rsync
        run: sudo apt-get update && sudo apt-get install -y rsync

      - name: Setup SSH Agent
        uses: webfactory/[email protected]
        with:
          ssh-private-key: ${{ secrets.ANSIBLE_SSH_PRIVATE_KEY }}

      - name: Deploy Config
        working-directory: ansible
        run: |
          ansible-playbook ./deploy-config.yml

      - name: Deploy Binary
        if: startsWith(forgejo.ref, 'refs/tags/')
        working-directory: ansible
        run: |
          ansible-playbook ./deploy-binary.yml
Ansible 設定
首先在 repository 新增 ./ansible/ansible.cfg 以及 ./ansible/inventory.ini。
# ansible.cfg

[defaults]
inventory = inventory.ini
host_key_checking = False
deprecation_warnings = False
interpreter_python = auto_silent
# inventory.ini
[targets]
192.168.0.197
[targets:vars]
ansible_user=root同步設定檔的 playbook ./ansible/deploy-config.yml
- name: Deploy Config
  hosts: targets
  become: yes

  vars:
    config_src: ../config/
    config_dest: /opt/glance/config/

  tasks:
    - name: Ensure configuration directory exists
      ansible.builtin.file:
        path: "{{ config_dest }}"
        state: directory
        mode: 0755

    - name: Ensure rsync is installed on target
      become: yes
      ansible.builtin.package:
        name: rsync
        state: present

    - name: Sync configuration files
      ansible.posix.synchronize:
        src: "{{ config_src }}"
        dest: "{{ config_dest }}"
        recursive: yes
        delete: yes
        rsync_opts:
          - --no-motd
同步設定檔的 playbook ./ansible/deploy-binary.yml
- name: Deploy Binary and Service
  hosts: targets
  become: yes

  vars:
    binary_src: ../dist/glanceapp/glance_linux_amd64_v1/glance
    remote_binary_path: /usr/local/bin/glance
    working_dir: /opt/glance/
    config_src: ../config/
    config_dest: /opt/glance/config/

  tasks:
    - name: Ensure working directory exists
      ansible.builtin.file:
        path: "{{ working_dir }}"
        state: directory
        mode: 0755

    - name: Ensure configuration directory exists
      ansible.builtin.file:
        path: "{{ config_dest }}"
        state: directory
        mode: 0755

    - name: Sync configuration files
      ansible.posix.synchronize:
        src: "{{ config_src }}"
        dest: "{{ config_dest }}"
        recursive: yes
        delete: yes
        rsync_opts:
          - --no-motd
      notify: Restart Glance Service

    - name: Copy Glance binary
      ansible.builtin.copy:
        src: "{{ binary_src }}"
        dest: "{{ remote_binary_path }}"
        mode: 0755
      notify: Restart Glance Service

    - name: Create Systemd service file
      ansible.builtin.copy:
        dest: /etc/systemd/system/glance.service
        content: |
          [Unit]
          Description=Glance (A lightweight, highly customizable dashboard that displays your feeds in a beautiful, streamlined interface)
          After=syslog.target
          After=network.target

          [Service]
          RestartSec=2s
          Type=simple
          User=root
          Group=root
          WorkingDirectory={{ working_dir }}
          ExecStart={{ remote_binary_path }} --config={{ config_dest }}glance.yml
          Restart=always

          [Install]
          WantedBy=multi-user.target
      notify: Restart Glance Service

    - name: Ensure Glance service is enabled
      ansible.builtin.systemd:
        name: glance
        enabled: yes
        daemon_reload: yes

  handlers:
    - name: Restart Glance Service
      ansible.builtin.systemd:
        name: glance
        state: restarted
        daemon_reload: yes
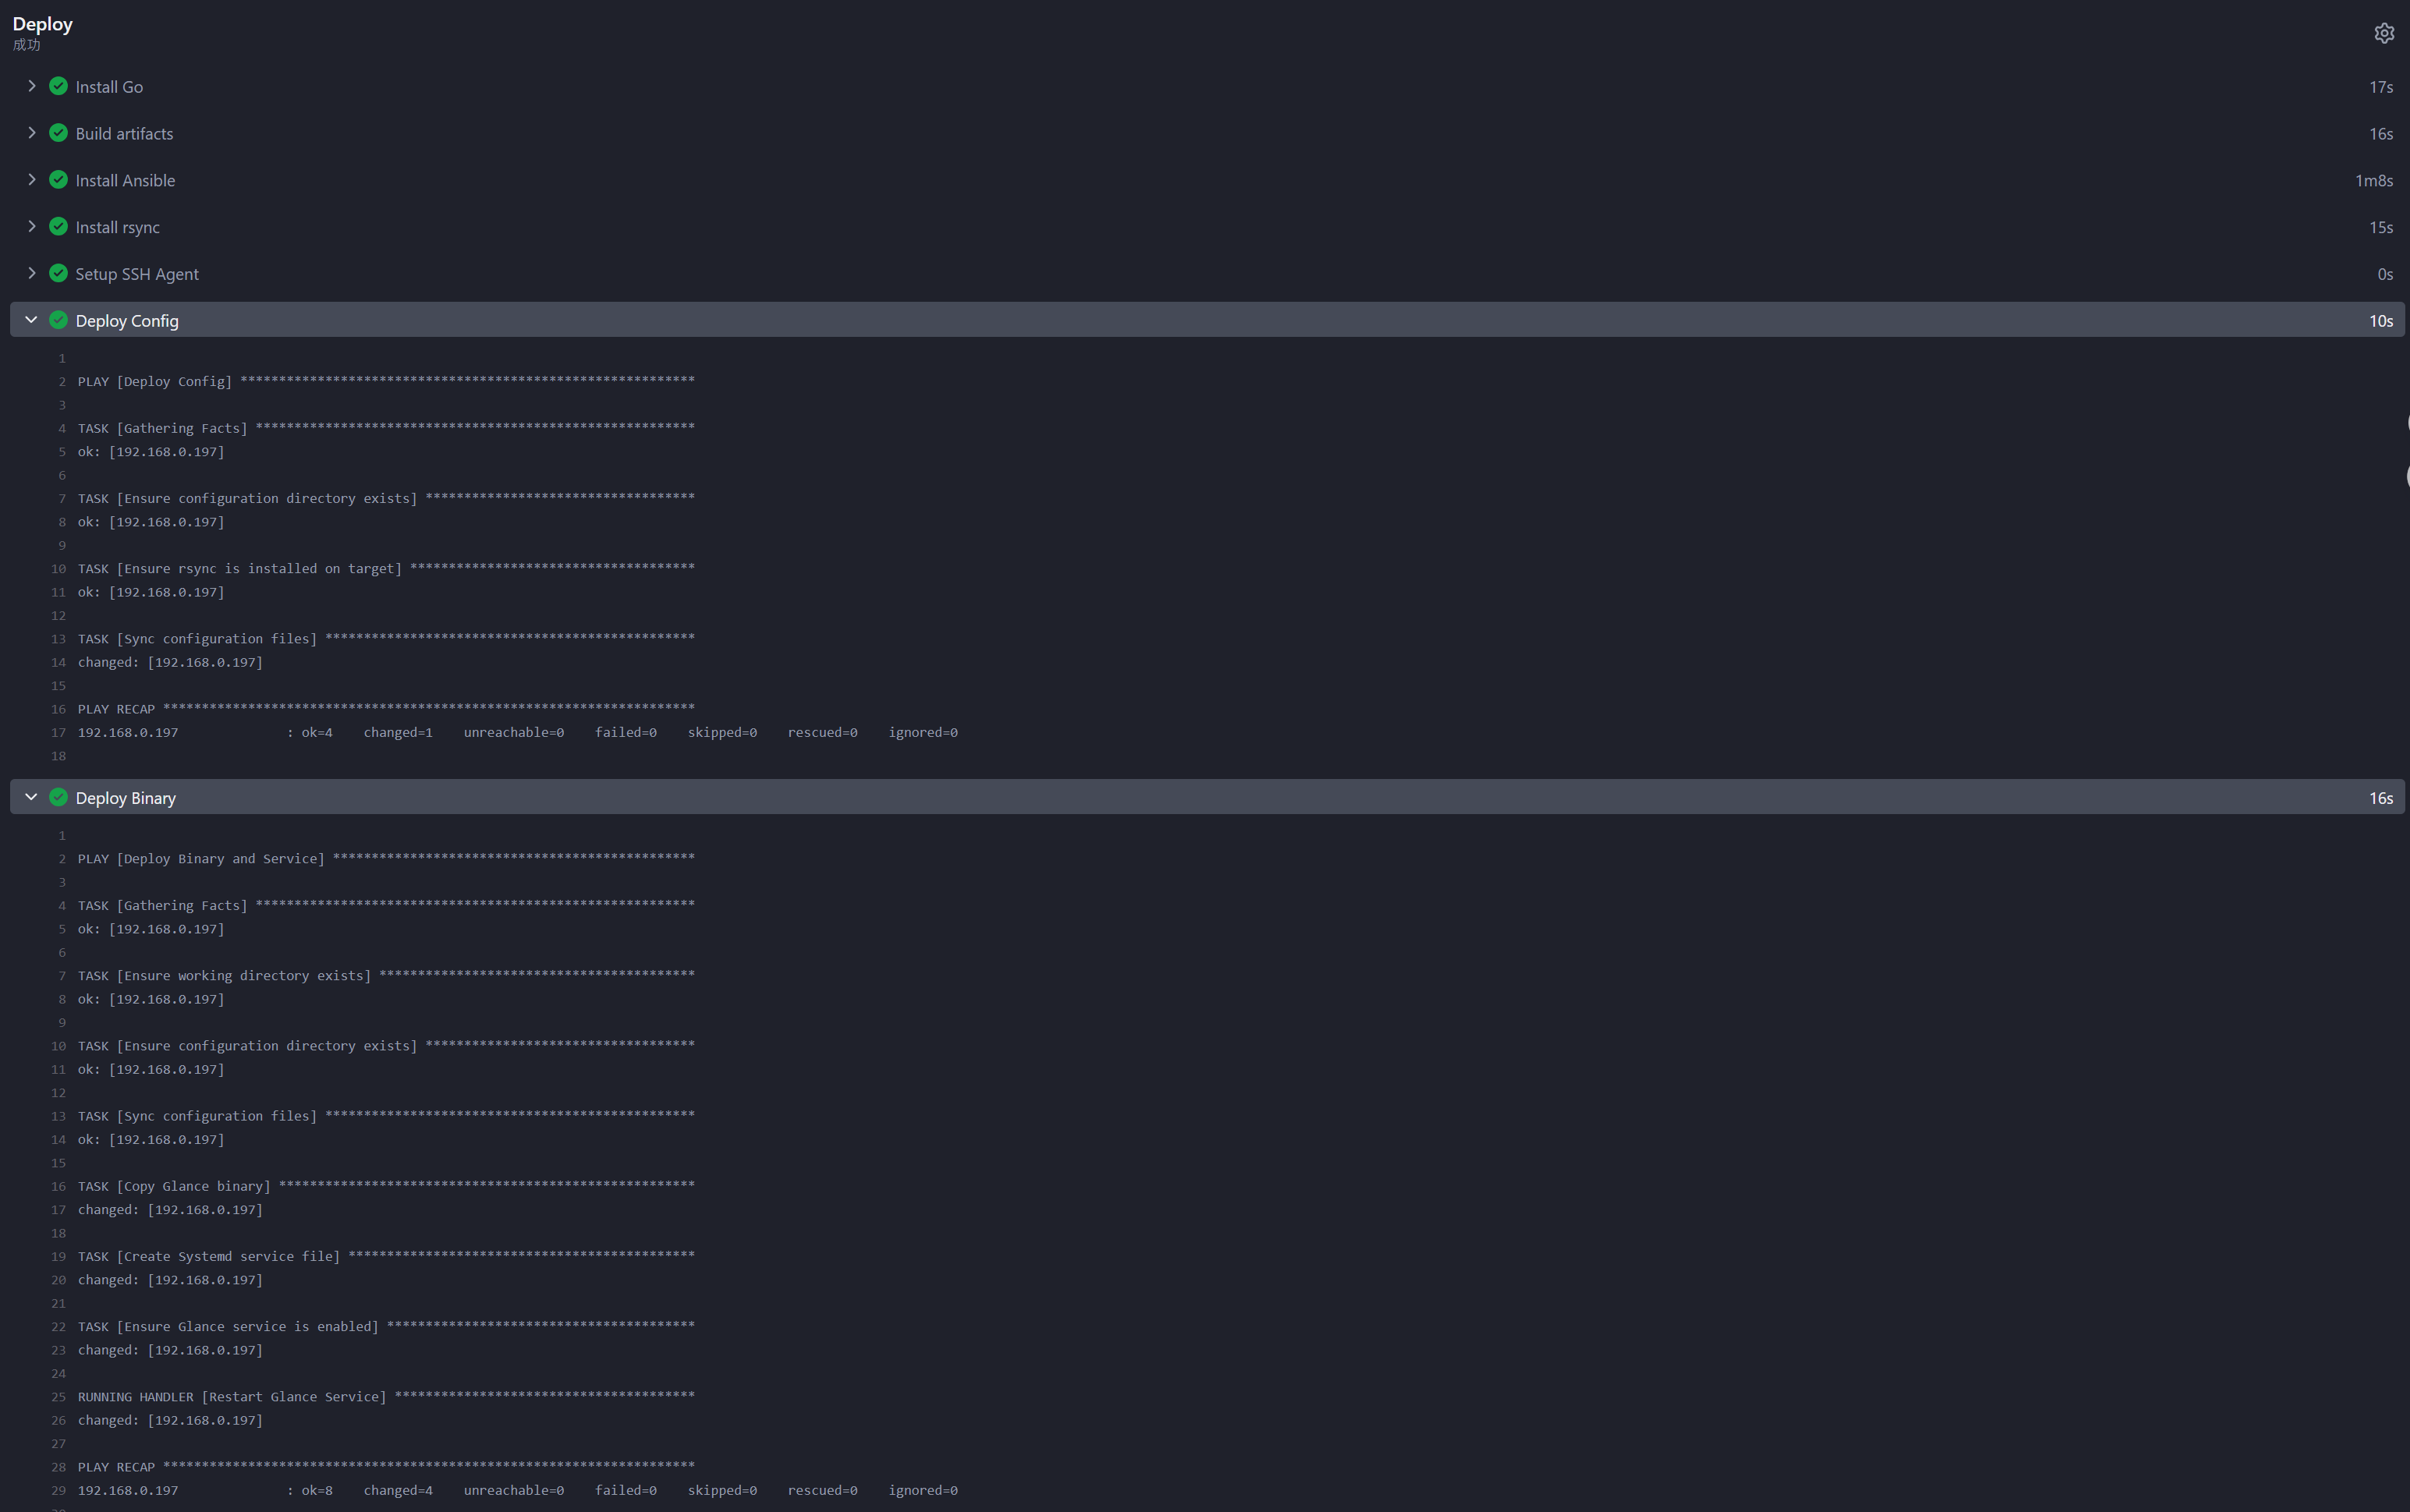
在新增以上的設定檔後,可以在專案打一個 tag,可以看到執行檔已經被編譯並正確被佈署。
後記
在這一篇文章裡,我們介紹了三個安裝在 Proxmox 平台上的核心服務,有 LXC 也有 VM,我選擇這些工具都算是目前我用起來好安裝,用資源也不多設定也算簡單的組合,希望大家可以試試看。