home-lab 2.0 part 2 核心服務篇


TL;DR
 Wan, Jiun-Wei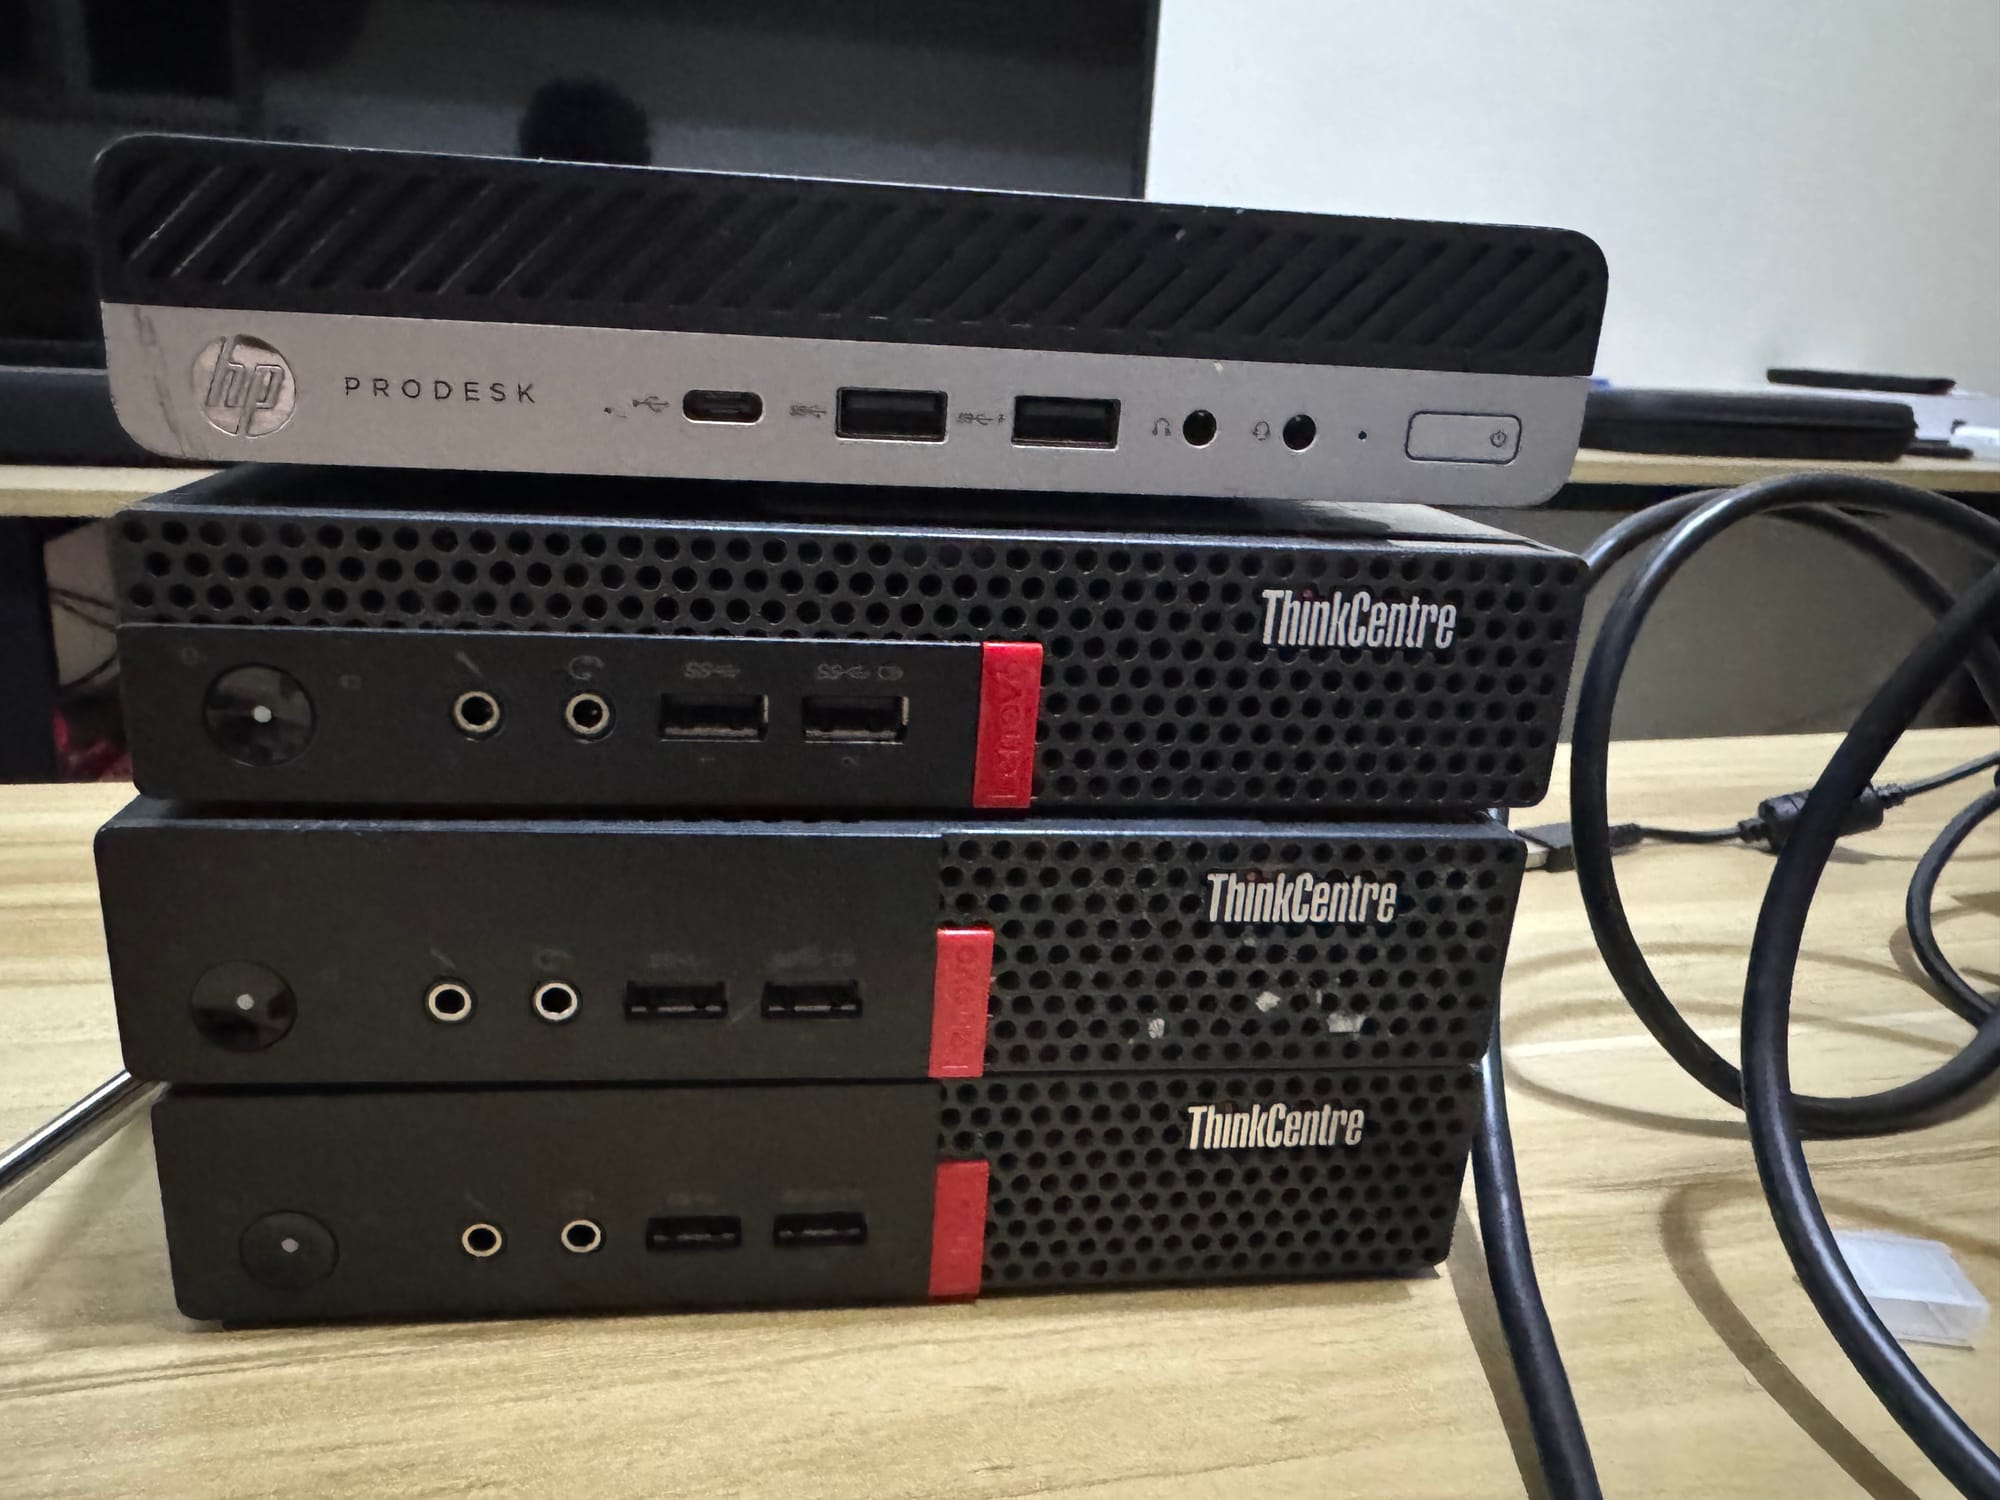
在前一篇採購完硬體之後,接下來就規劃一下家中服務要怎麼部署。
我在過去想法是能放到 Kubernetes 上的服務就放上去,但是幾次旅行之後發現,我出遠門想要關掉幾台伺服器時,常常關一台機器,某個 Ingress Controller 或是 Storage Controller 掛掉,就整個集群很多服務開始循環崩潰。
因此這次就規劃了一下哪些服務要怎麼部署,主要考慮以下三個原則:
- 避免循環引用
- 避免單一服務故障導致雪崩
- 電源最佳化
- 需要長期運行的服務,例如:Tailscaled、DNS、內網用的 Nginx 網關之類的部署在低耗電的單板電腦。(Raspberry Pi)
- 考慮降級運行
- 出遠門時,多數服務以及伺服器可以簡單地關機,不用手動按照嚴格順序操作 Drain Node 之類的作業。
服務列表
核心服務 -> 單板實體機 (出國降級運行時不關機)
- Raspberry Pi 4 Model B 8GB
- Proxmox Backup Server
- 備份 Proxmox VM
- CasaOS
- 可用 Samba 分享行動硬碟
- 管理 Docker
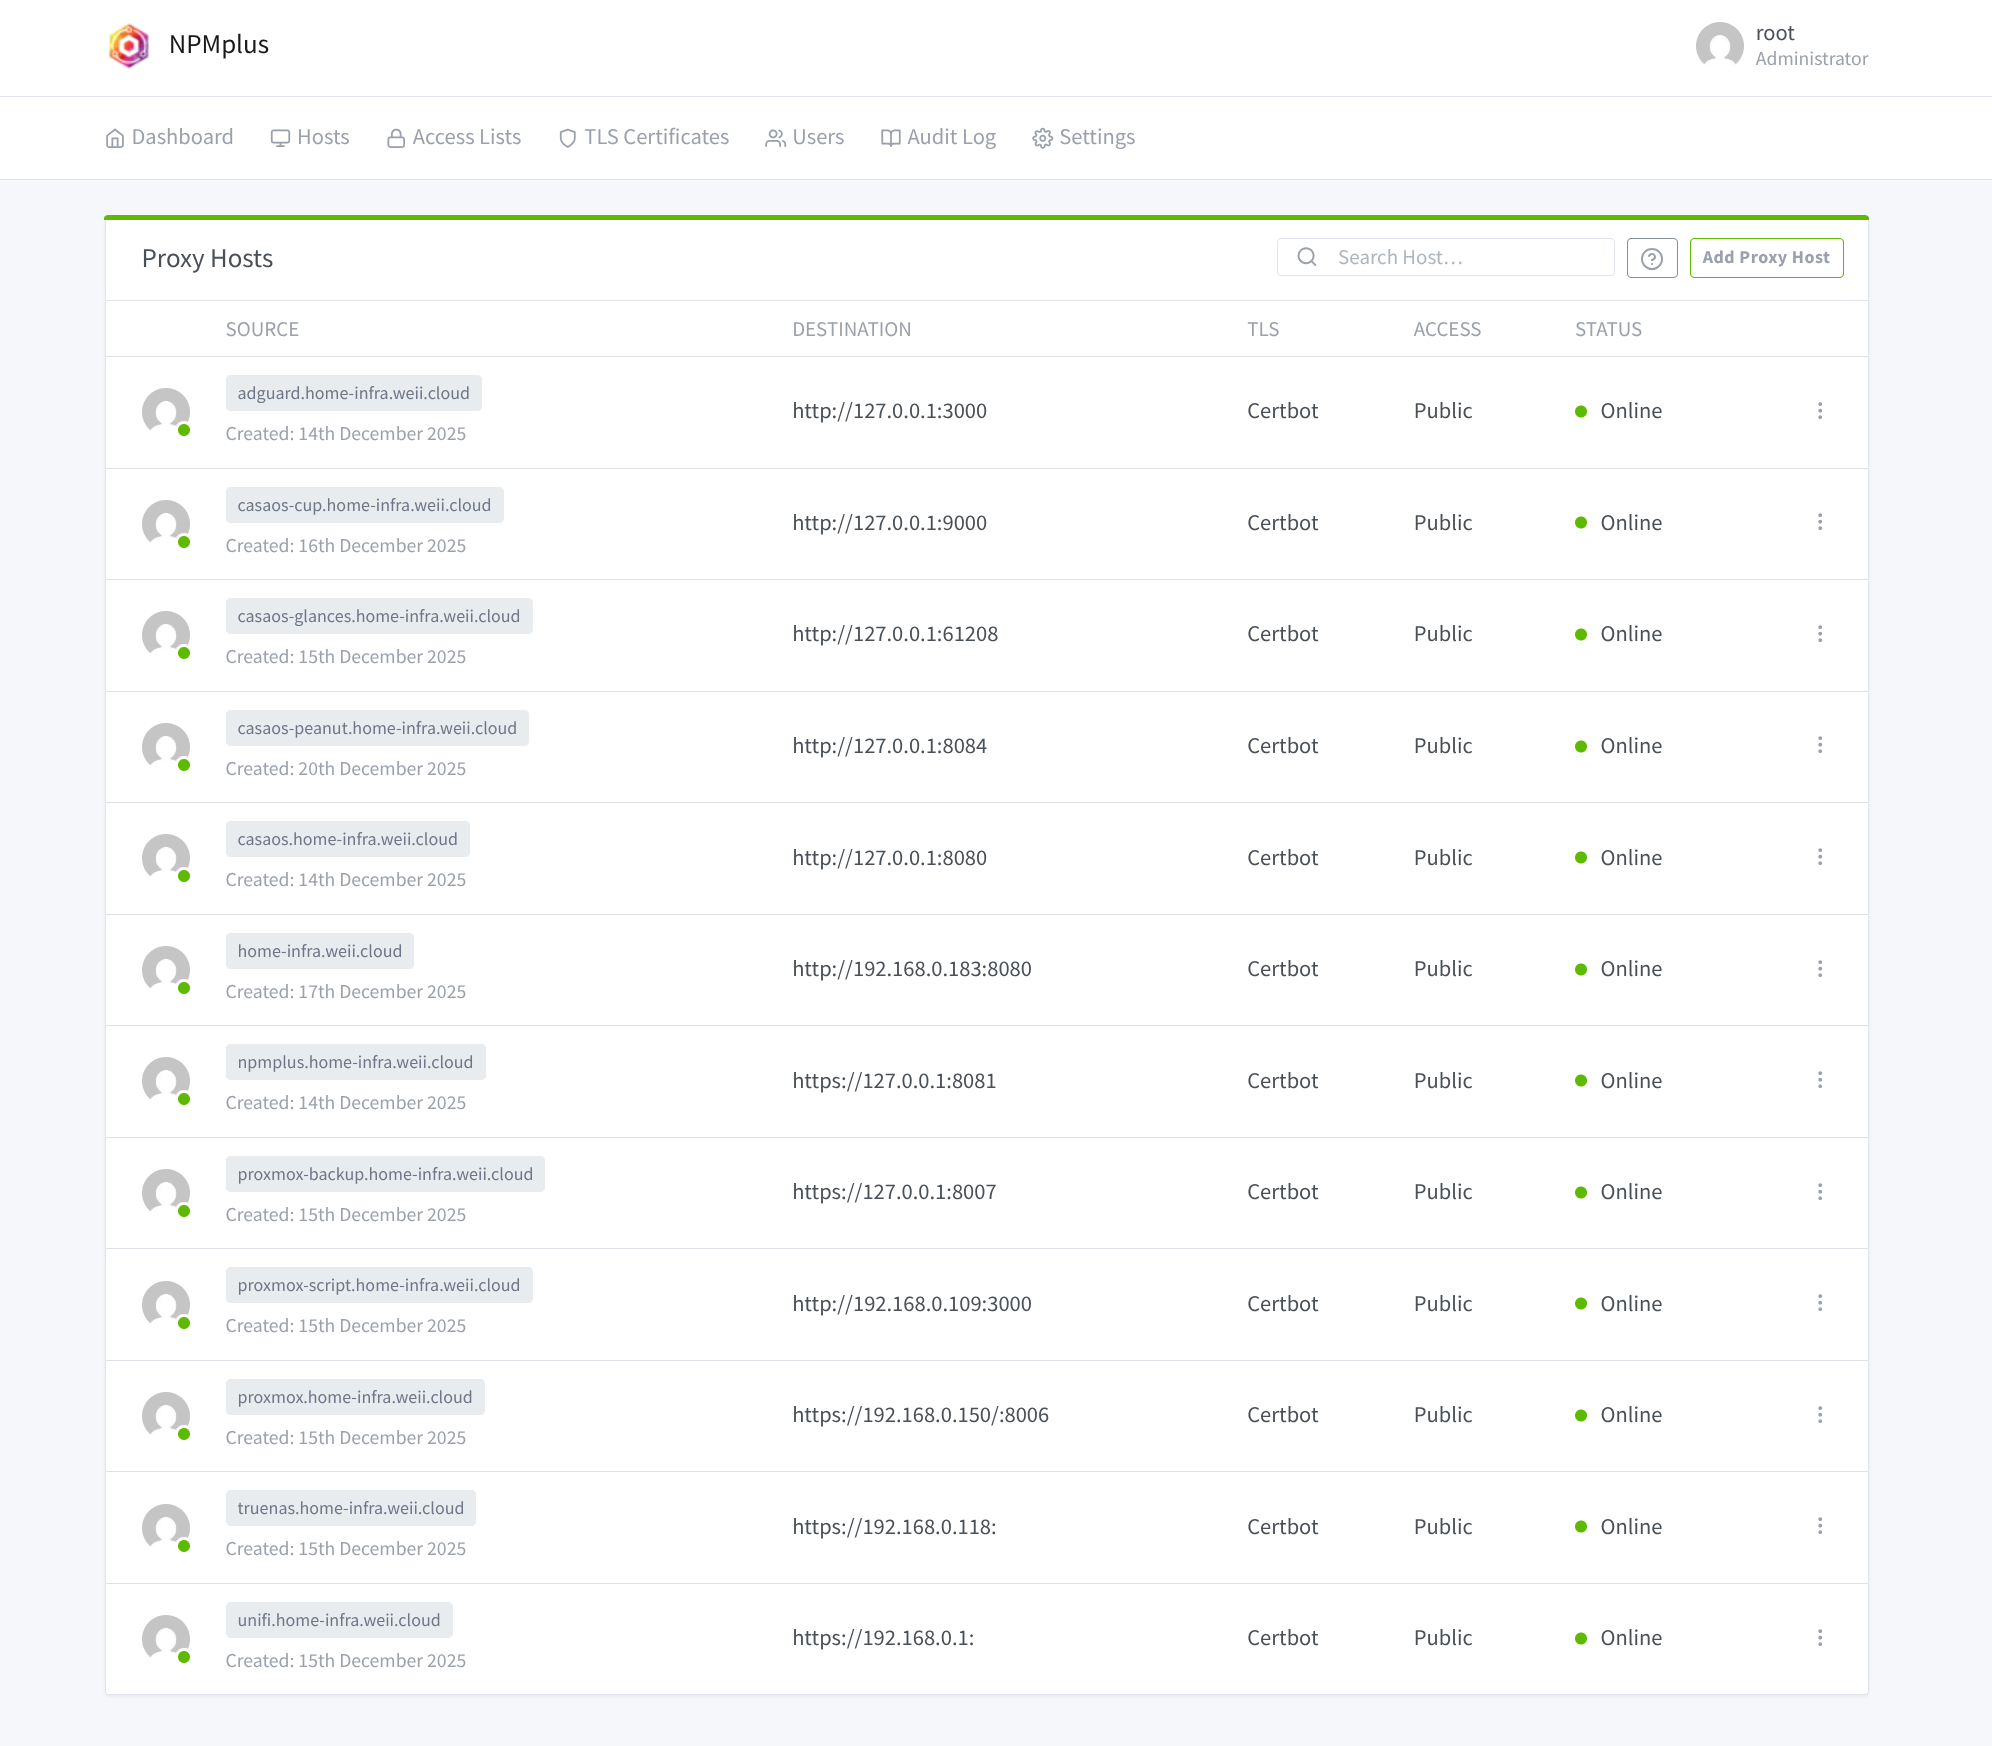
- Nginx Proxy Manager Plus
- 家中服務的網關
- Certbot 自動簽 Let's Encrypt 證書
- Tailscale
- 出門時可以透過 Tailscale VPN App 連回家中
- subnet router + exit node
- AdGuard Home
- DNS Server 擋廣告
- Proxmox Backup Server
- ZimaBlade 16GB
- TrueNAS
- 更重要的個人資料 HDD RAID1
- UPS 整合斷電自動關機
- TrueNAS
Proxmox 虛擬化 (出國降級運行時遷移負載至某幾台實體機其他關機)
- LXC
- PVEScriptsLocal
- Glance
- 家庭實驗室主頁
- 部落格
- Ghost + MySQL + Nginx + Cloudflared
- 用官方建議的方式安裝
- VM
- Forgejo
- Gitea 的社群硬分支版本
- Forgejo + PostgreSQL + Forgejo Runner + Docker
- 用官方建議的方式安裝
- Home Assistant
- Talos Kubernetes
- 性能 (Promethues)、資安 (Wazuh) 監控
- Serveless Platform Knative Serving + Event with WasmEdge
- Kafka (TopoLVM CSI)
- PostgreSQL (TopoLVM CSI) cloudnative-pg
- Object Storage Garage (TopoLVM CSI)
- 其他低效能 PV 使用 Longhorn RWO Replica or RWX
- plex
- immich
- 分享給朋友的 Coder Server (Tailscaled or Cloudflared 部署在裡面隔離故障)
- Forgejo
安裝
本篇主要會介紹在 Raspberry Pi 4 Model B 8GB 上安裝上面那些核心服務的過程。
Proxmox Backup Server
首先我是參考網路上這篇文章來製作安裝隨身碟跟安裝 Proxmox Backup Server,在我安裝的時候 Raspberry Pi Imager 上的 Raspberry Pi OS Lite 已經是 Debian 13 trixie 文章裡面更新系統的部份就可以跳過了,簡單的 apt update apt upgrade 更新一下套件就好。
 Raspberry Pi Ltd
安裝完 OS 就依照文章這裡提到的步驟,把 PBS 裝起來、設定 root 密碼,基本上就結束可以開始用了。
 wofferl
安裝完之後,從樹莓派的 IP 位置 8007 port 用前面設定的 root 登入管理介面,然後先打開命令列跑一下 PBS Post Install 腳本更新系統。
 Bram Suurd
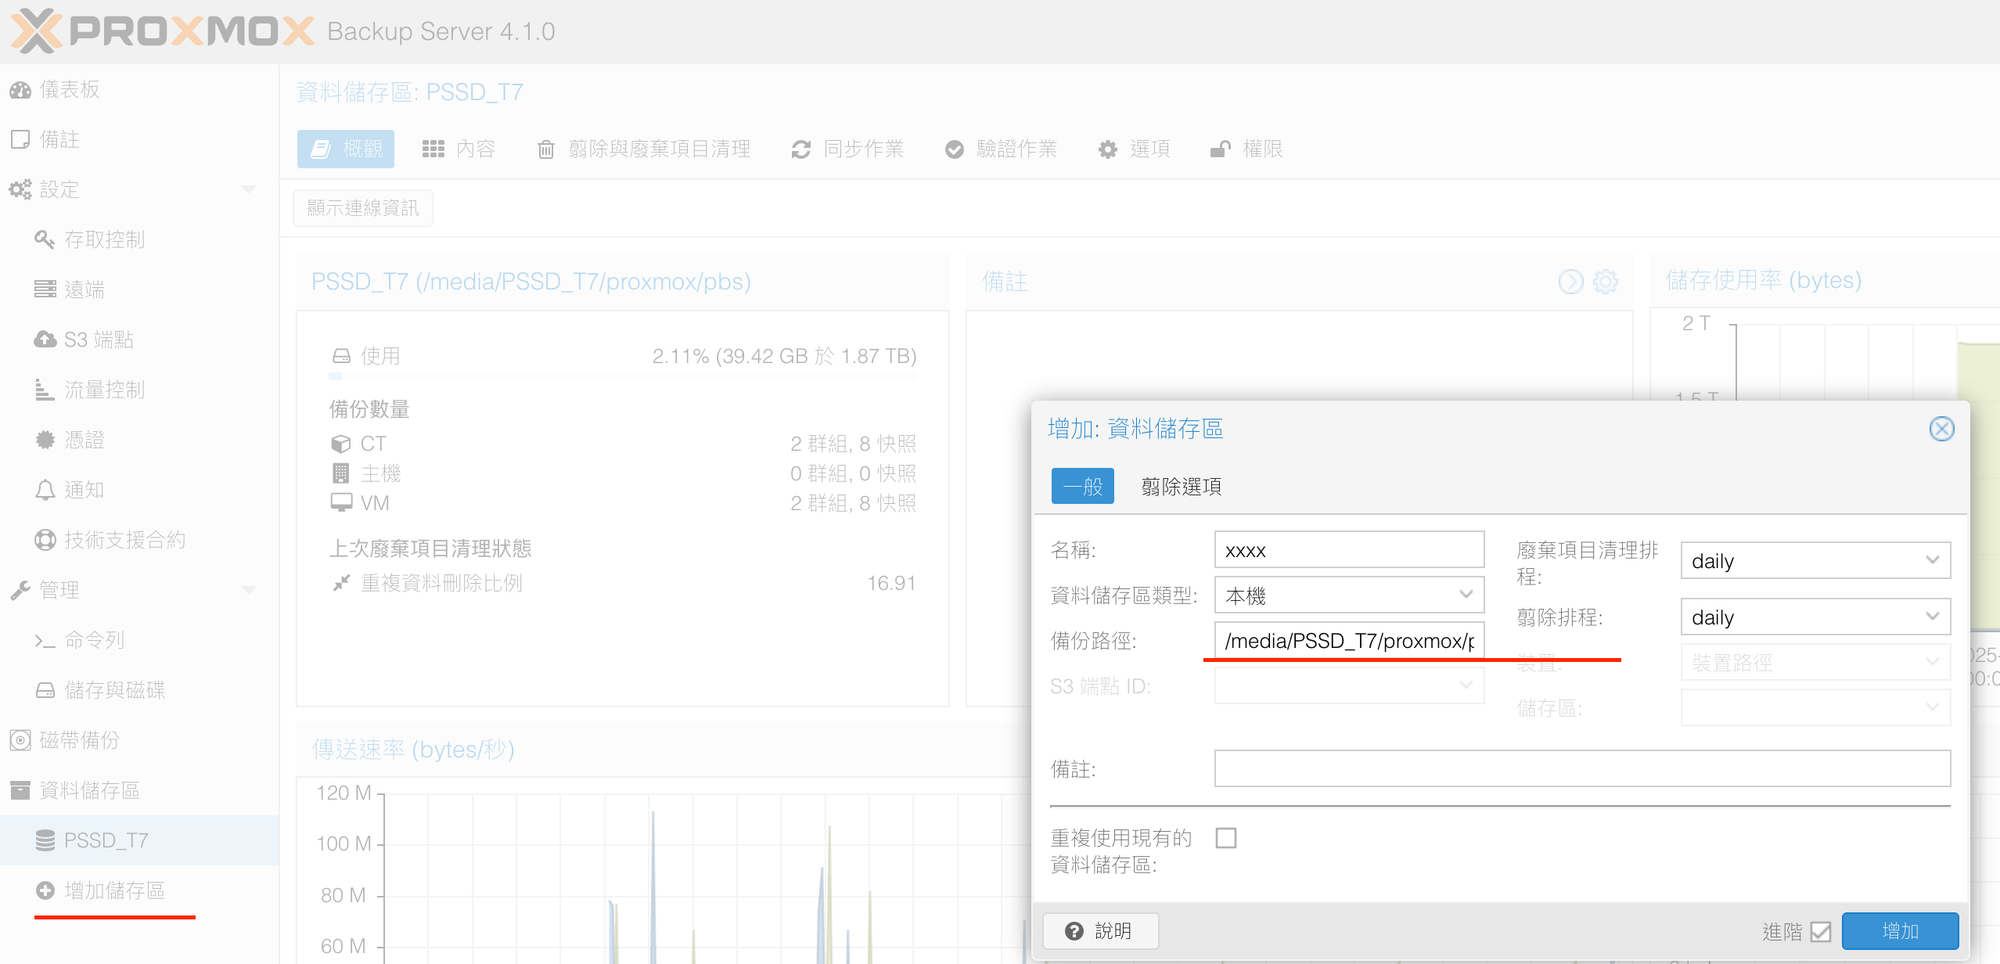
我這裡是找一顆行動硬碟當作備份裝置,選擇抹除磁碟用 ext4 格式:
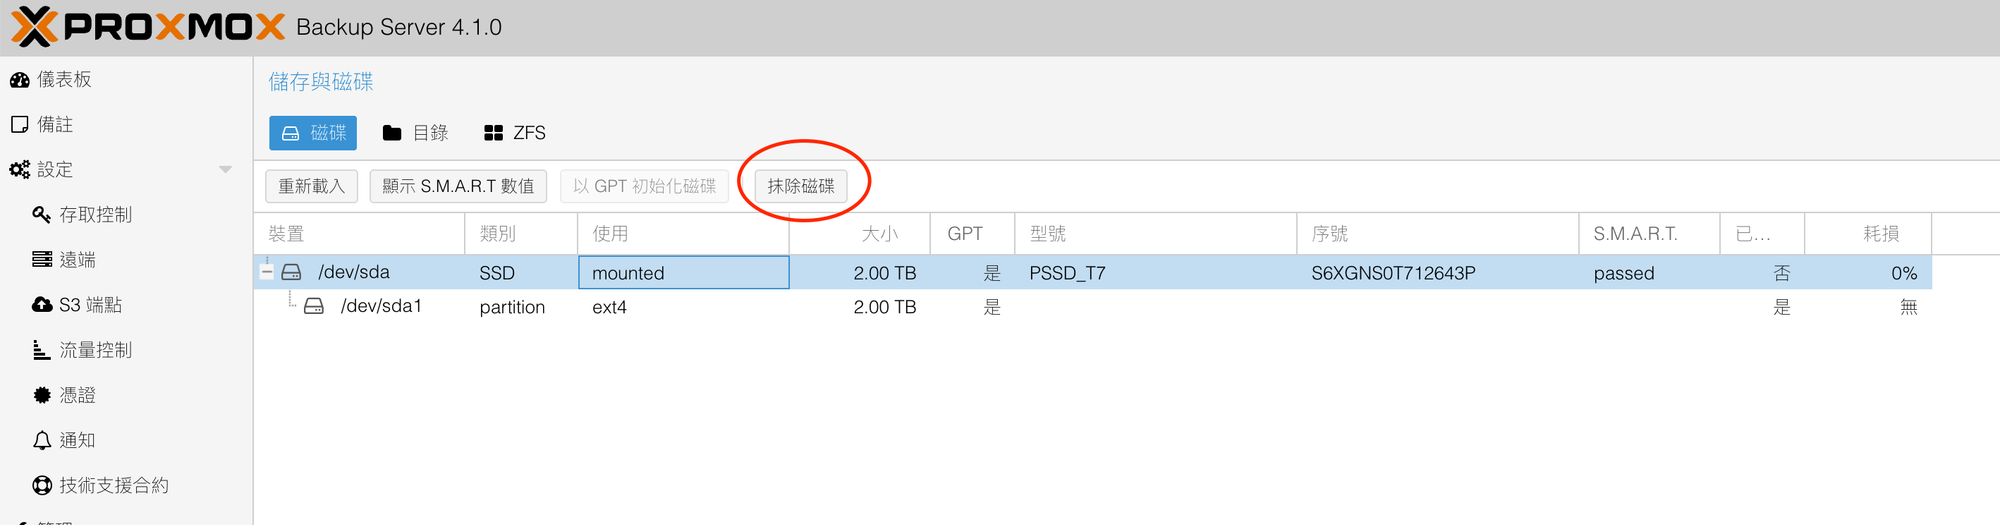
這裡我特意這樣做而不是整個硬碟都給 PBS使用,是我想要在後續的 CasaOS 裡的 Samba 分享資料夾跟 Docker 應用程式的資料也放到行動硬碟上。
然後進入命令列設定開機自動掛載:
sudo mkdir /media/PSSD_T7 # 建立掛載資料夾
lsblk -o NAME,FSTYPE,UUID,MOUNTPOINTS # 查看 UUID
sudo nano /etc/fstab # 最後一行貼上以下內容存檔
UUID=xxxxx-xxxxx-xxxx-xxx-xxxxx /media/PSSD_T7 ext4 defaults 0 2
sudo findmnt --verify # 最後檢查沒有設定錯誤,重開機
lsblk -o NAME,FSTYPE,UUID,MOUNTPOINTS # 重開機後檢查掛載有成功就可以了最後增加儲存區就可以用了,然後依照這裡的指示把 PVE 連上 PBS 就可以用了。
CasaOS
接下來是要安裝 CasaOS 要用來管理樹莓派上的其他服務,第一步先安裝 Docker,主要按照下面這個官方文件操作就好了:


安裝完之後,到 CasaOS 官方網站:


複製以下的腳本到樹梅派上執行:
curl -fsSL https://get.casaos.io | sudo bash接著就可以從樹梅派 IP 位置 80 Port 連到 CasaOS Web 界面了,第一次登入會提示你設定管理員帳號,設定完之後就可以連進去。
然後馬上就會摔到坑裡,Docker APP 無法載入,主要是官方後來已經將開發重心轉到 ZimaOS 上,因此開始遇到各種版本的問題,像是這則 issue。解決的方式也不難,稍微改一下 CasaOS systemctl 設定檔指定一下使用的 Docker API 版本就好。
 andyCASAOS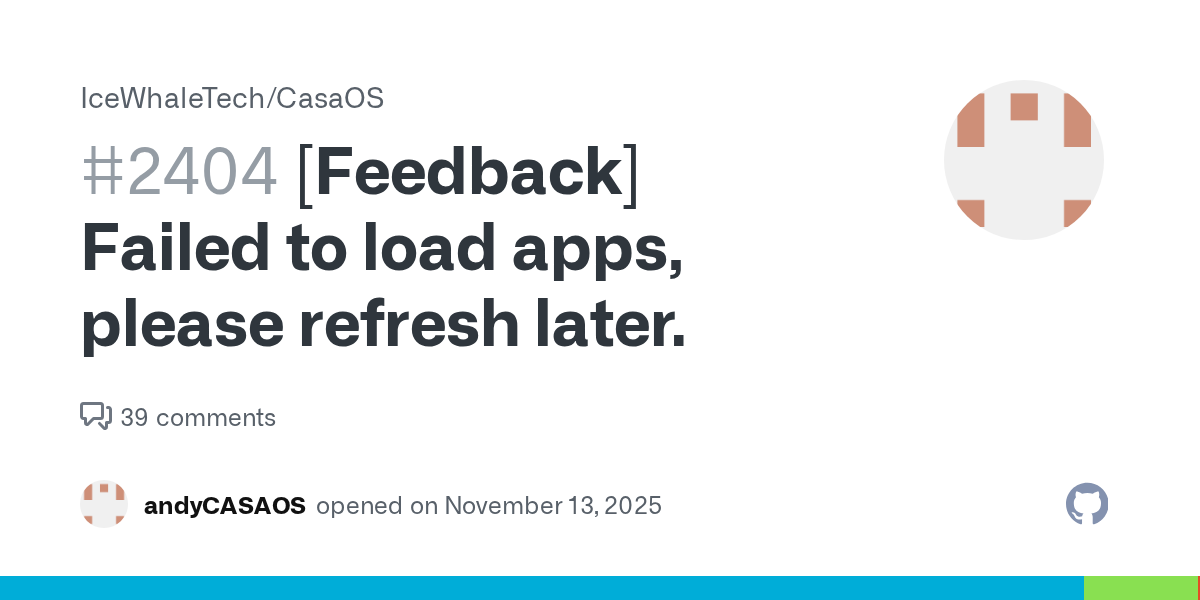
Smaba Share 行動硬碟
接下來,還記得前面安裝 Proxmox Backup Server 時候行動硬碟的設定嗎?
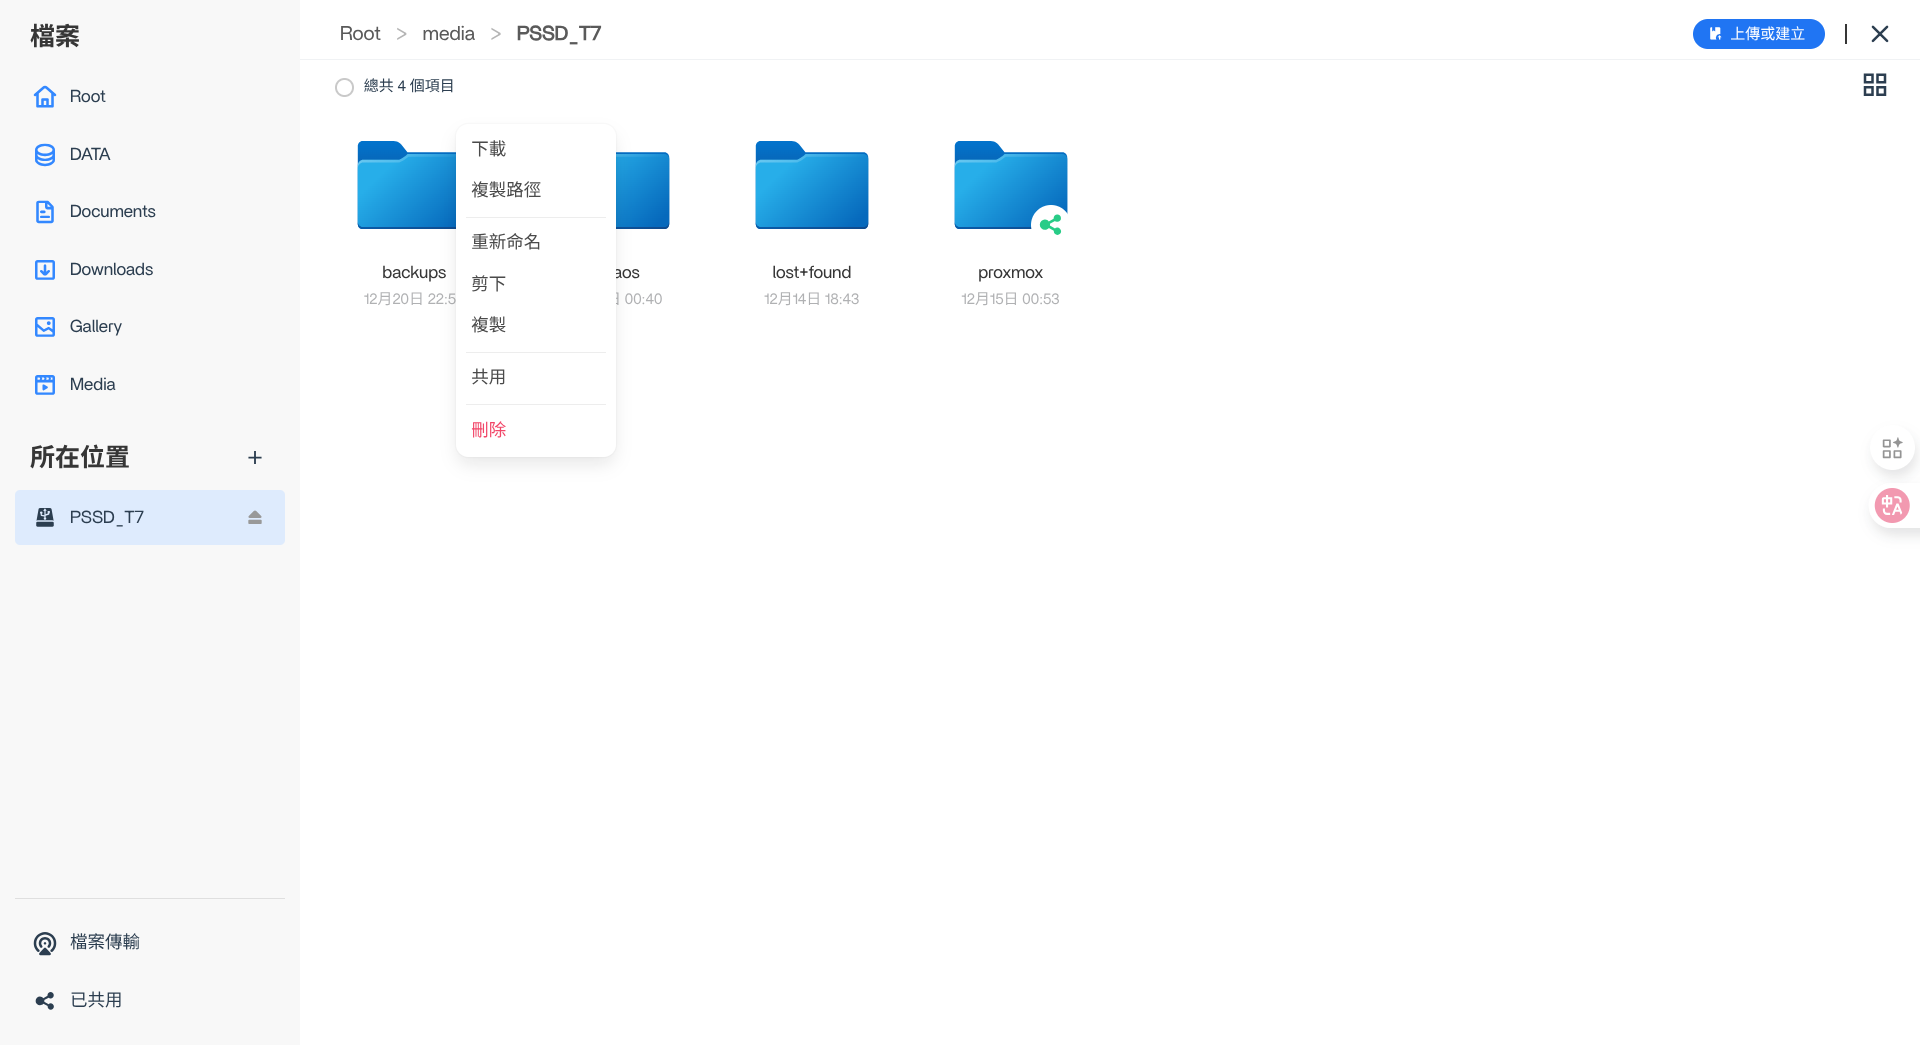
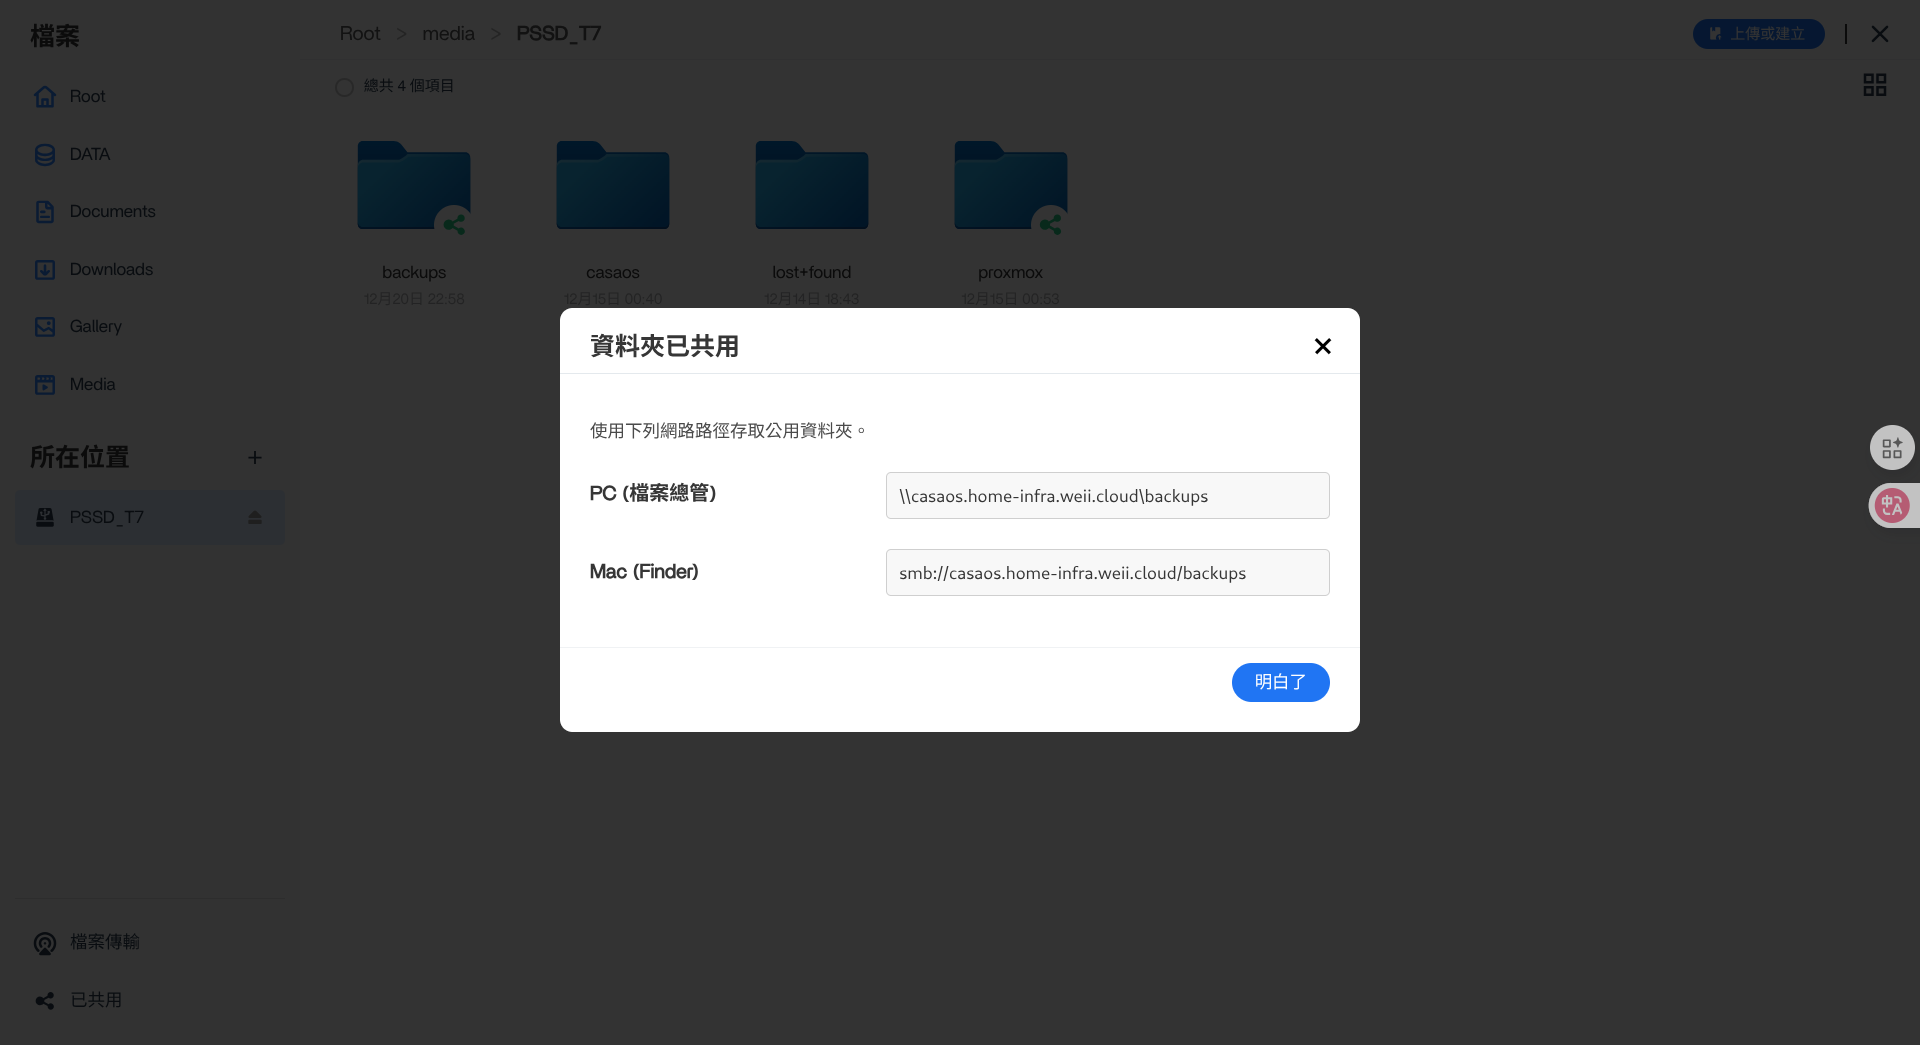
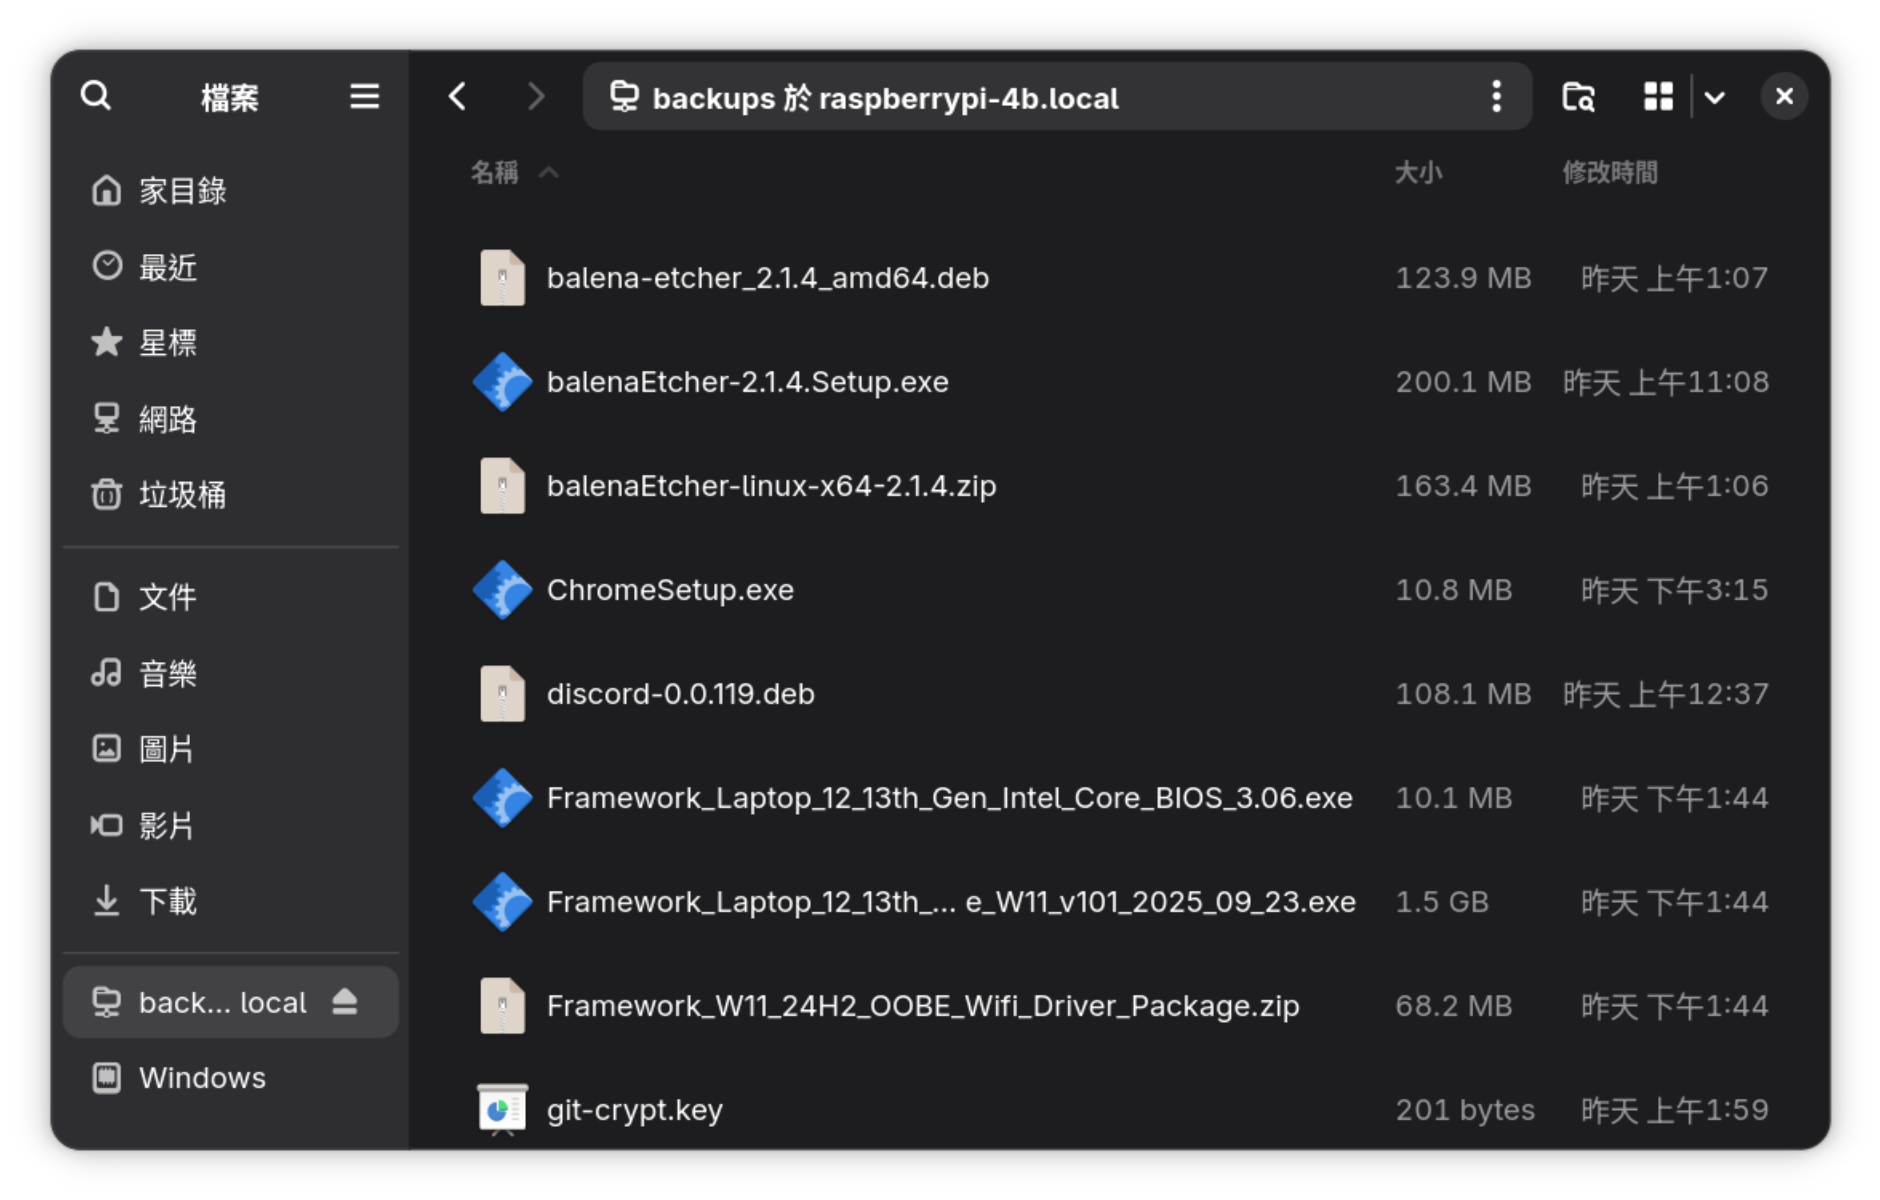
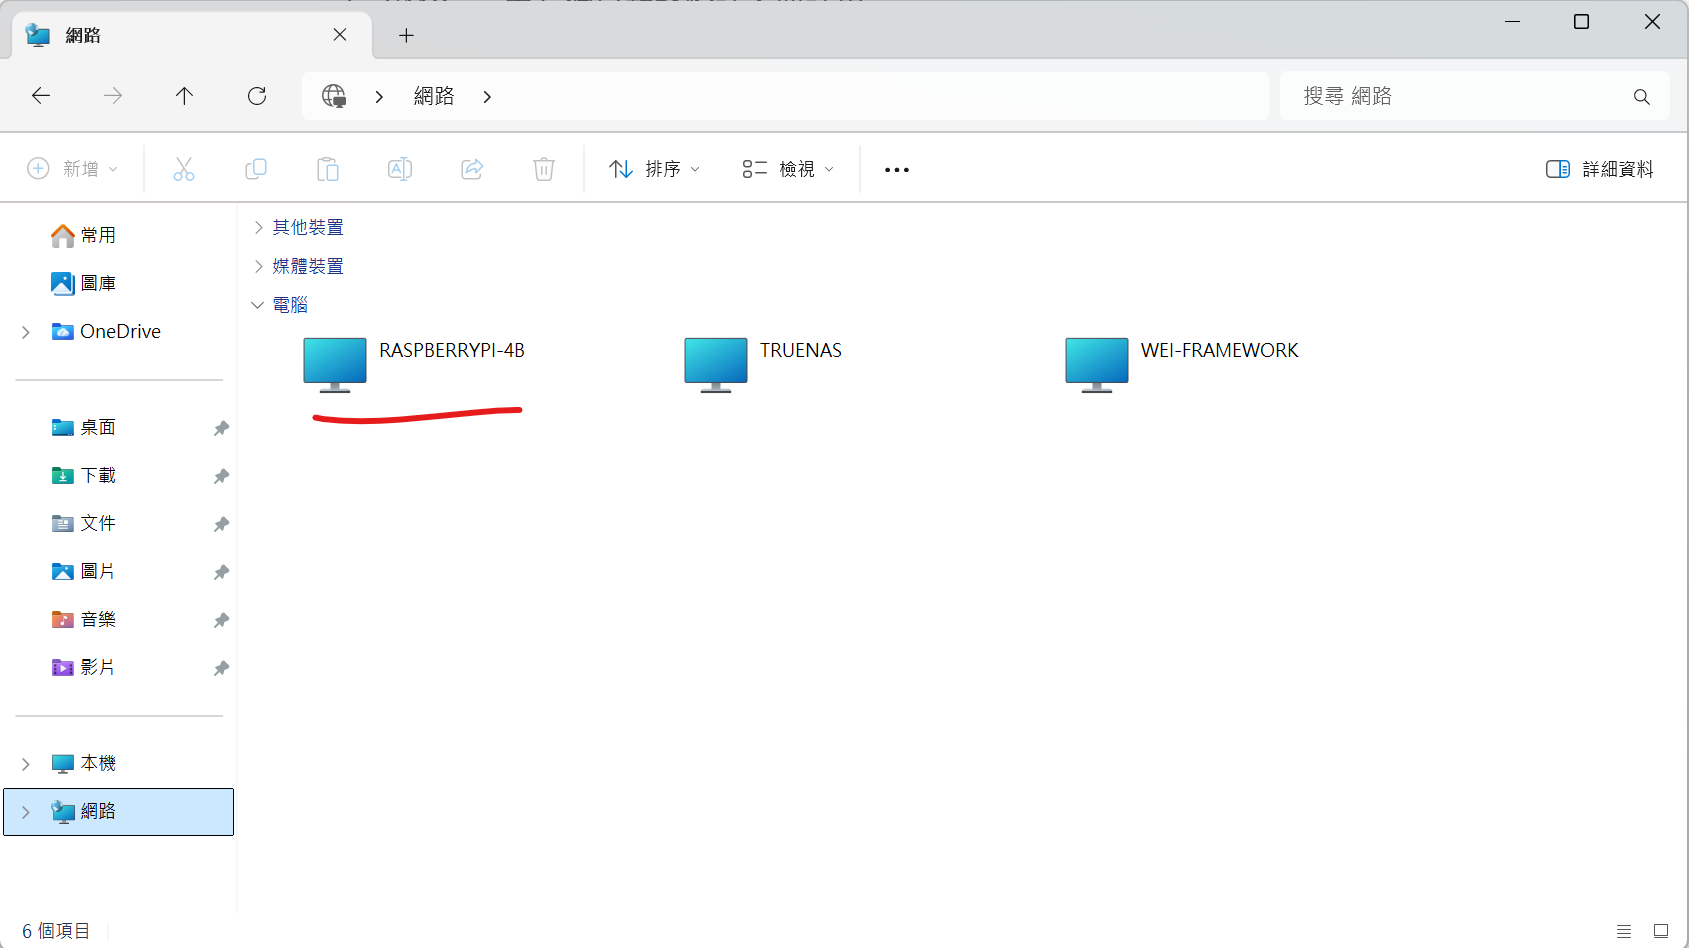
我們可以開啟 CasaOS 內建的 Files APP 然後在行動硬碟上建立一個資料夾,然後點共用,接著就可以在 Macbook 或是 Linux 系統上簡單的連上去你的共享資料夾,然後在 Windows 上這時候會有另一個坑要注意。
 dknappettmsft
謝謝微軟為我們的安全把關,請依照以下的步驟解決:
(建議完全理解再操作)
- 啟用 SMB Client v1,請反著做(找不到控制台到開始功能表搜尋就好,預設不顯示),可以只啟用 SMB 1.0 Client 功能就好。
- 設定允許 Guest 登入 SMB
- 用系統管理員身分在 PowerShell 執行這兩個指令:
Set-SmbClientConfiguration -EnableInsecureGuestLogons $true -Force
Set-SmbClientConfiguration -RequireSecuritySignature $false
- 用系統管理員身分在 PowerShell 執行這兩個指令:
- 安裝 wsdd 讓 Windows 可以透過網路發現到 Samba 伺服器
- ssh 到樹梅派上
- 執行以下的指令
wget https://raw.githubusercontent.com/christgau/wsdd/master/src/wsdd.py
sudo mv wsdd.py /usr/local/bin/wsdd.py && sudo chmod a+x /usr/local/bin/wsdd.py && sudo chown root:root /usr/local/bin/wsdd.py
sudo systemctl edit --force --full wsdd.service - 貼入以下內容
[Unit]
Description=WSDD Service
Wants=network.target
After=network.target
[Service]
ExecStartPre=/bin/sleep 5
ExecStart=/usr/bin/python3 /usr/local/bin/wsdd.py
Restart=always
RestartSec=1
[Install]
WantedBy=multi-user.target - 啟動 WSDD 服務並檢查是否正常啟動
sudo systemctl enable --now wsdd.service && systemctl status wsdd.service
大功告成,可以正常在 Windows 的網路開啟裝置探索時找到 CasaOS 的主機了。
(如果我有空的話可能會分支一份 CasaOS 的程式碼把這些安全問題改好)
Nginx Proxy Manager Plus
 ZoeyVid
後面的服務就簡單了,幾乎都是到 CasaOS 內建的 App Store 裡就可以安裝。
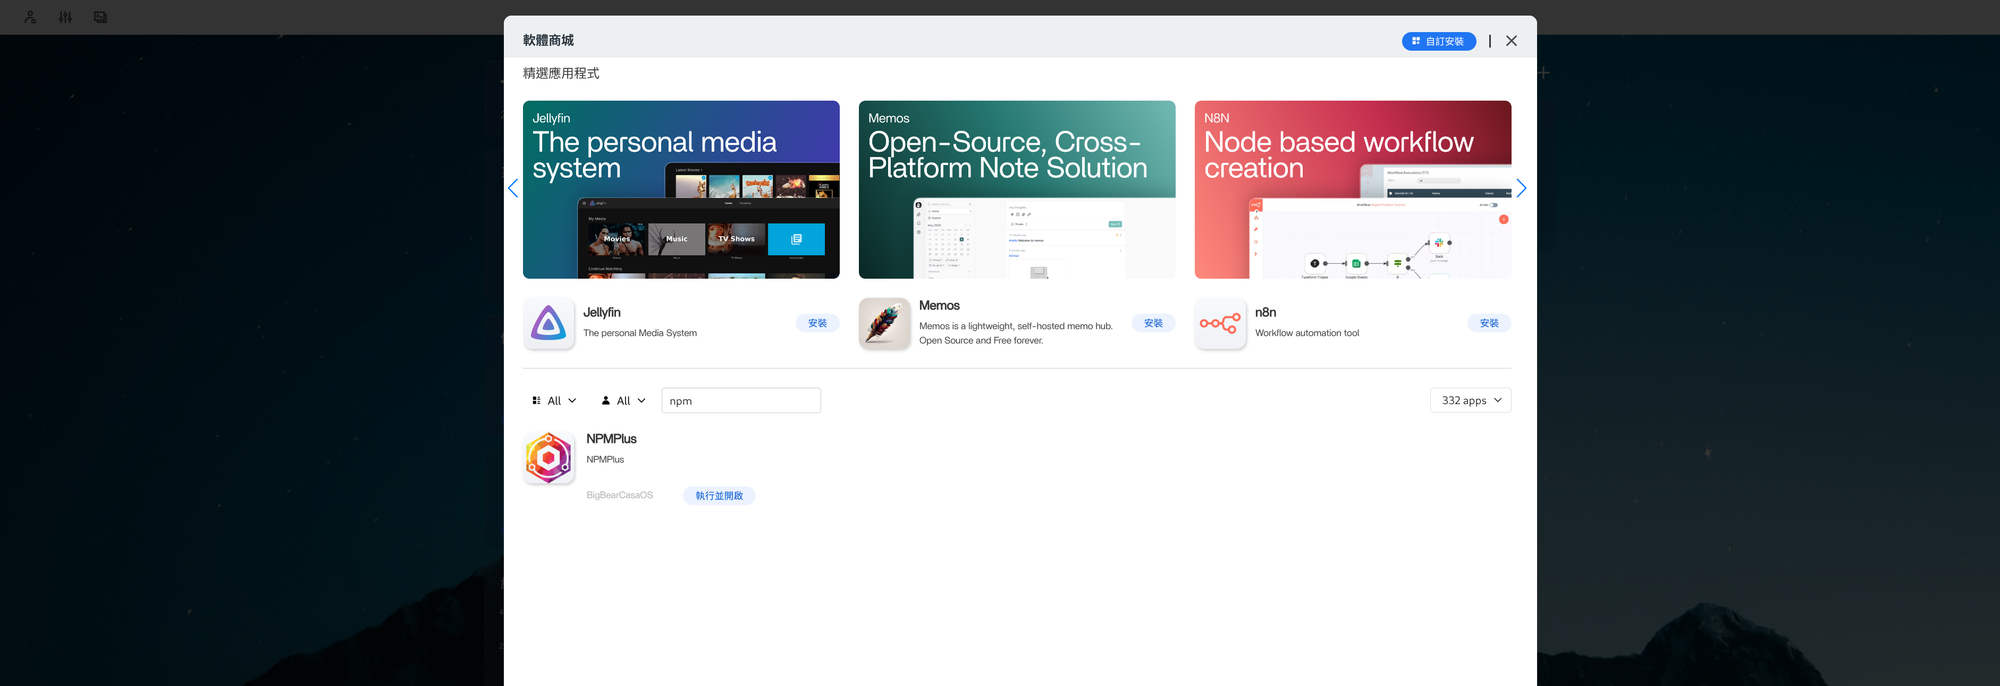
設定如下:
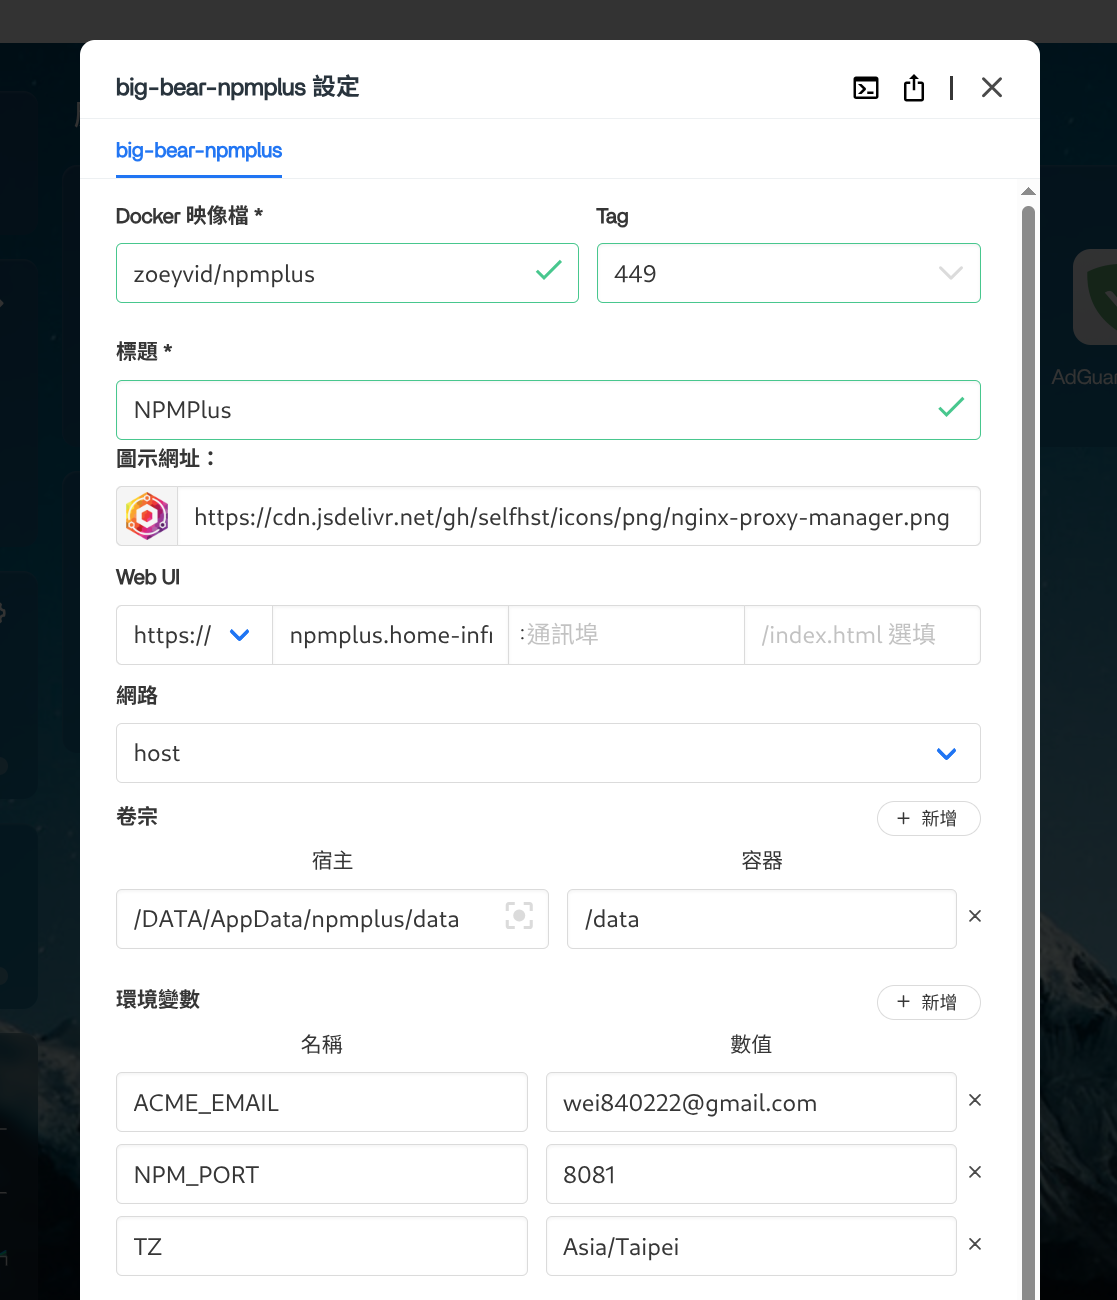
基本上環境變數設定一下給 Certbot 發證書用的 email 然後網路設定成 host 其他沒什麼好注意的了。
如何設定可以參考這一篇:
 Life-is-short--so--enjoy-it
Cloudflare 的 Token 我是使用 Terraform 來建立的,避免之後忘記怎麼設定的,使用官方的 Provider,以下是我的設定檔需要的可以參考:
locals {
  zone_id = {
    "xxxx.com" = "xxxxxxxx"
  }
}

data "cloudflare_account_api_token_permission_groups_list" "all" {
  account_id = var.ACCOUNT_ID
}

resource "cloudflare_account_token" "npmplus_certbot" {
  account_id = var.ACCOUNT_ID
  name       = "NPMplus Certbot"
  policies = [
    {
      effect = "allow"
      permission_groups = [
        for group in data.cloudflare_account_api_token_permission_groups_list.all.result : group if group.name == "DNS Write"
      ]
      resources = jsonencode({
        "com.cloudflare.api.account.${var.ACCOUNT_ID}" = {
          "com.cloudflare.api.account.zone.*" = "*"
        }
      })
    }
  ]
}

// terragrunt output -raw account_token_npmplus_certbot
output "account_token_npmplus_certbot" {
  value     = <<EOT
# Paste this content to NPMplus > TLS Certificates > Add Certbot Certificate > Credentials File Content (Enable DNS Challenge)
dns_cloudflare_api_token=${cloudflare_account_token.npmplus_certbot.value}
EOT
  sensitive = true
}

resource "cloudflare_dns_record" "home_infra_xxxx_com" {
  zone_id = local.zone_id["xxxx.com"]
  name    = "home-infra.xxxx.com"
  type    = "A"
  ttl     = 1
  content = "192.168.x.x"
}

resource "cloudflare_dns_record" "wildcard_home_infra_xxxx_com" {
  zone_id = local.zone_id["xxxx.com"]
  name    = "*.home-infra.xxxx.com"
  type    = "CNAME"
  ttl     = 1
  content = cloudflare_dns_record.home_infra_xxxx_com.name
}
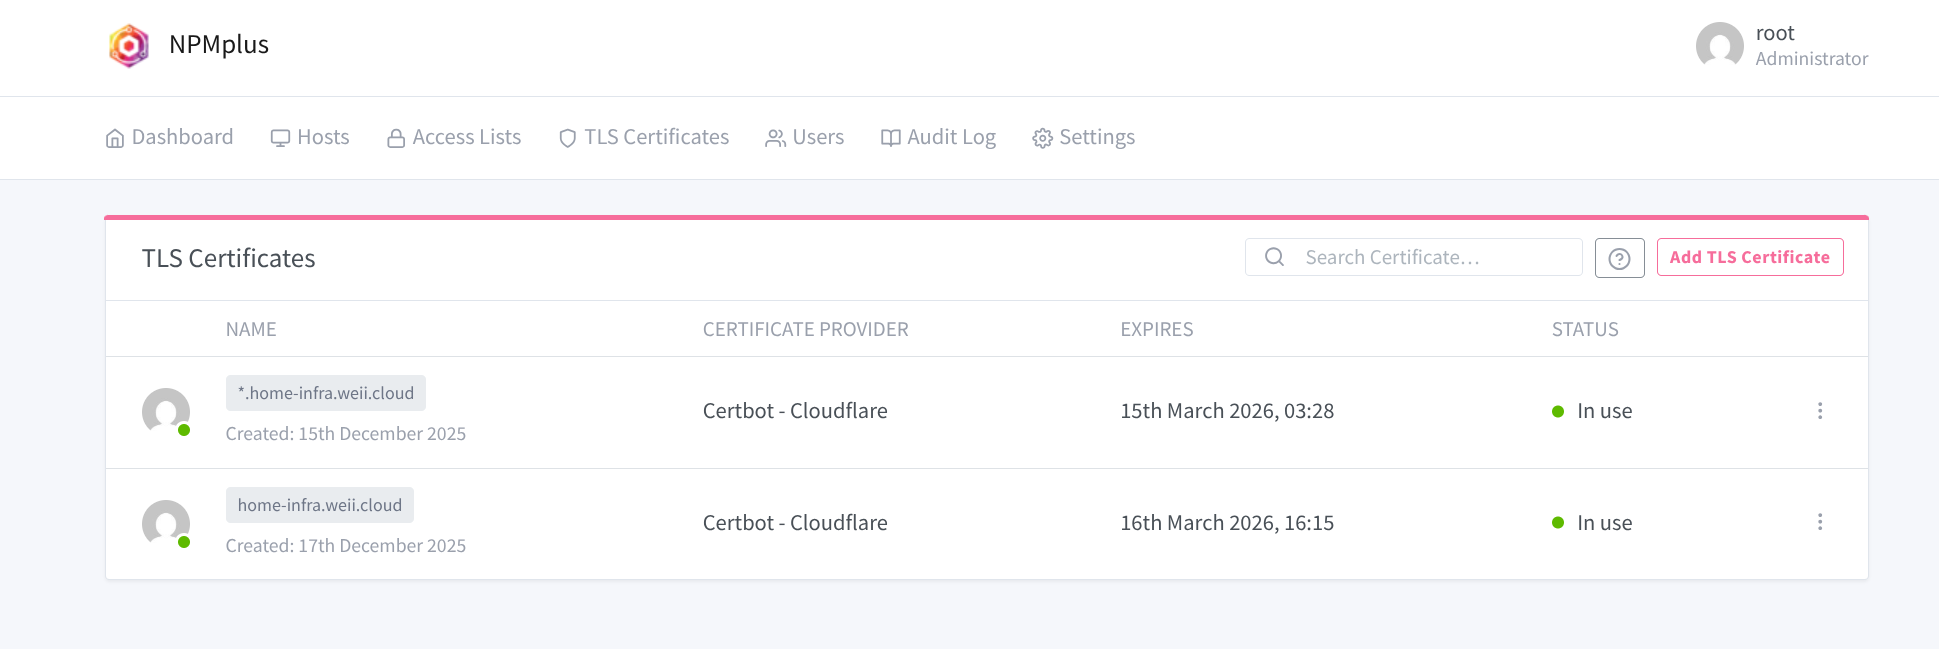
完成之後就可以透過 NPMplus 簽通配符憑證,然後家裡一些 wifi 或是 nas 也都可以設定走過來這個 nginx 就可以在瀏覽器上有綠色的鎖頭,真安全。
Tailscale


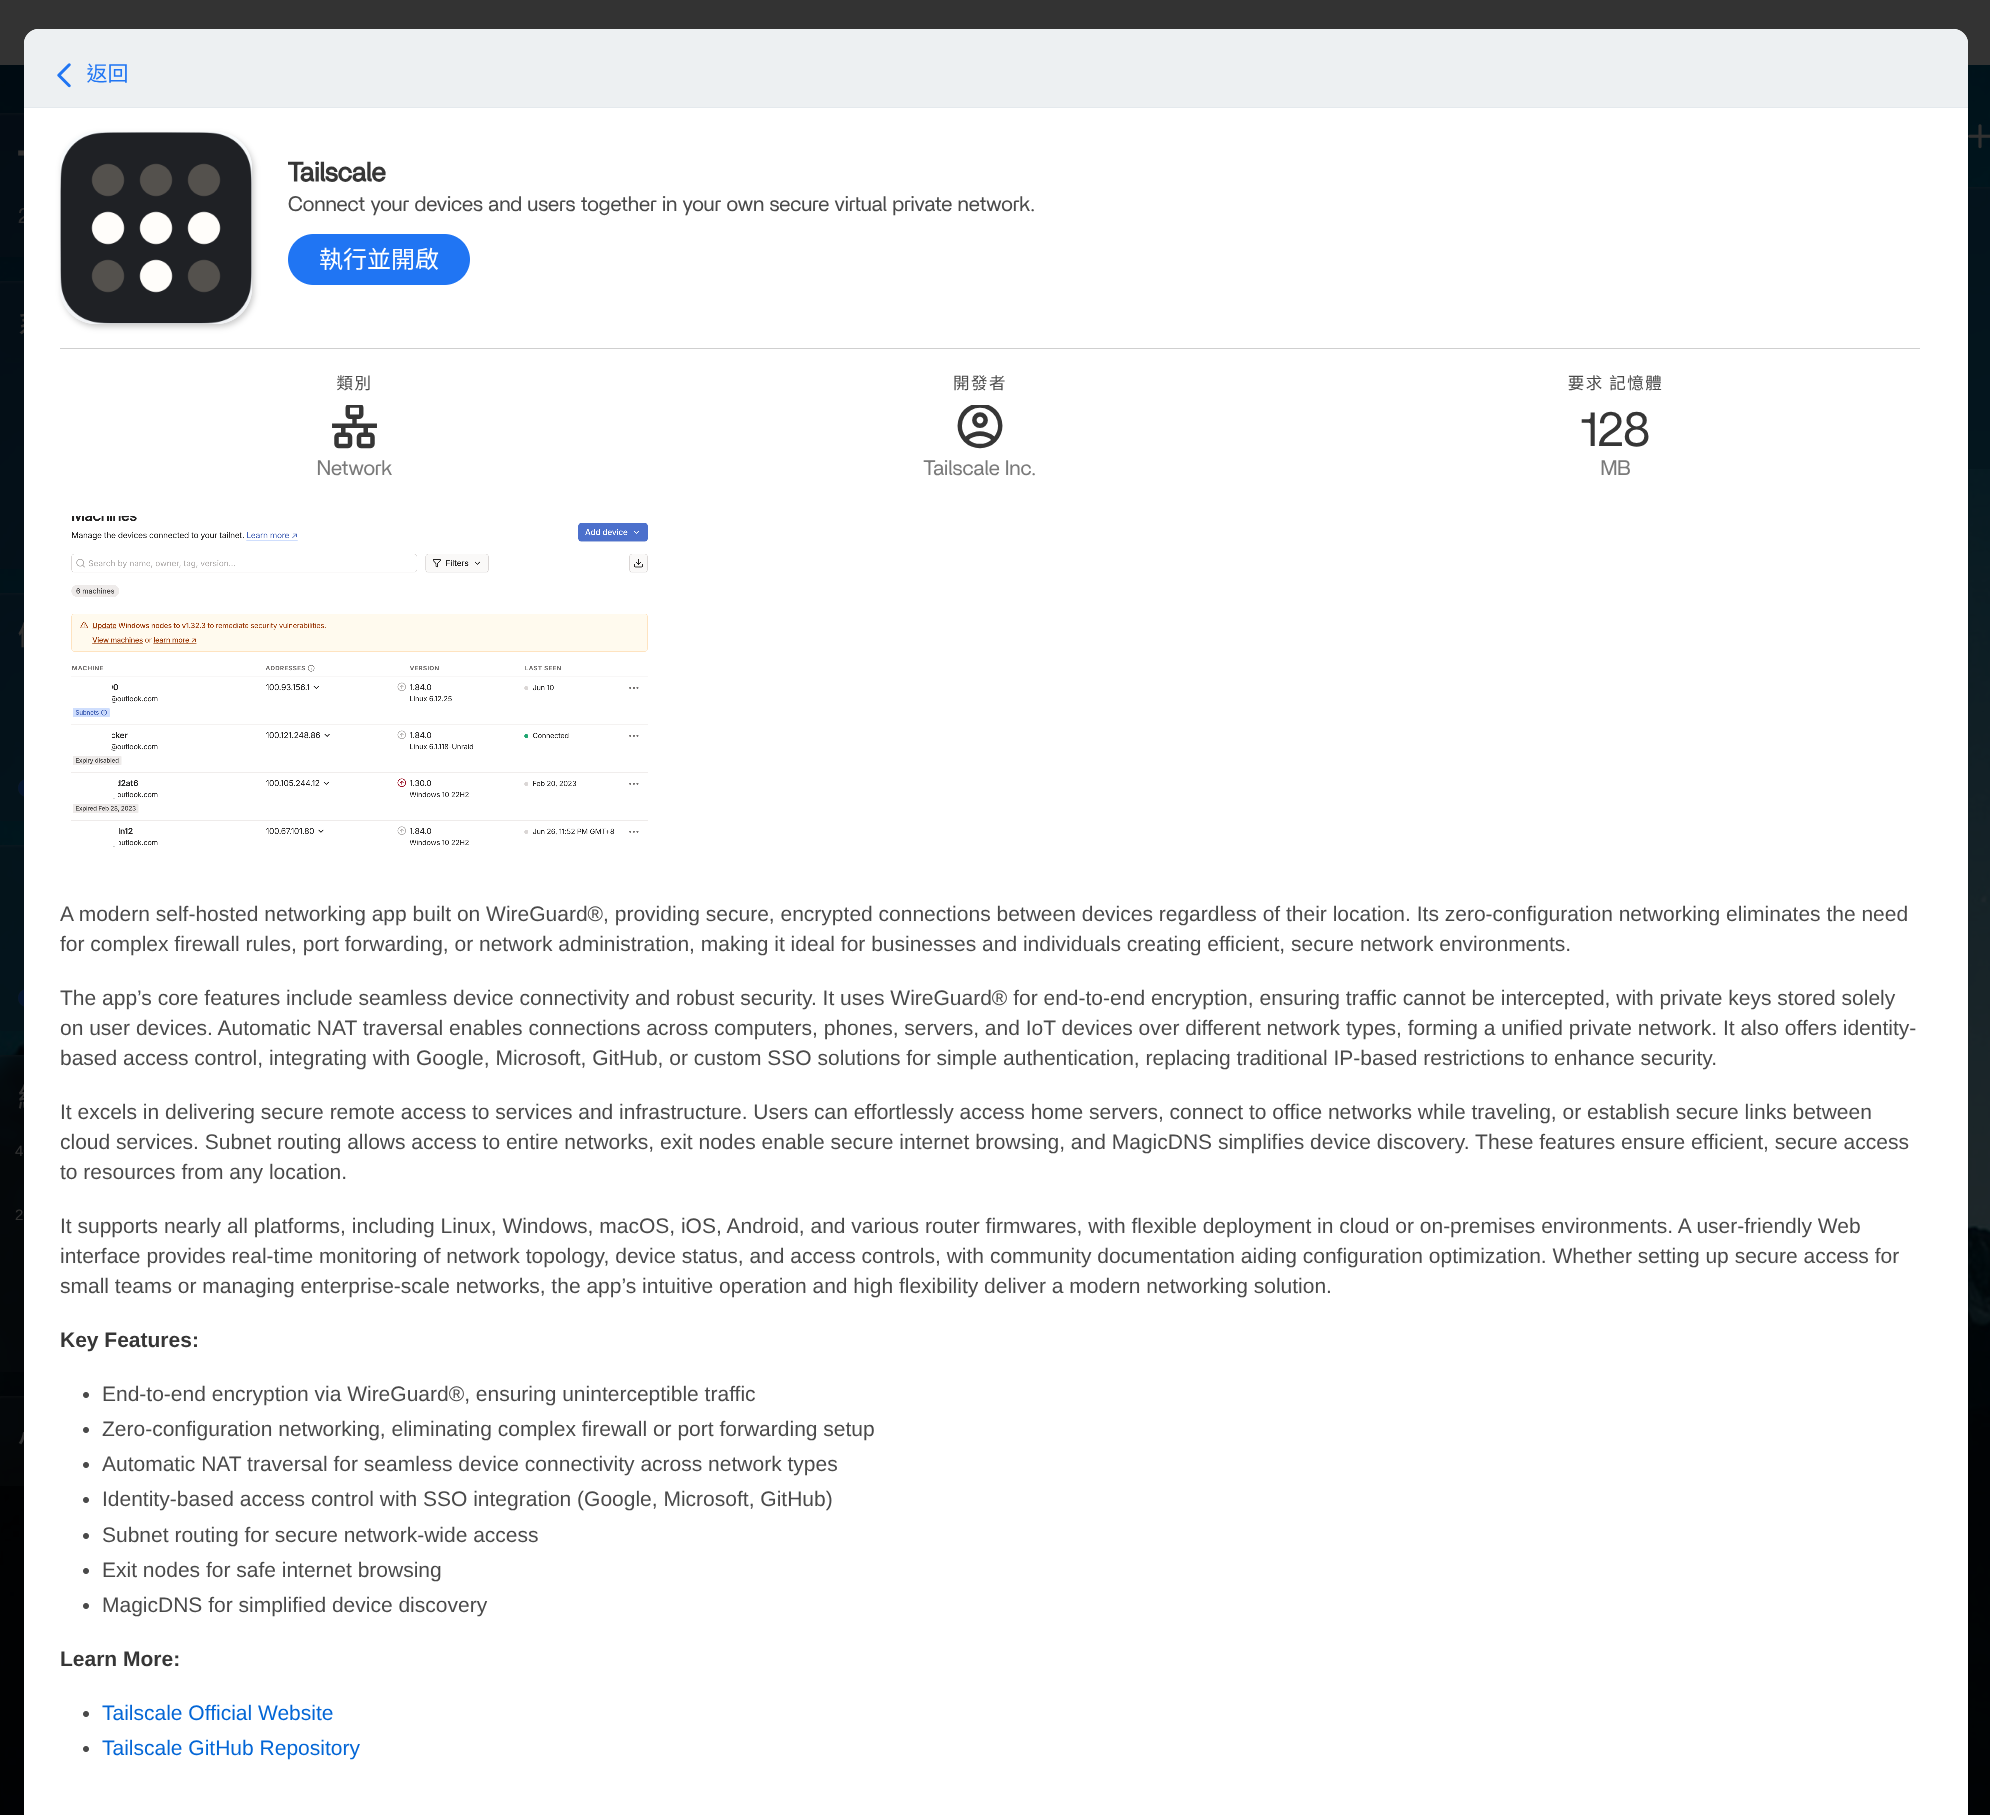
上面文件是官方的用 Docker 部屬的教學,我們這裡有偷吃步,同樣的在 CasaOS 內建的 App Store 裡點一點就可以安裝。
這裡設定就有點多,大家可以先照著我的截圖修改:
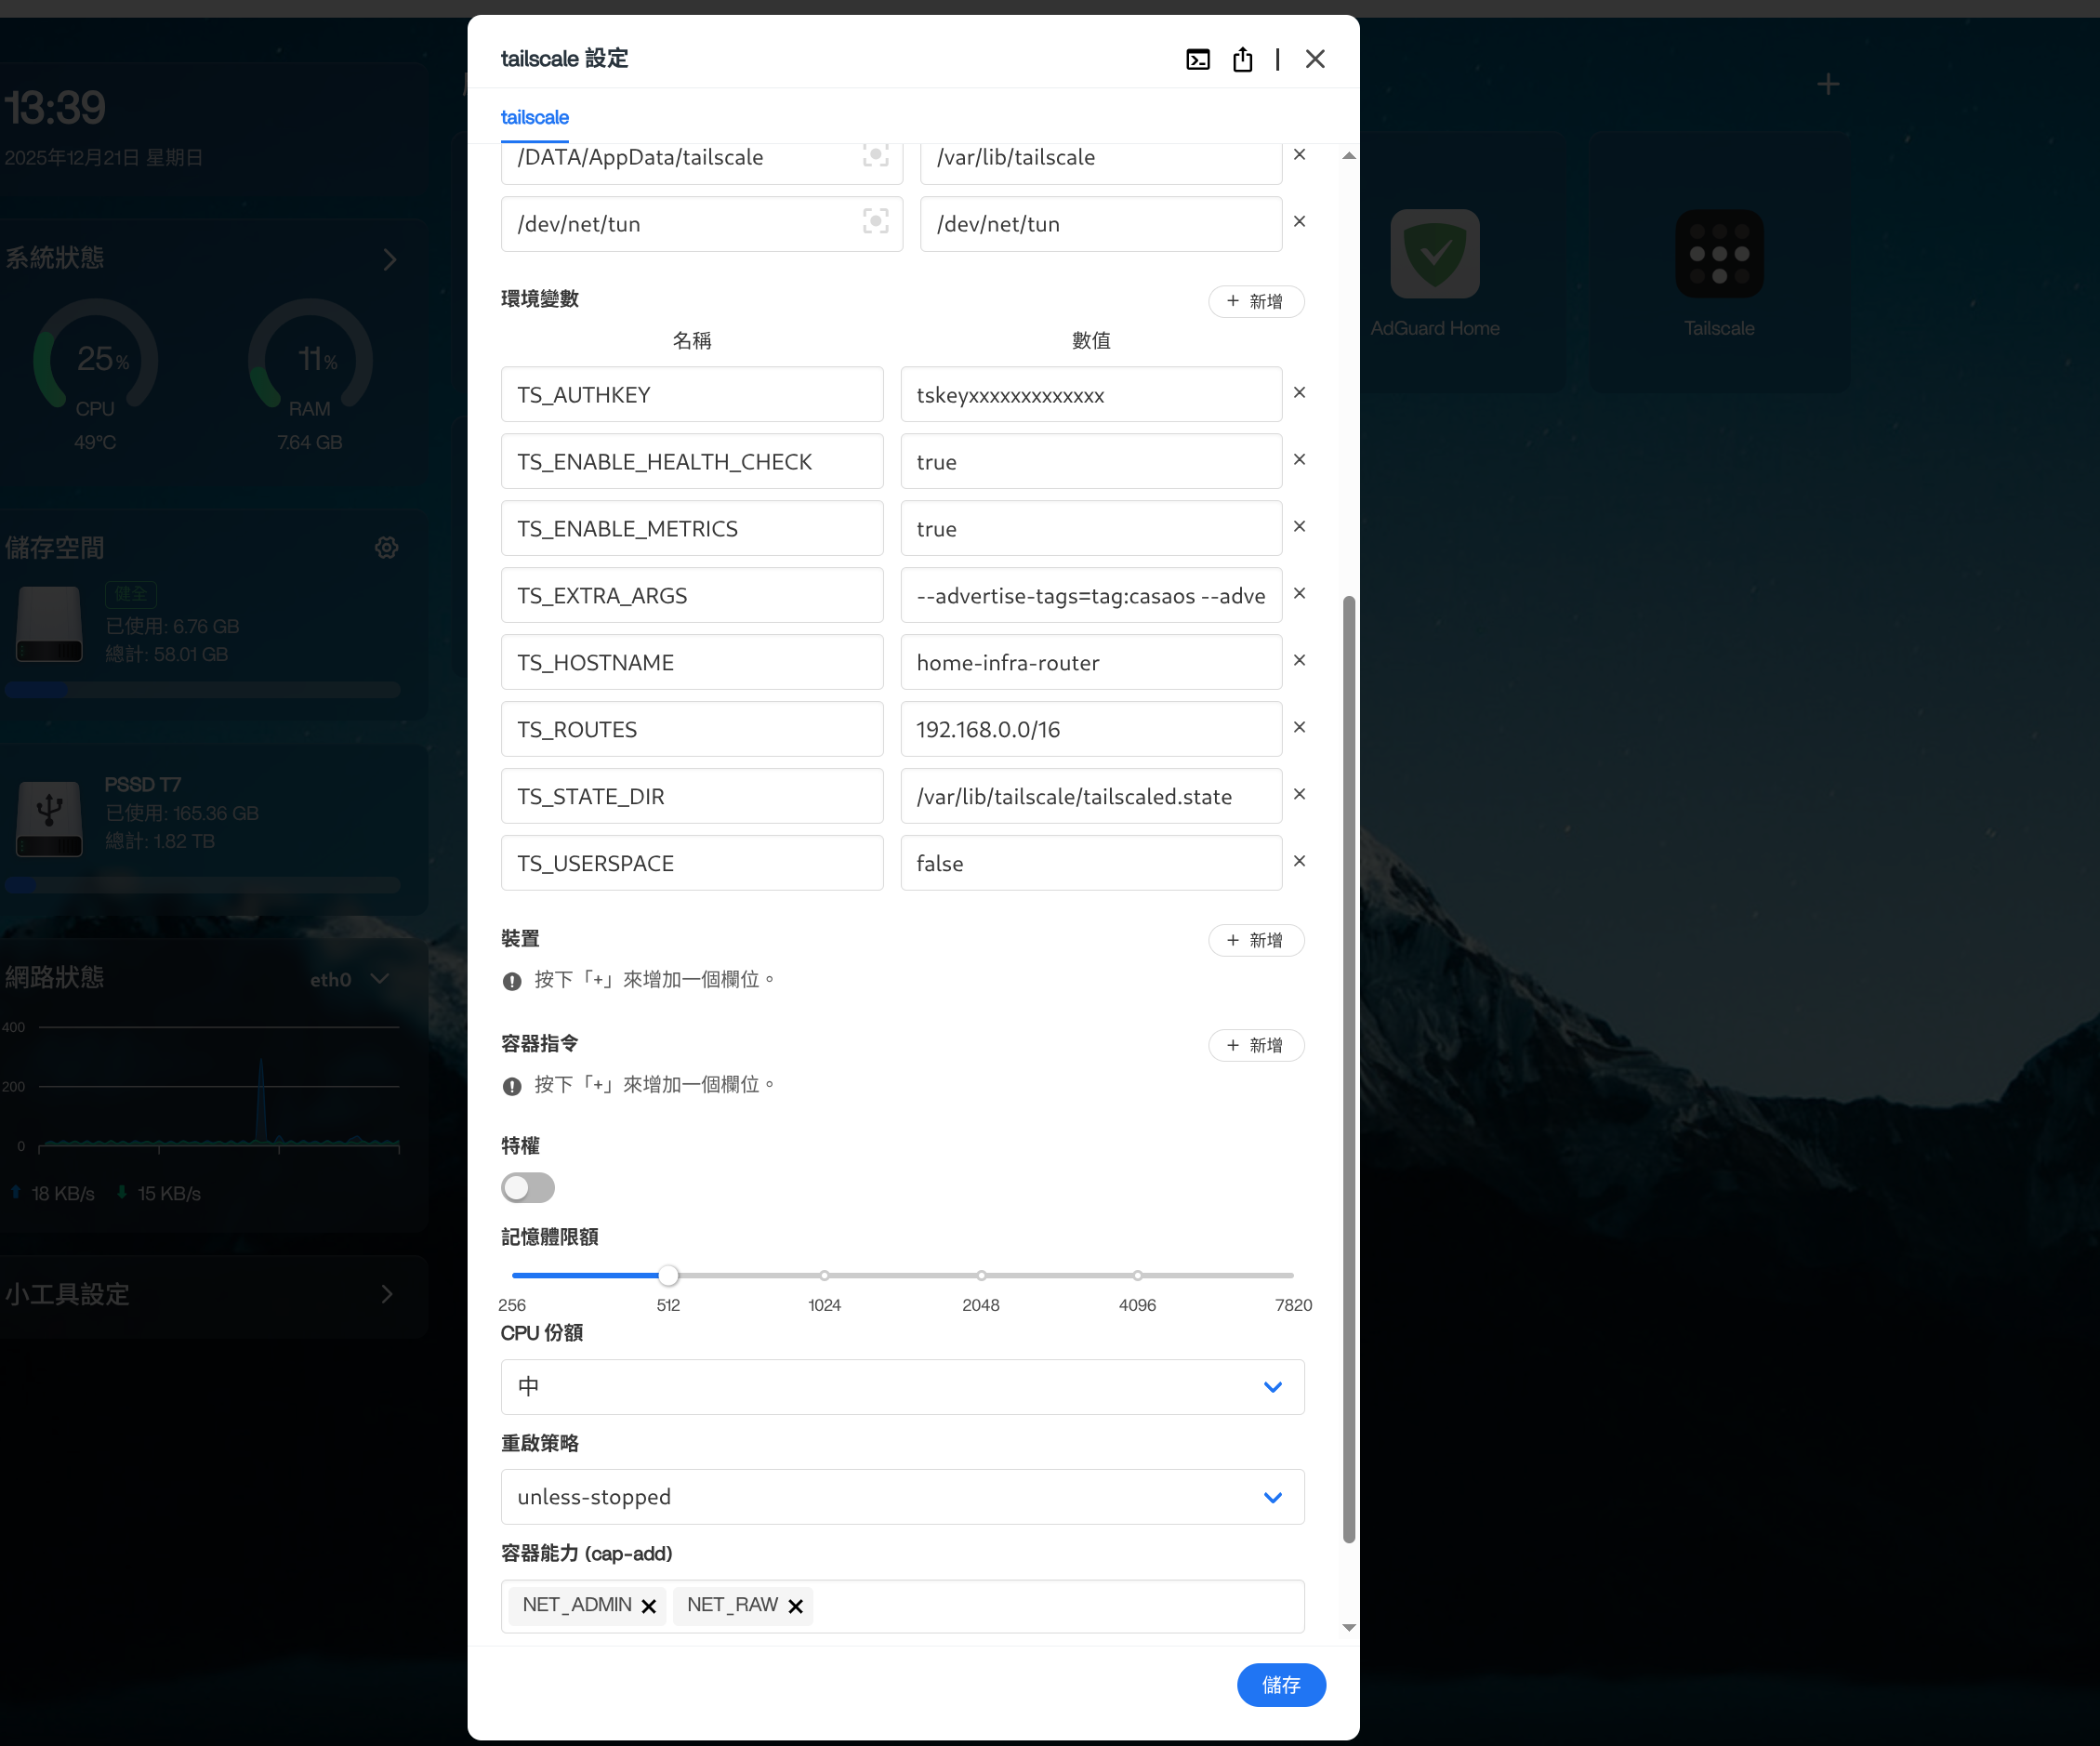
環境變數


首先這個環境變數是用來設定 Auth Key 用的,我這裡同樣是利用 Terraform 來建立,主要要設定三個東西:
- tag
要利用 oauth cleint 建立 token 需要有一個 tags 用來分配給用同一個 oauth client 建出出來的所有設備。 - acl
設定哪些人可以連線到你的設備,還有 autoApprove 規則,讓你的 tailscaled 節點可以自動成為 subnet-router 跟 exit-node。 - OAuth client
產生一組 Client Id 跟 Secret 讓 tailscaled 使用。
resource "tailscale_acl" "default" {
  overwrite_existing_content = true
  acl = jsonencode(
    {
      // Declare static groups of users. Use autogroups for all users or users with a specific role.
      "groups" : {
        "group:admin" : ["[email protected]"],
        "group:guest" : ["[email protected]"],
      },

      // Define the tags which can be applied to devices and by which users.
      "tagOwners" : {
        "tag:casaos" : [],
      },

      // Define grants that govern access for users, groups, autogroups, tags,
      // Tailscale IP addresses, and subnet ranges.
      "grants" : [
        // Allow all connections.
        // Comment this section out if you want to define specific restrictions.
        { "src" : ["group:admin"], "dst" : ["*"], "ip" : ["*"] },
        { "src" : ["group:guest"], "dst" : ["tag:guest"], "ip" : ["*"] },
      ],

      "autoApprovers" : {
        "routes" : {
          "192.168.0.0/16" : ["tag:casaos"],
        },
        "exitNode" : ["tag:casaos"]
      },
    }
  )
}

resource "tailscale_oauth_client" "casaos" {
  description = "CasaOS"
  scopes      = ["auth_keys"]
  tags        = ["tag:casaos"]
}

output "casaos_client_id" {
  value = tailscale_oauth_client.casaos.id
}

// terragrunt output casaos_client_secret
output "casaos_client_secret" {
  value     = tailscale_oauth_client.casaos.key
  sensitive = true
}
terraform apply 完之後把 casaos_client_secret 的內容,設定在 TS_AUTHKEY 的值裡,最後 TS_EXTRA_ARGS 設定以下內容 --advertise-tags=tag:casaos --advertise-exit-node。
在啟動容器之前,先用 ssh 連線到樹梅派裡執行以下指令,啟用 Enable IP forwarding:
echo 'net.ipv4.ip_forward = 1' | sudo tee -a /etc/sysctl.d/99-tailscale.conf
echo 'net.ipv6.conf.all.forwarding = 1' | sudo tee -a /etc/sysctl.d/99-tailscale.conf
sudo sysctl -p /etc/sysctl.d/99-tailscale.conf
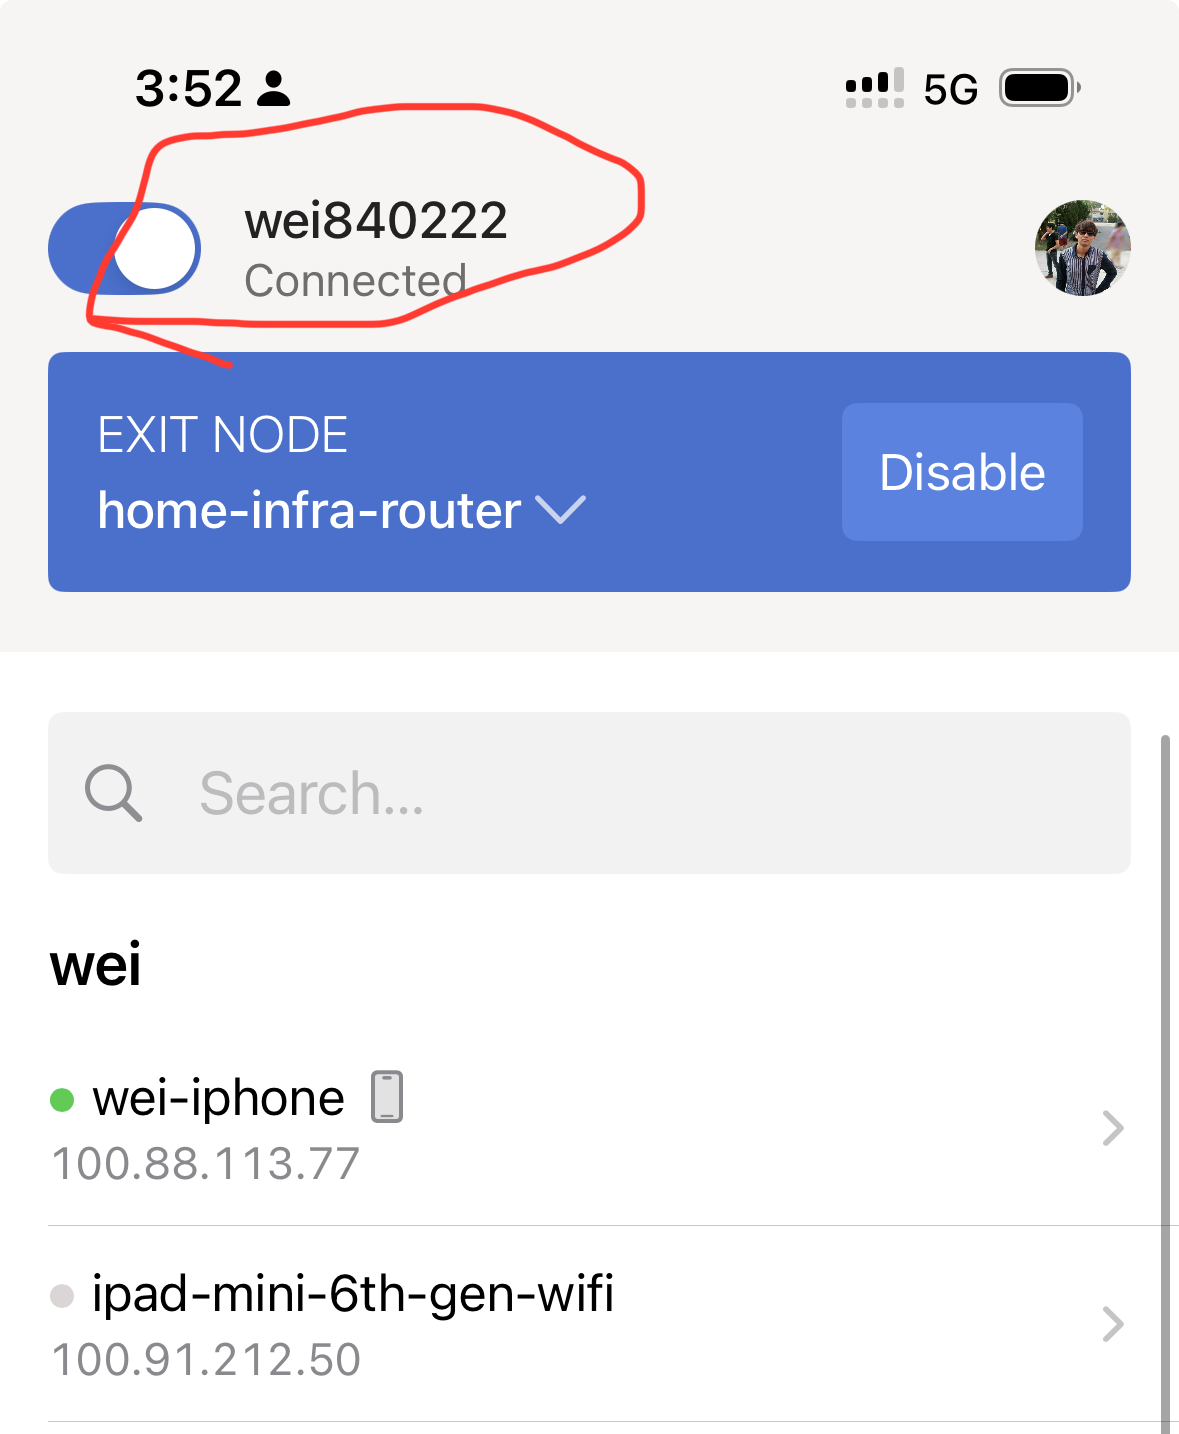
完成啟動容器之後,到 tailscale 管理界面檢查你設定的裝置已經狀態是 Connected。
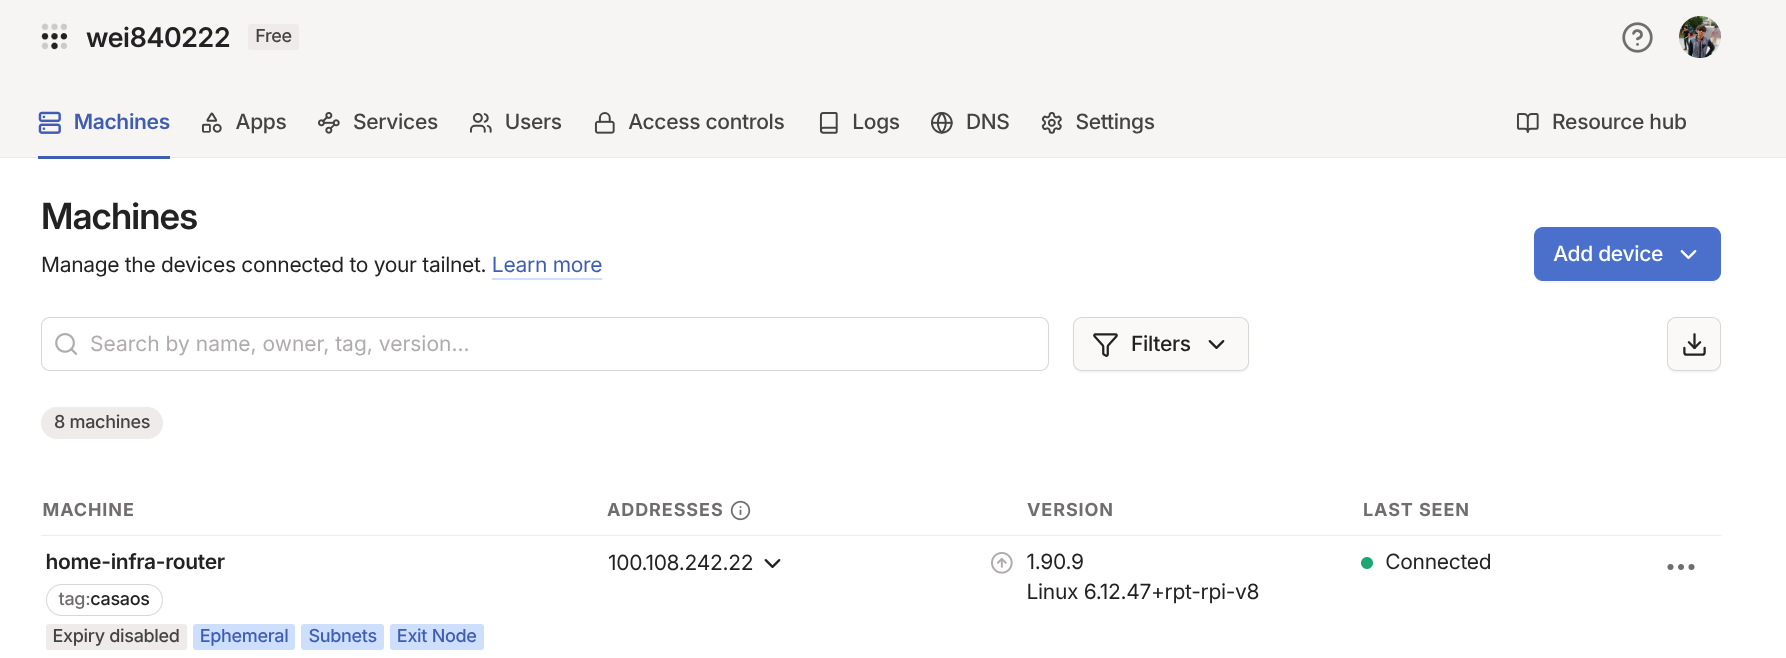
完成之後,只要就算在外面只要用手機的 tailscale app 連上 VPN 也可以使用家裡的服務。
AdGuard Home
老樣子,一樣是 App Store 一鍵安裝就好。

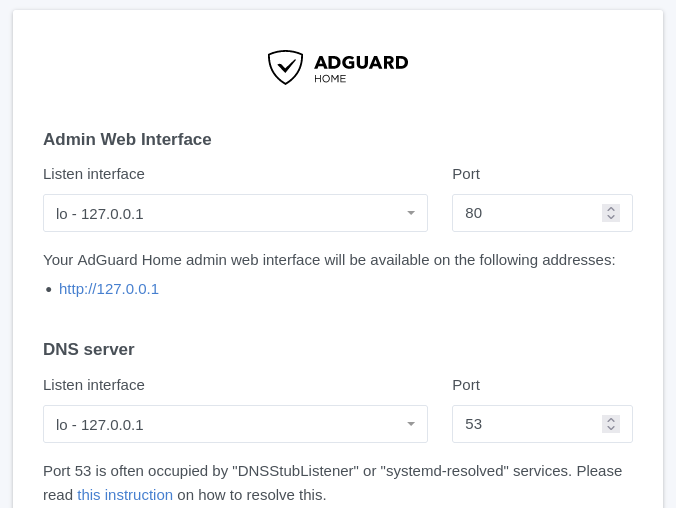
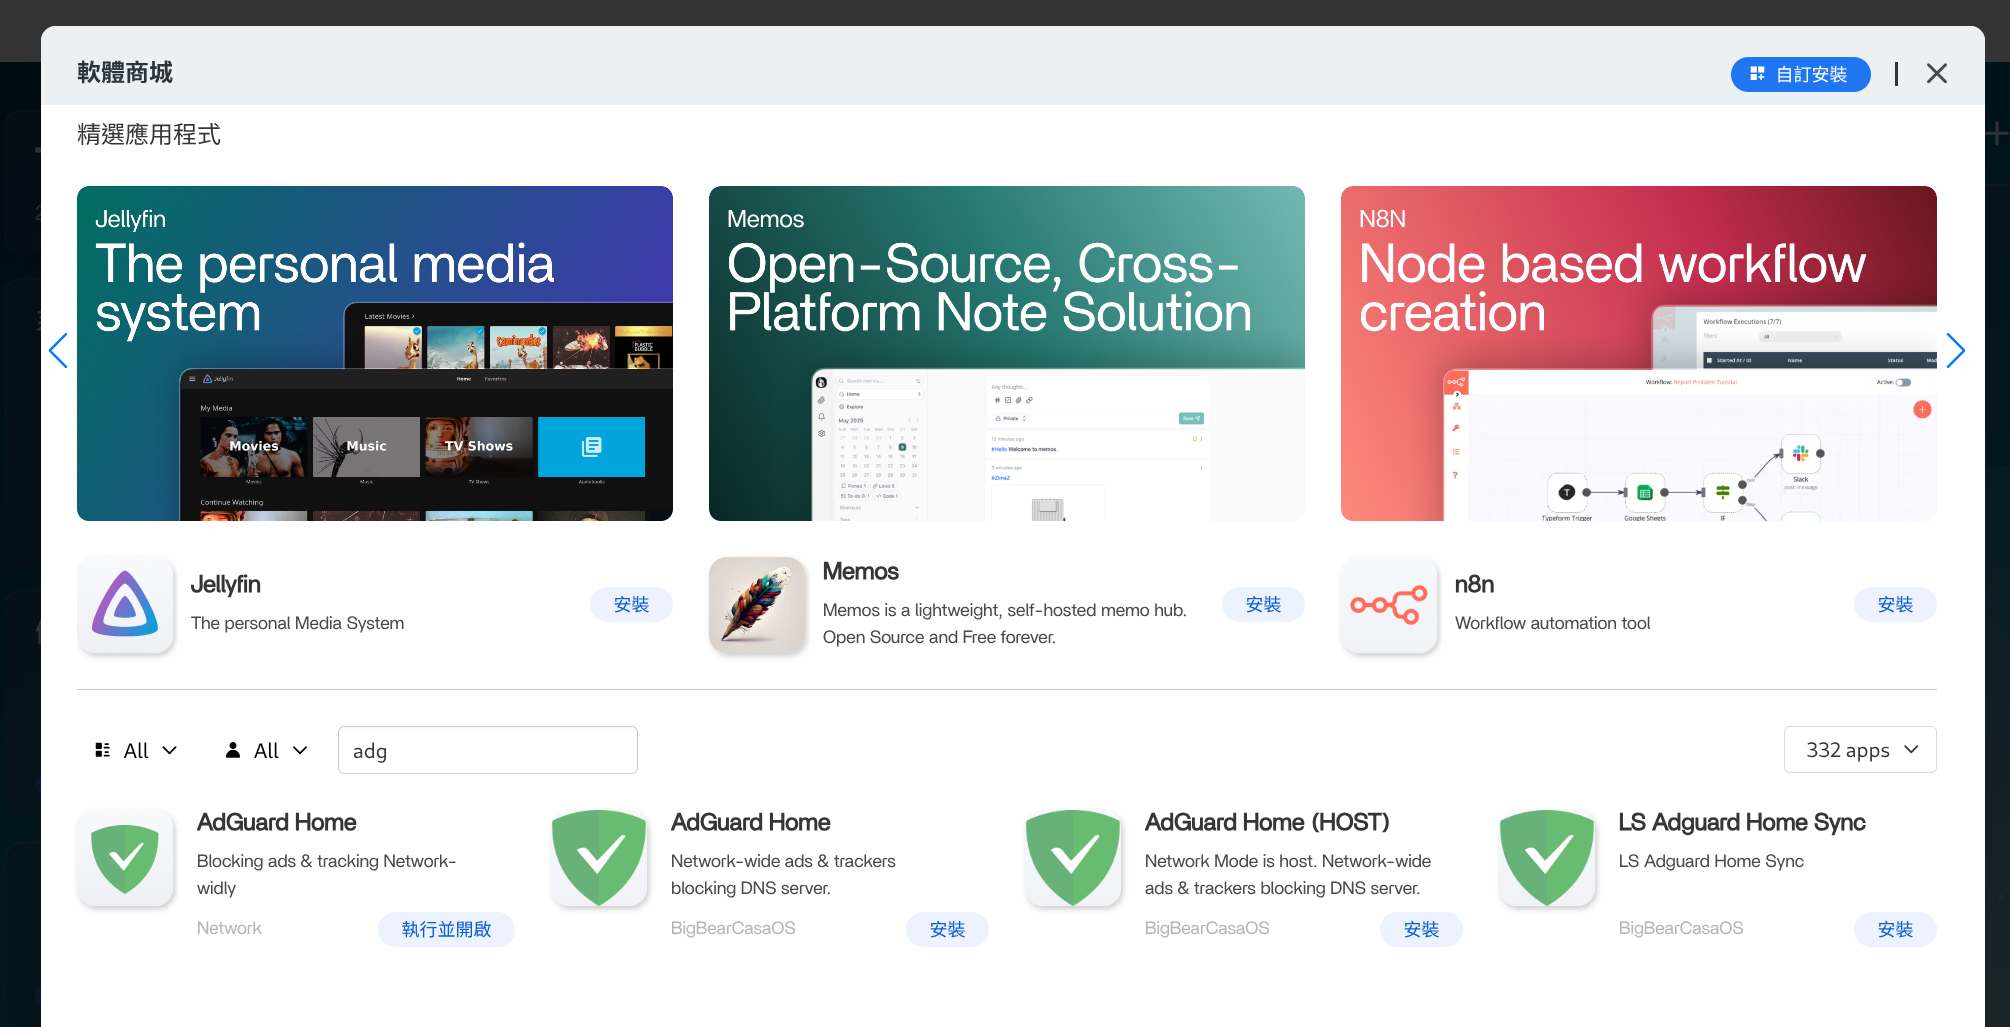
然後再利用 terraform 設定以下的 tailscale 設定,這樣只要連上 VPN 就可以自動享有阻擋廣告的功能。
resource "tailscale_dns_preferences" "default" {
  magic_dns = true
}

resource "tailscale_dns_nameservers" "default" {
  nameservers = [
    # AdGuard Home
    "192.168.0.179",

    # unifi
    "192.168.0.1",

    # Google Public DNS
    "8.8.8.8",
    "8.8.4.4",
    "2001:4860:4860::8888",
    "2001:4860:4860::8844",

    # Cloudflare Public DNS
    "1.1.1.1",
    "1.0.0.1",
    "2606:4700:4700::1111",
    "2606:4700:4700::1001",
  ]
}
結尾
在 CasaOS 中其實還可以透過 Docker 安裝更多有趣的專案,下面是我目前有在執行的專案,主要都是一些資源用不多,但是需要很穩定而且幾乎不會關閉的服務。
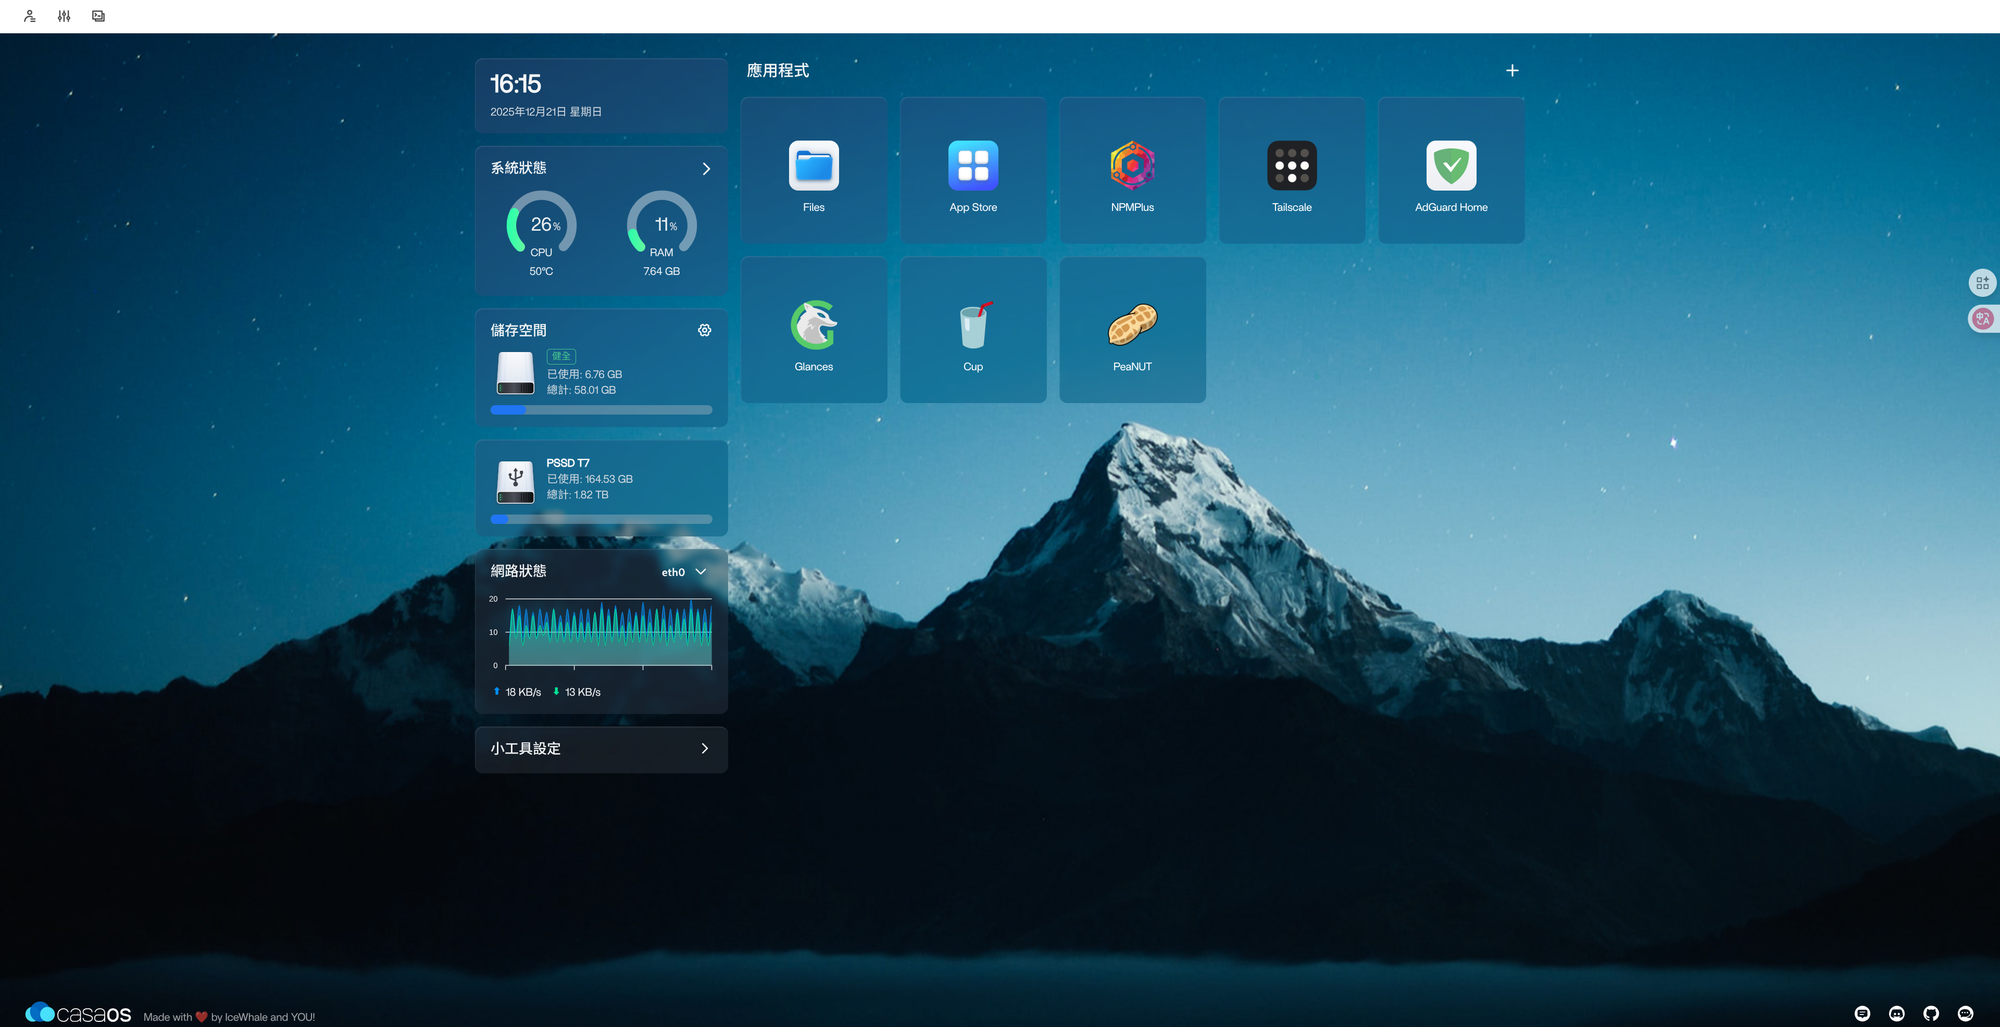
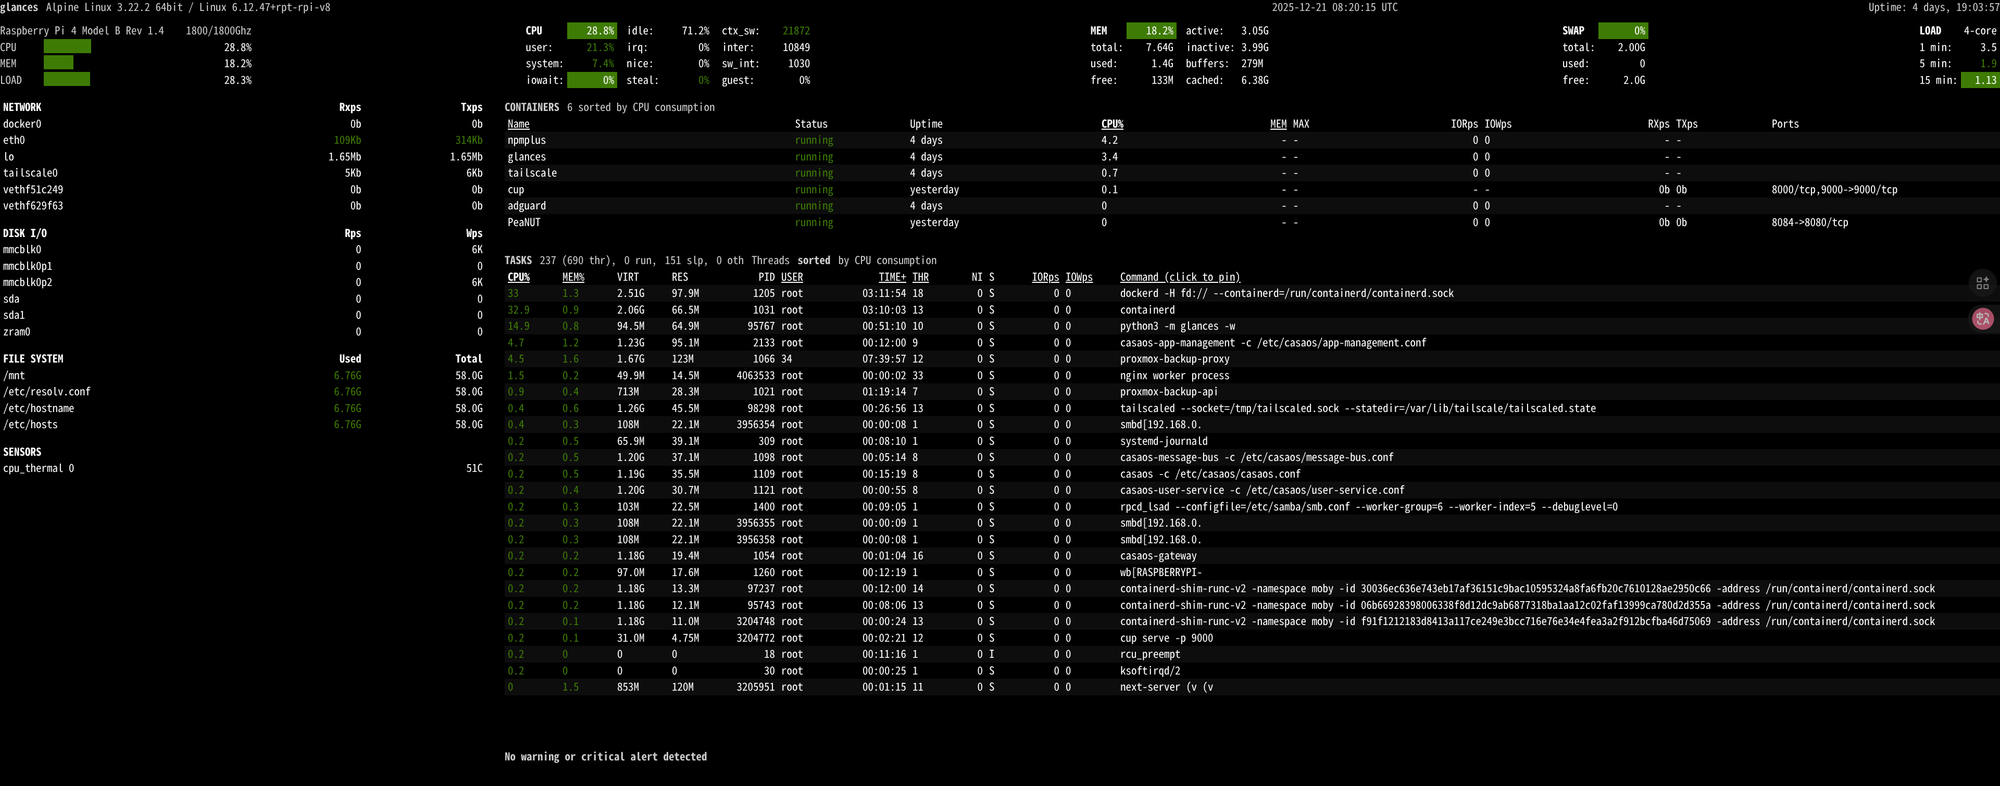
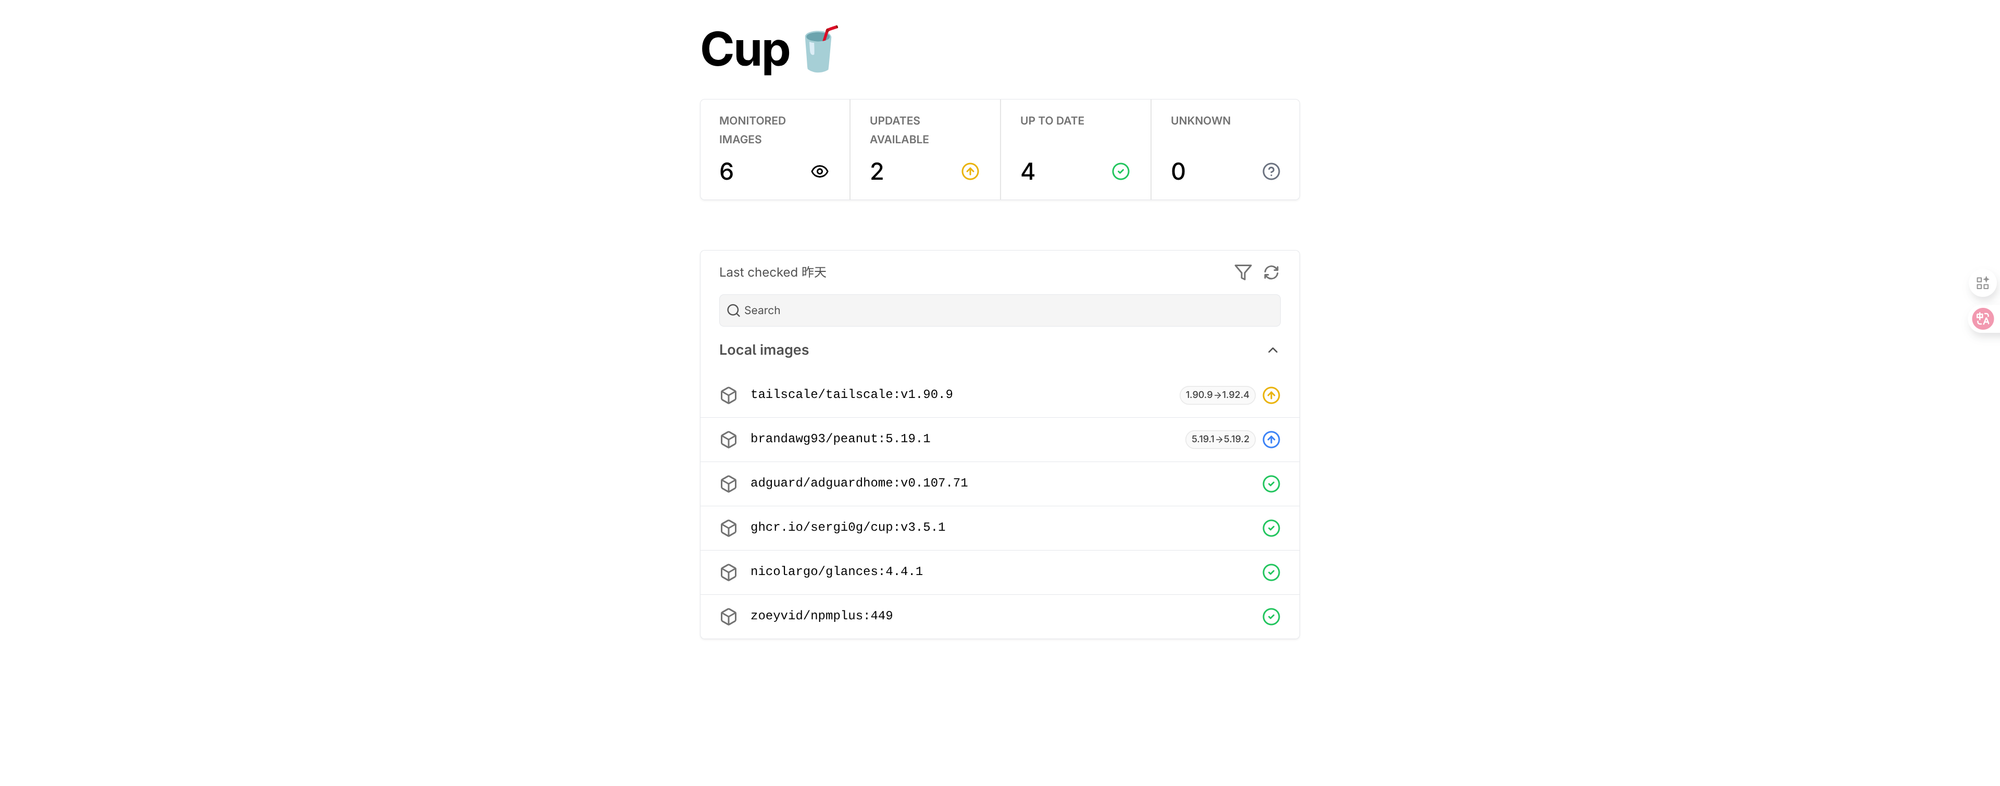
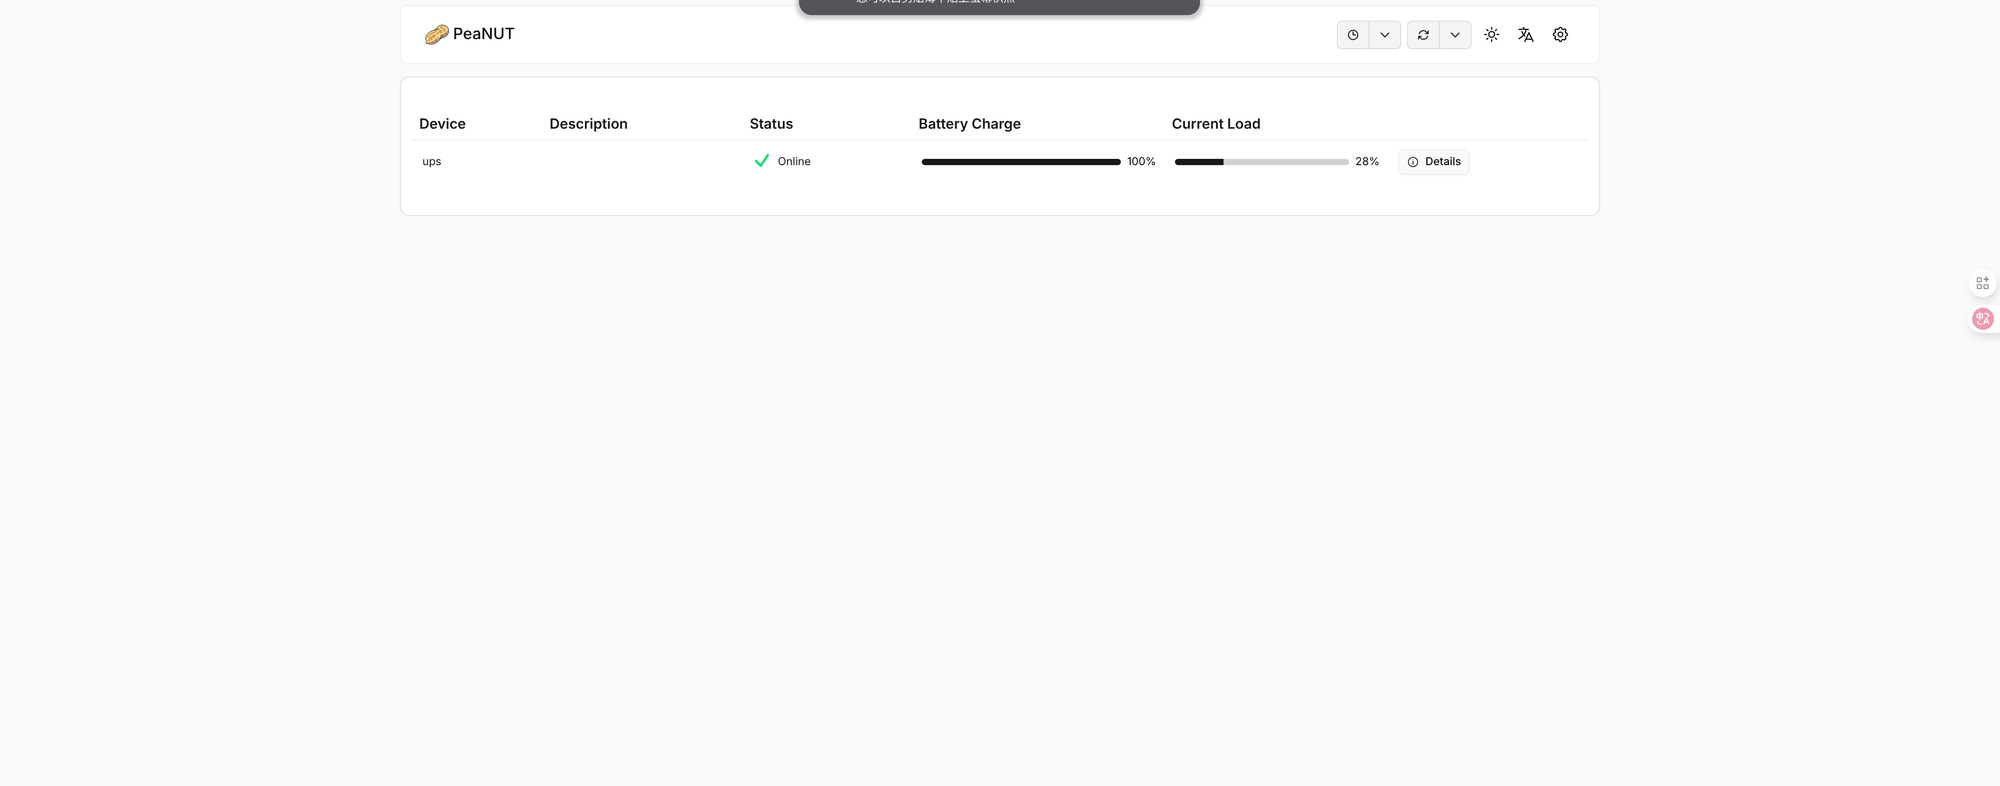
我還有安裝了幾個好用的服務:
- Glances
- 可以有個網頁看目前機器的資源消耗
- Cup
- 觀察機器上 Docker Image 版本是否需要更新
- PeaNUT
- 透過 NUT Client 取得 TrueNAS 的 UPS 資訊
然後觀察一週的資源使用情況,除了半夜有排程自動備份跟修剪重複資料的作業之外,資源使用率其實都還算可以。
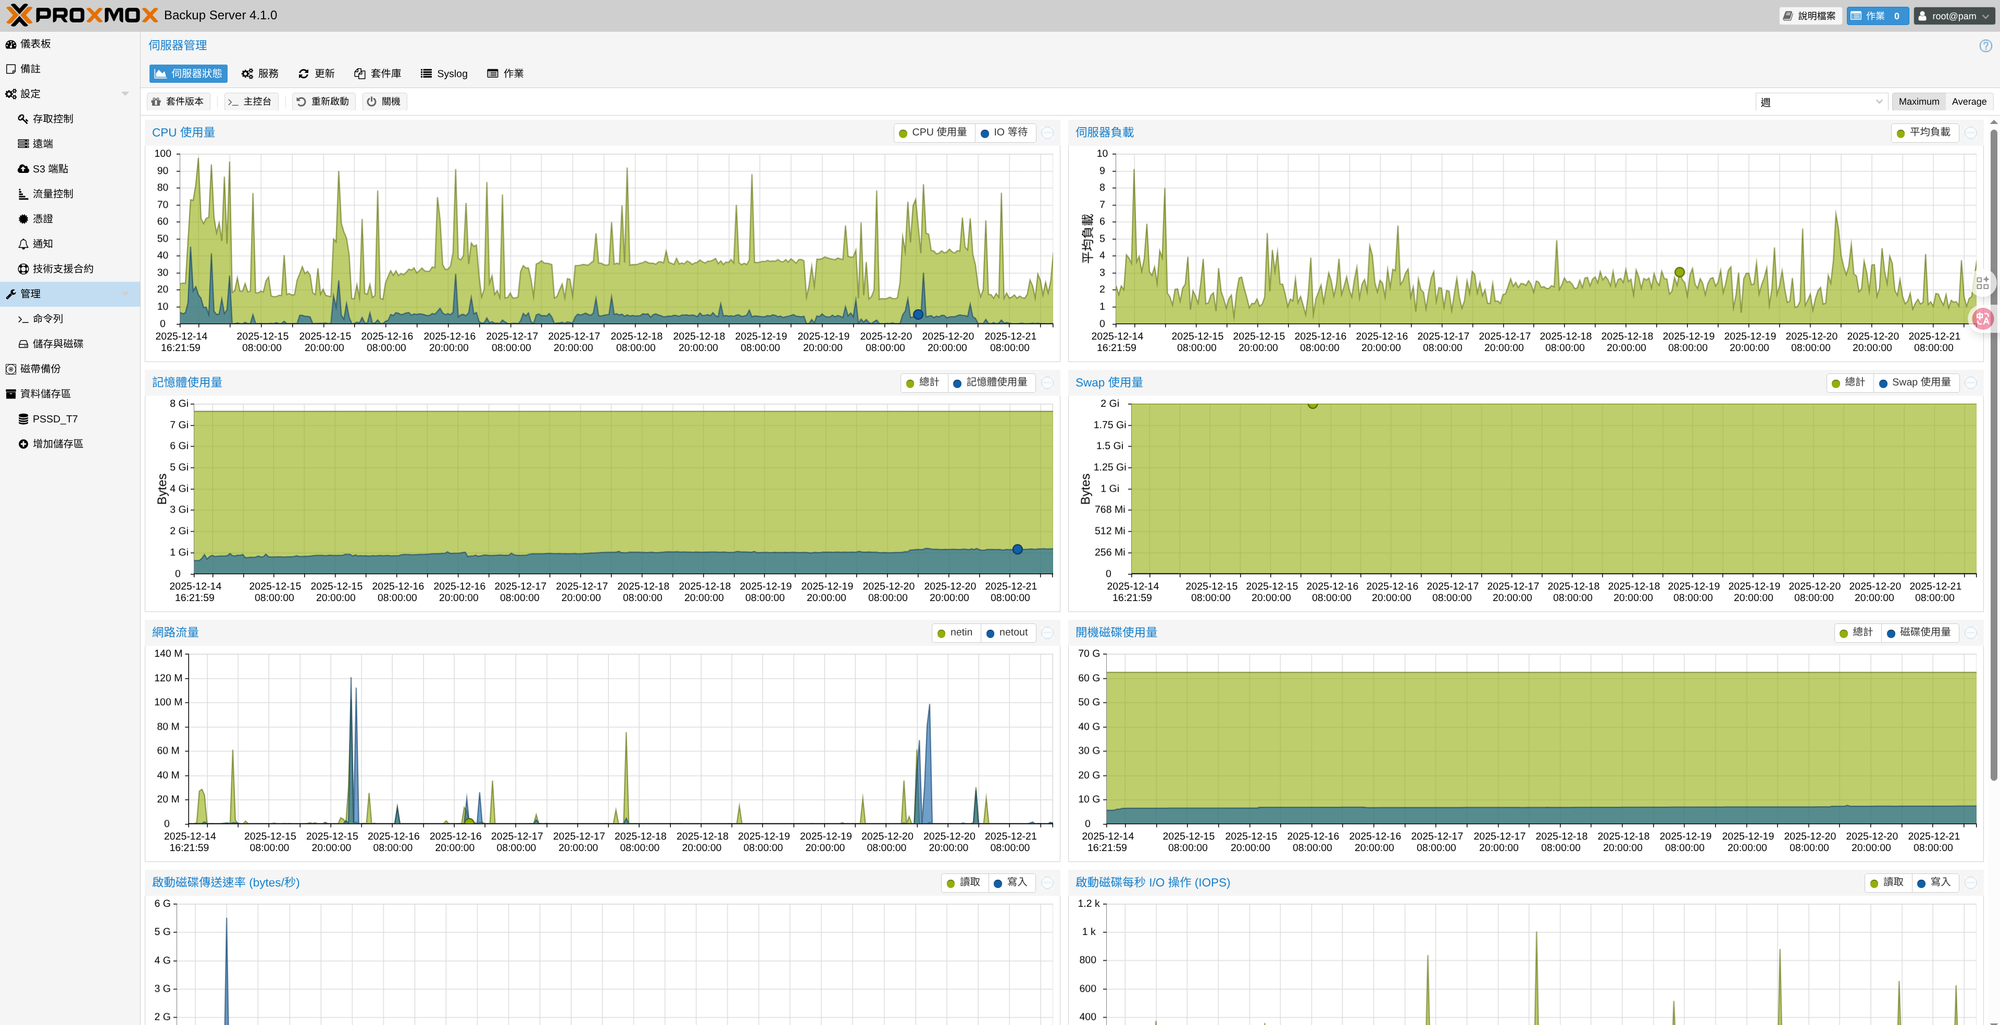
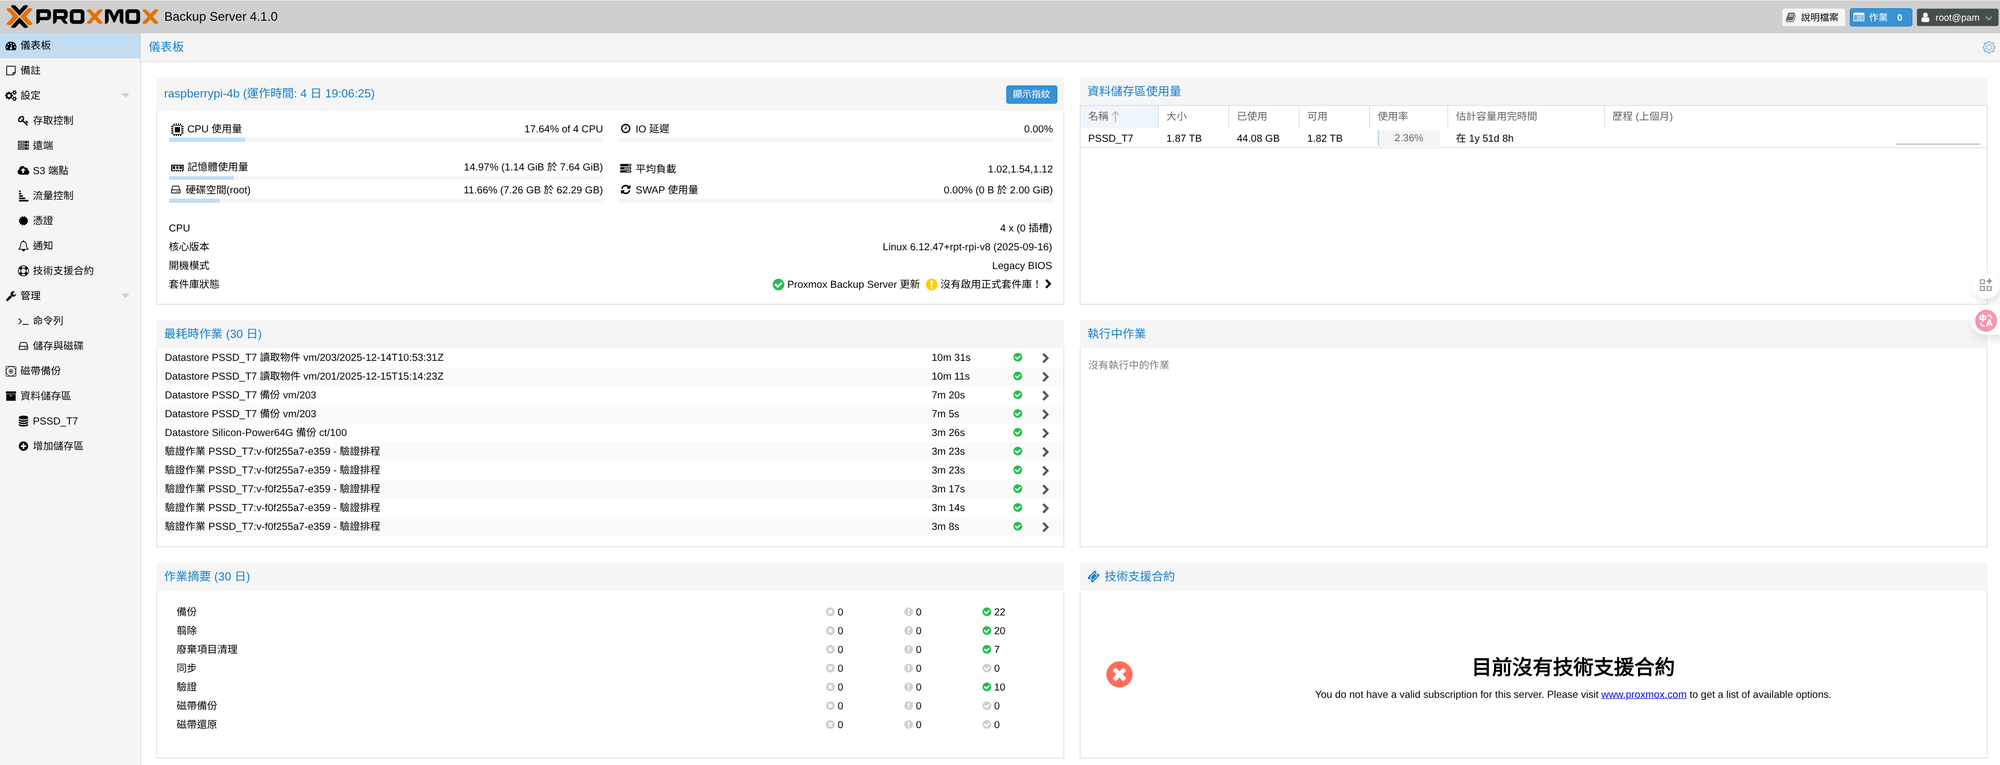
下一篇 Home Lab 系列文章,就會來寫如何在 Proxmox 上如何安裝一些 LXC 或是 VM 的基礎服務,敬請期待。