OAuth2 Proxy 為你的後台提供認證

TD;DR
今天又來跟大家介紹好東西,有時候我們在 Kubernetes 架了一些東西想要在離開家裡的區域網路環境也要能使用,雖然可以用下面文章提到的 Cloudflare ZeroTrust 服務 來把服務公開到 Internete,不過像是一些有權限存取重要資料的後台就不適合,最好還要加上認證確保只有特定的使用者才可以使用。
 Wan, Jiun-Wei
其實通常第一直覺就是想到用 Basic Auth 來驗證,不過這種方法雖然也是可以但卻有以下的缺點:
- 需要自己管理密碼,尤其當服務一多就很麻煩
- 密碼外洩問題,這種方式只要密碼外洩那防護一樣形同虛設
- 沒有 2FA 的保護,通常現在的服務例如 Google、GitHub 都有 2FA 提供額外的保障,萬一密碼外洩仍然不會輕易的被其他人登入自己的帳號
因此今天就來介紹這個東西 OAuth2 Proxy,它可以把你公開在網路上的後台結合你的 Google、GitHub 帳號的認證服務,例如:登入你的 GitHub 帳號並且確定你的使用者 ID 是你本人,才能訪問你的後台。

運作原理

通常你的網站架設在 Kubernetes 中,會透過 Ingress Controller 來去公開在 Internet 上,並掛上 SSL 憑證。
以上圖為例子,流量進來第一步就會進到 nginx ,nginx 這個角色就是 Ingress Controller 的部分,由它來提供 SSL 證書以及第一手的流量轉發。
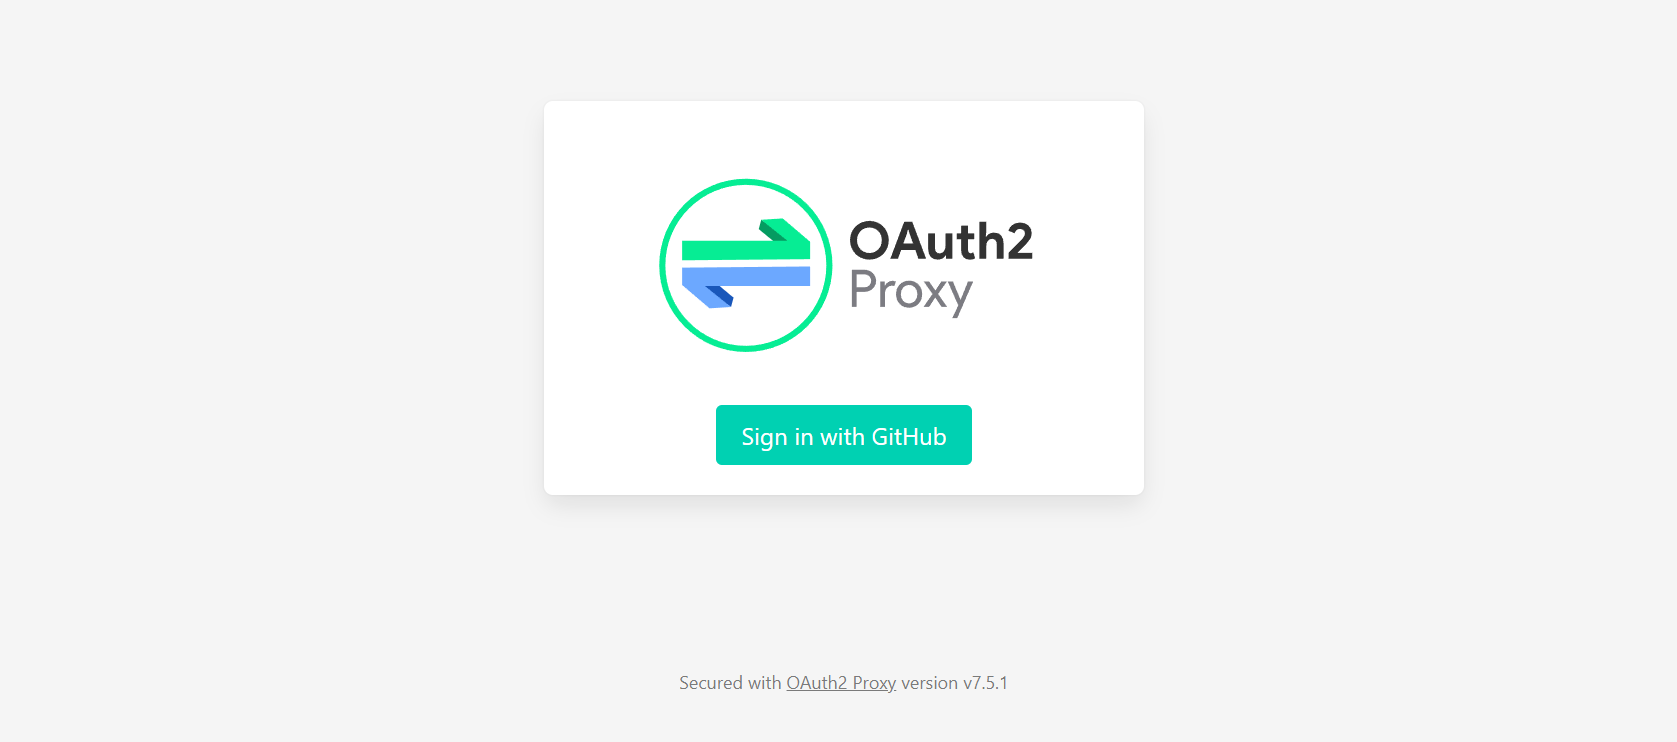
接著流量會轉到 OAuth2 Proxy,由它檢查請求中是否有登入過的 Cookie 沒有的話,就會像下面的圖一樣,顯示一個登入畫面,如果使用者按下 Sign in 就會跳轉到發起 OAuth2 流程的部分,接著使用者就會跳轉到設定好的登入提供者,例如:Google、GitHub、Keycloak。
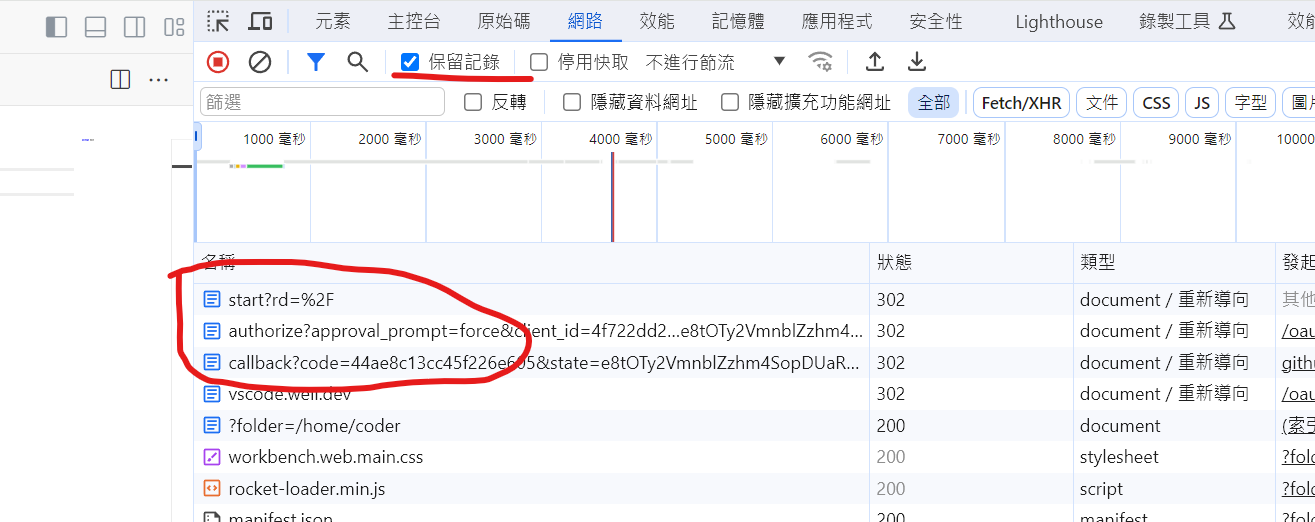
對於認證流程有興趣的可以打開開發者工具,勾選保留紀錄後,去找我打勾的三個請求,就會是 OAuth2 認證的過程,可以參考下面的文章看看。

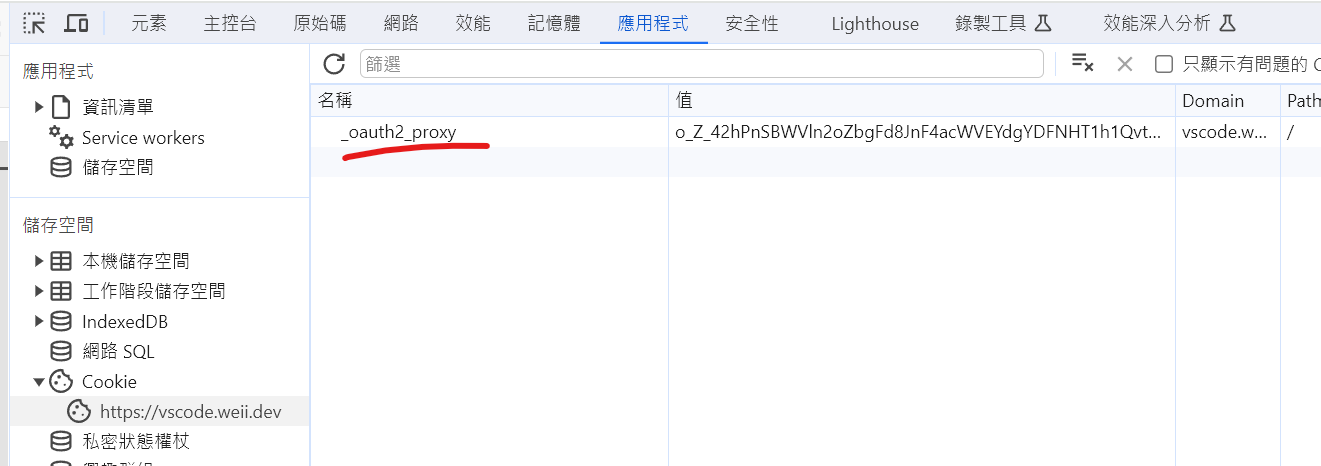
最後可以看到完成登入後你的瀏覽器就會被塞一把 Cookie,這個就會是 Oauth token 下次再進入你的後台時,流量到 Oauth2 Proxy 這一層,它發現你有攜帶這把 Cookie 就會直接放行流量到你的後台。
具體怎麼運作的細節,可以參照以下官方文件的說明。
如何整合到你的服務
其實如果不想了解原理單純看,如何整合的話相對是很簡單的,這裡以 Code Server 為例子:
選擇要整合的 Provider
有支援的 Provider 如官網,還蠻多種的,這裡會選定 GitHub當作例子。
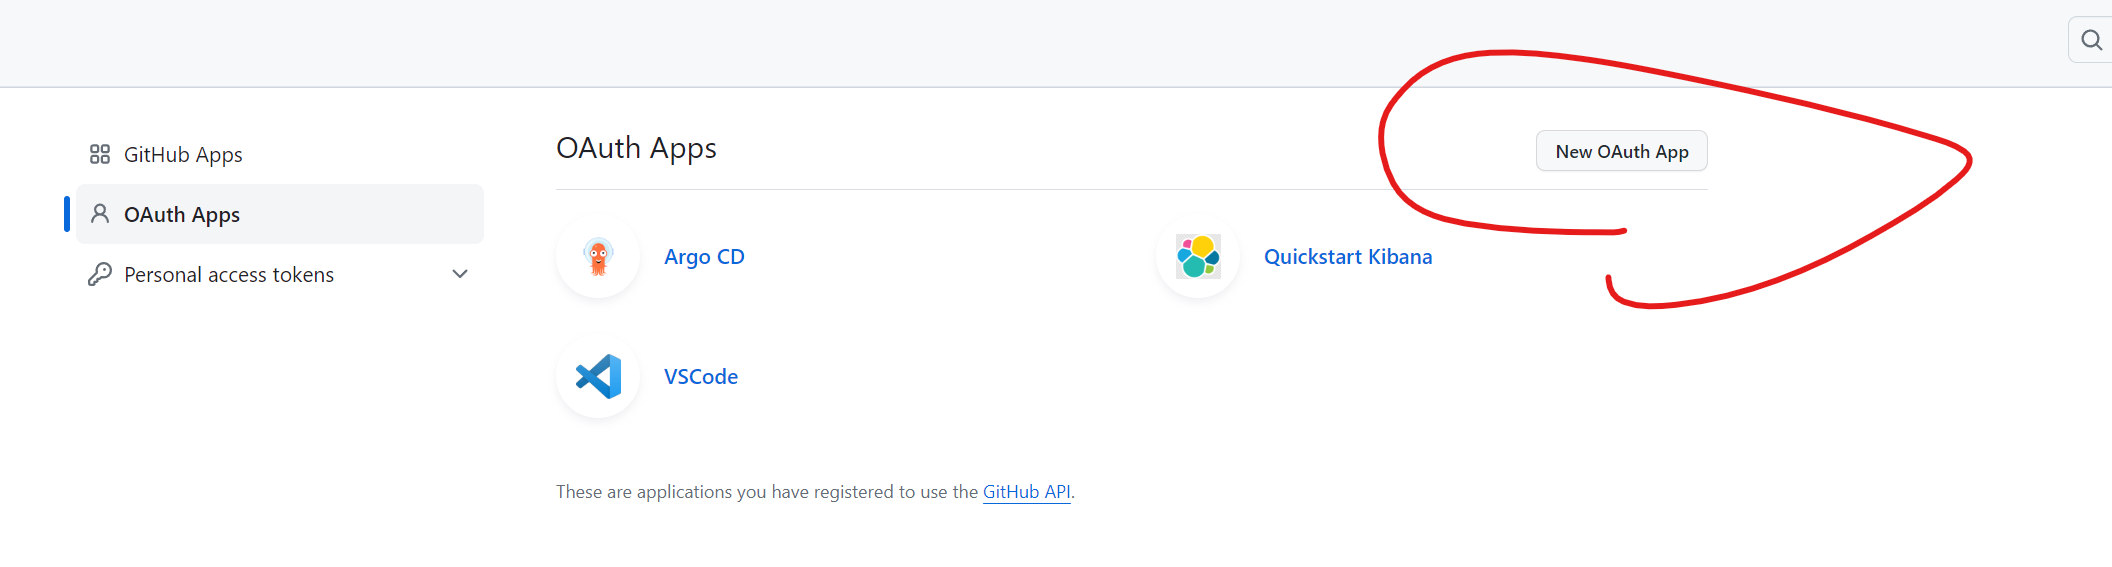
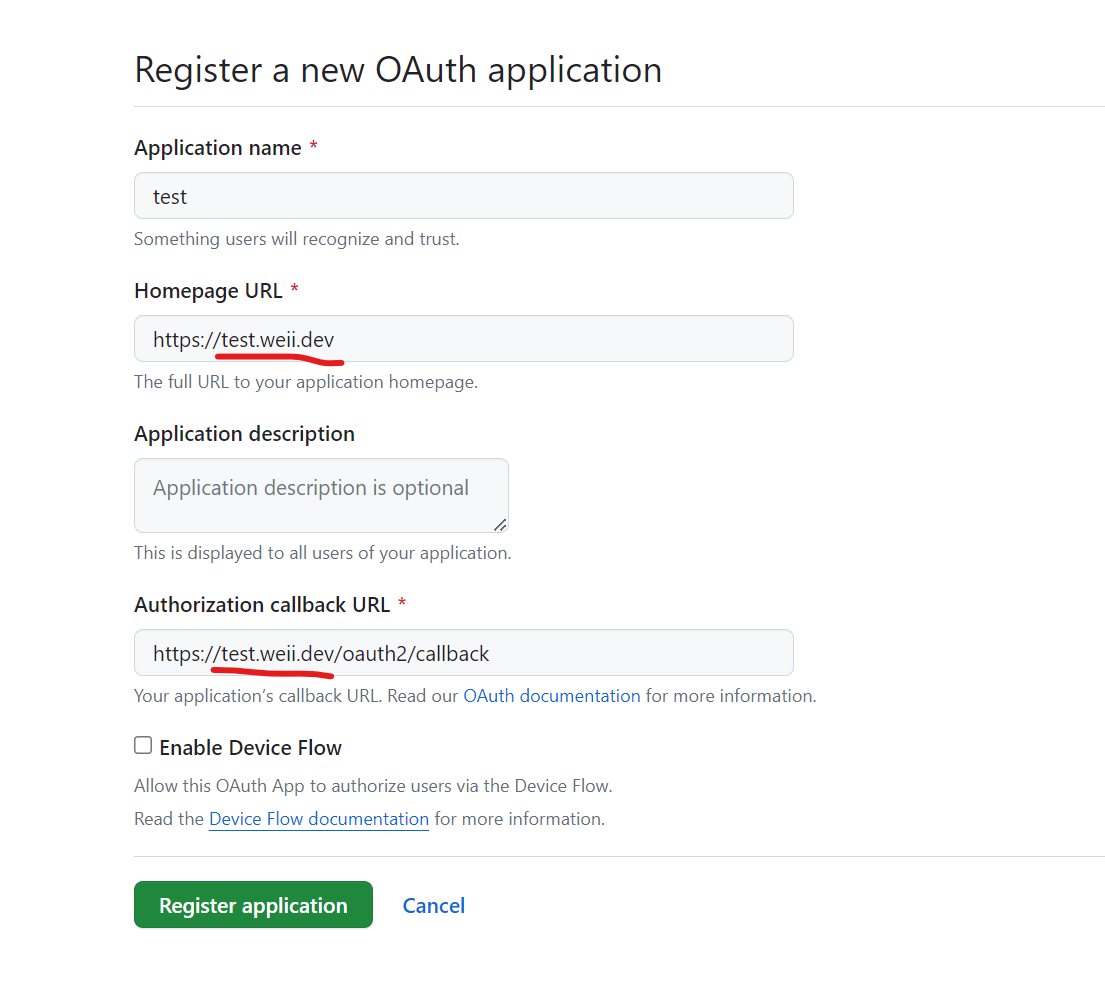
首先先到這個網頁去新增一個 OAuth App。

域名換成自己的。
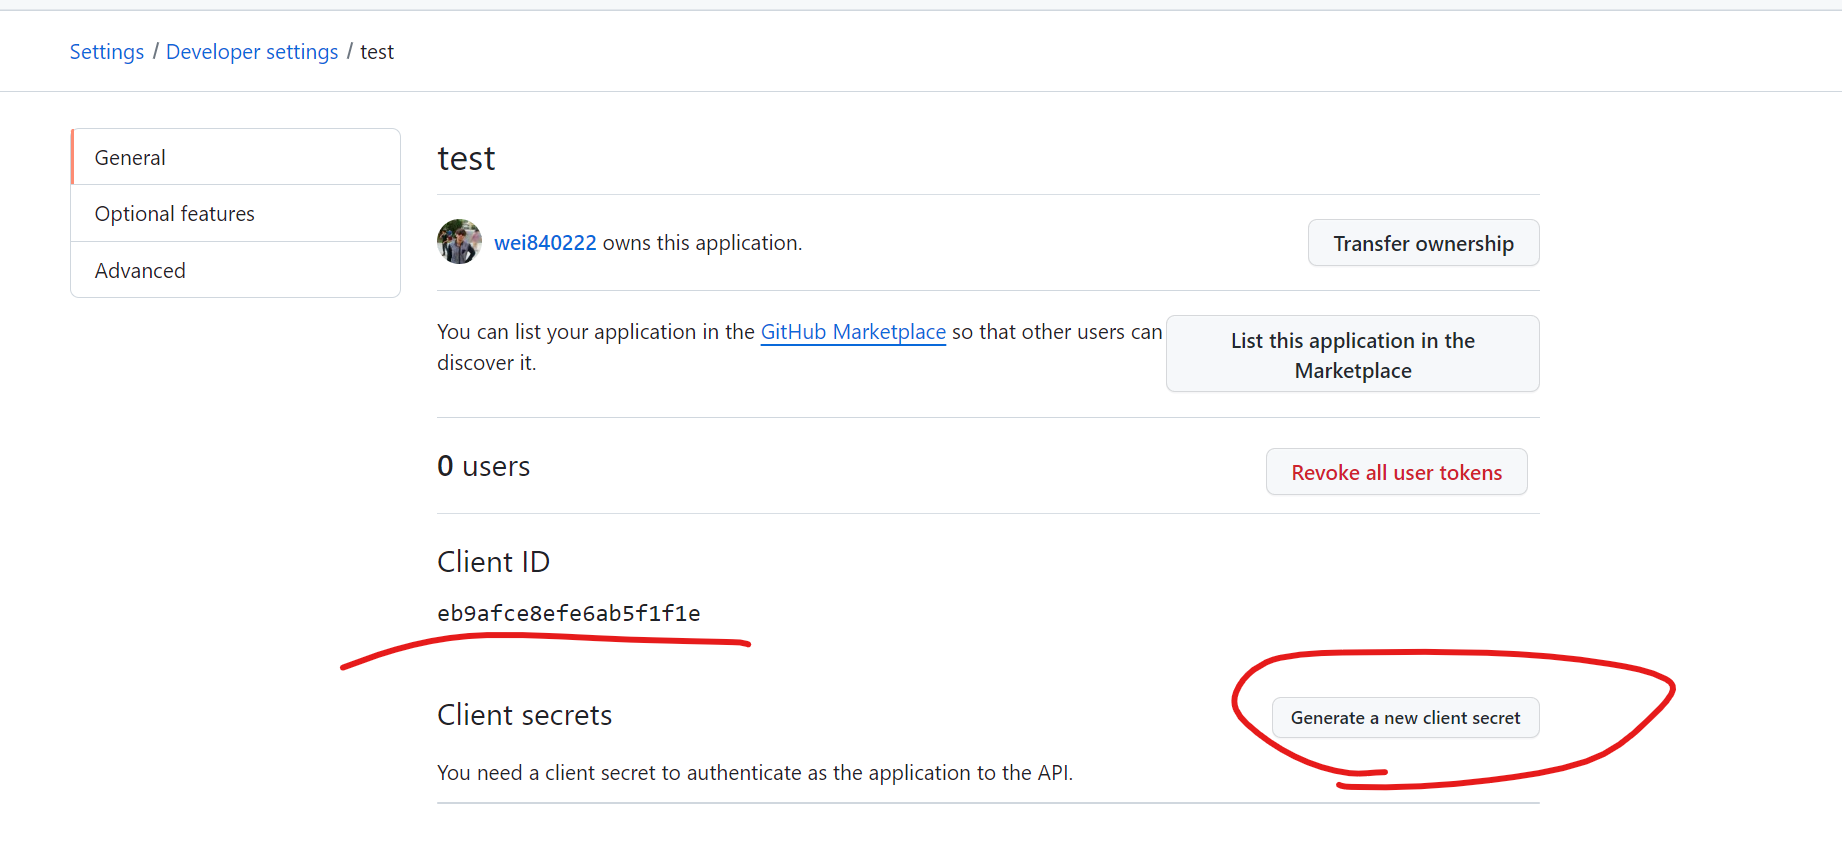
接著把 Client ID 留下,並按 Generate a new client secret 並把 Client Secret 留下。
將 OAauth2 Proxy 佈署成服務的上游
為了簡單說明這裡只貼出佈署 Code Server 用的 Deployment,OAauth2 Proxy 是以 Side Car 的方式跟 Code Server 跑在同一個 Pod 裡,OAuth2 Proxy 的設定看下方註解。
apiVersion: apps/v1
kind: Deployment
metadata:
  name: code-server
spec:
  selector:
    matchLabels:
      app.kubernetes.io/instance: code-server
      app.kubernetes.io/name: code-server
  template:
    metadata:
      labels:
        app.kubernetes.io/instance: code-server
        app.kubernetes.io/name: code-server
    spec:
      containers:
      # oauth2-proxy 的容器
      - name: oauth-proxy
        image: quay.io/oauth2-proxy/oauth2-proxy:v7.5.1
        imagePullPolicy: IfNotPresent
        args:
        # command line args 設定
        - --http-address=0.0.0.0:4180 # 預設 127.0.0.1:4180 沒辦法訪問要改掉
        - --upstream=http://localhost:8080 # 指定你的服務,這裡是 Side Car 佈署,所以指定 localhost:服務的port
        - --provider=github
        - --client-id=xxxxx # 前一步GitHub取得的 Client ID
        - --client-secret=xxxxxx # 前一步GitHub取得的 Client Secret
        - --cookie-secret=xxxxxx # 照這裡提供的指令生一個 https://oauth2-proxy.github.io/oauth2-proxy/configuration/overview#generating-a-cookie-secret
        - --email-domain=* # 照抄
        - --github-user=xxxxx # 放想要給訪問的 GitHub User ID,有多組就逗點分隔
        ports:
        - name: oauth-proxy
          containerPort: 4180
      - name: code-server
        image: codercom/code-server:4.18.0
        imagePullPolicy: IfNotPresent
        args:
        - --auth=none
        - --disable-telemetry=true
        - --disable-update-check=true
        ports:
        - name: http
          containerPort: 8080
        livenessProbe:
          httpGet:
            port: http
            path: /
        readinessProbe:
          httpGet:
            port: http
            path: /
        volumeMounts:
        - mountPath: /home/coder
          name: data
      volumes:
      - name: data
        persistentVolumeClaim:
          claimName: code-server
最後創建一個 Service 以及對應的 Ingress 指到服務的 OAuth2 Proxy Port 就大功告成了。
apiVersion: v1
kind: Service
metadata:
  name: code-server
spec:
  type: ClusterIP
  selector:
    app.kubernetes.io/instance: code-server
    app.kubernetes.io/name: code-server
  ports:
  - name: oauth-proxy
    port: 4180
    protocol: TCP
    targetPort: 4180
---
ingress略...
結語
其實這個 OAuth2 Proxy 是我來現在的公司看到有在用,發現這東西蠻方便的,可以拿來保護一些沒有原生驗證機制又想開放到 Internet 的後台。
美中不足的是,它沒辦法說去做一個權限以及分組的對應或是切換,這裡我有去給他提了一個 Issue 想要給它支援可以讓使用者跑自定義的 lua 腳本,這樣就能在請求的開始或是結束在 Header 裡塞一些資料,讓例如:Kibana、Grafana 這類的後台能從 Header 特定欄位去對應出使用者的權限或是分組。
oauth2-proxy那後續如果這個功能提案被接受我攻陷完成後有機會再來寫一篇介紹怎麼樣去使用它,請大家期待。