n8n 簡單易用的工作流

不知道大家有沒有這樣的情境?每天從某個開放 API 抓資料,然後發個通知,例如:股票、天氣。或是當某個 Webhook 被觸發的時候執行某個操作。
如果你有這樣的需求,又懶得寫程式再把它的部屬起來,那我相信 n8n 可以解決你的問題。
以下內容部分取自官網
介紹

n8n 是一個開源而且免費的自動化工作流平台,它提供了簡單易用的 Web UI ,讓你像上面的影片一樣拉出工作流的流程圖,就能夠不用寫一行代碼就能夠簡單的創建自己的工作流。
n8n 還有幾個亮點
- 提供桌面板應用程式,想要快速試用可以直接下載安裝
- 豐富的內建工作流節點,像是:Webhook、Cronjob、Discord、Telegram、Google Sheet......
- 文件完整
- 如果有自定義需求也支援執行自己寫的 JavaScript 節點
- 能安裝社群第三方節點做擴充
- 架構設計支援水平擴展
安裝

基本上參考官網的上參考官網的這幾個選項,挑一個自己方便使用的就好。需要注意的是如果你要使用 Webhook 觸發工作流的話需要參考這邊,官方有提供免費的隧道方便使用。
https://docs.n8n.io/hosting/installation/npm/#n8n-with-tunnel
https://docs.n8n.io/hosting/installation/docker/#n8n-with-tunnel
基本概念
大家如果裝好了可以照這篇文件的快速上手教學,先玩玩看。https://docs.n8n.io/try-it-out/quickstart/
工作流
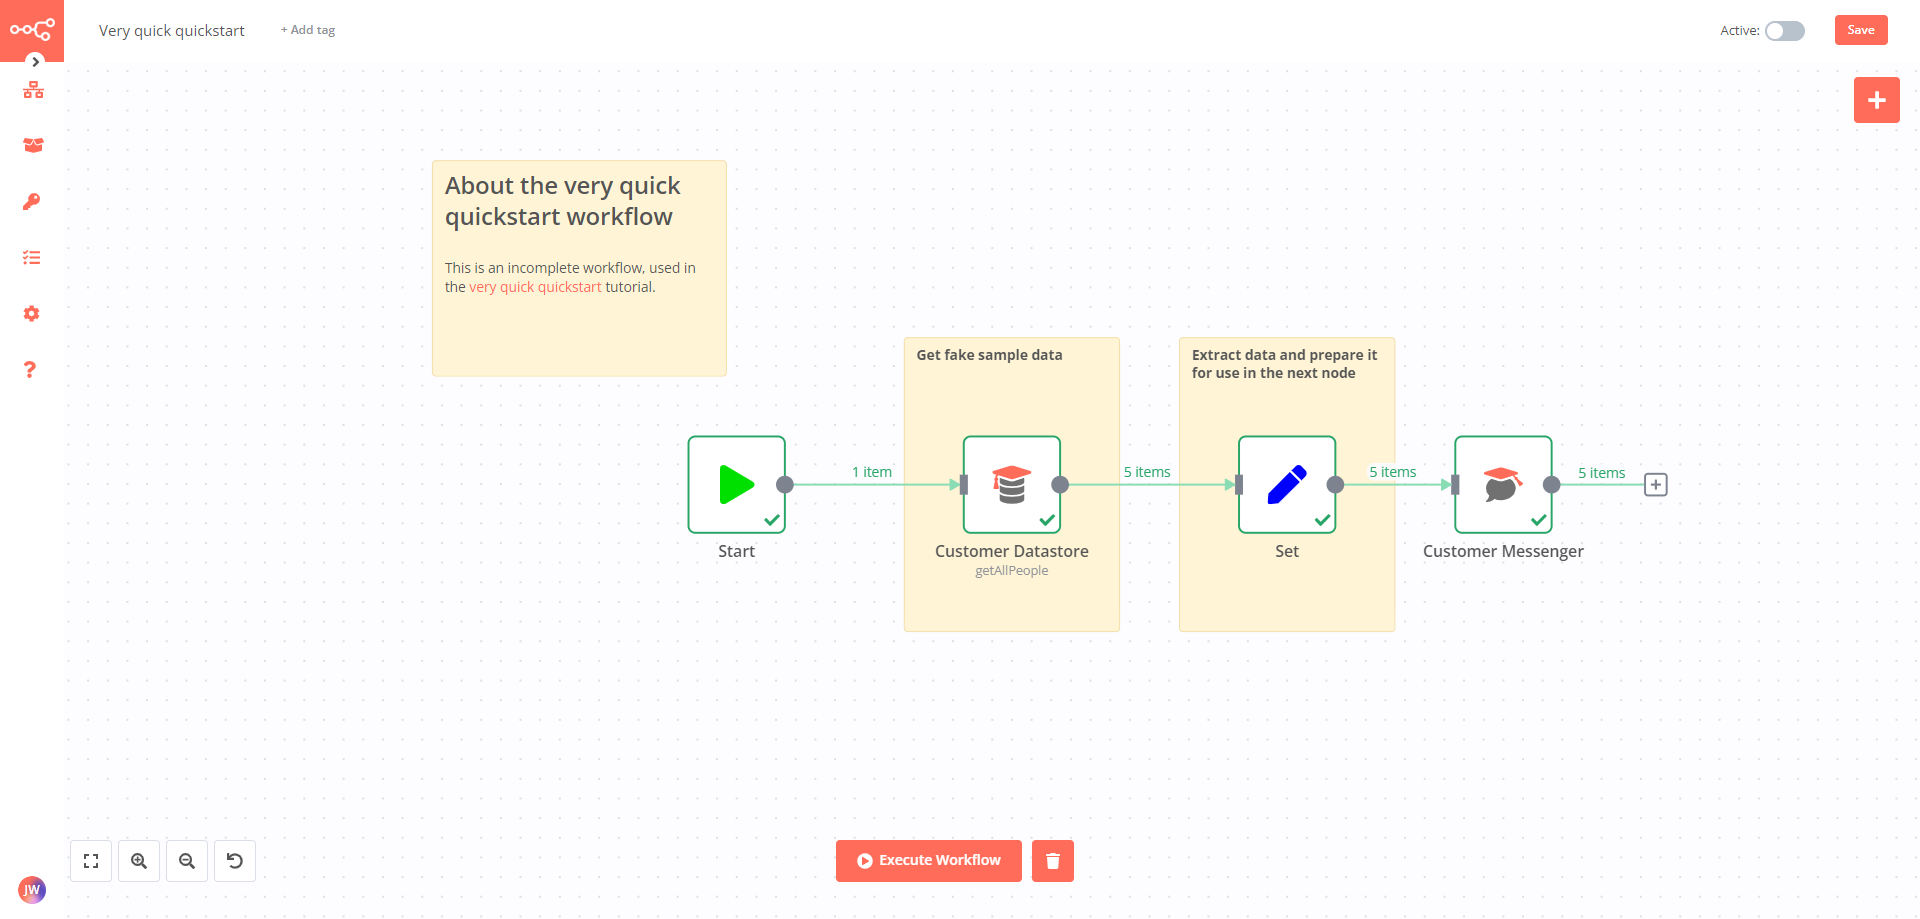
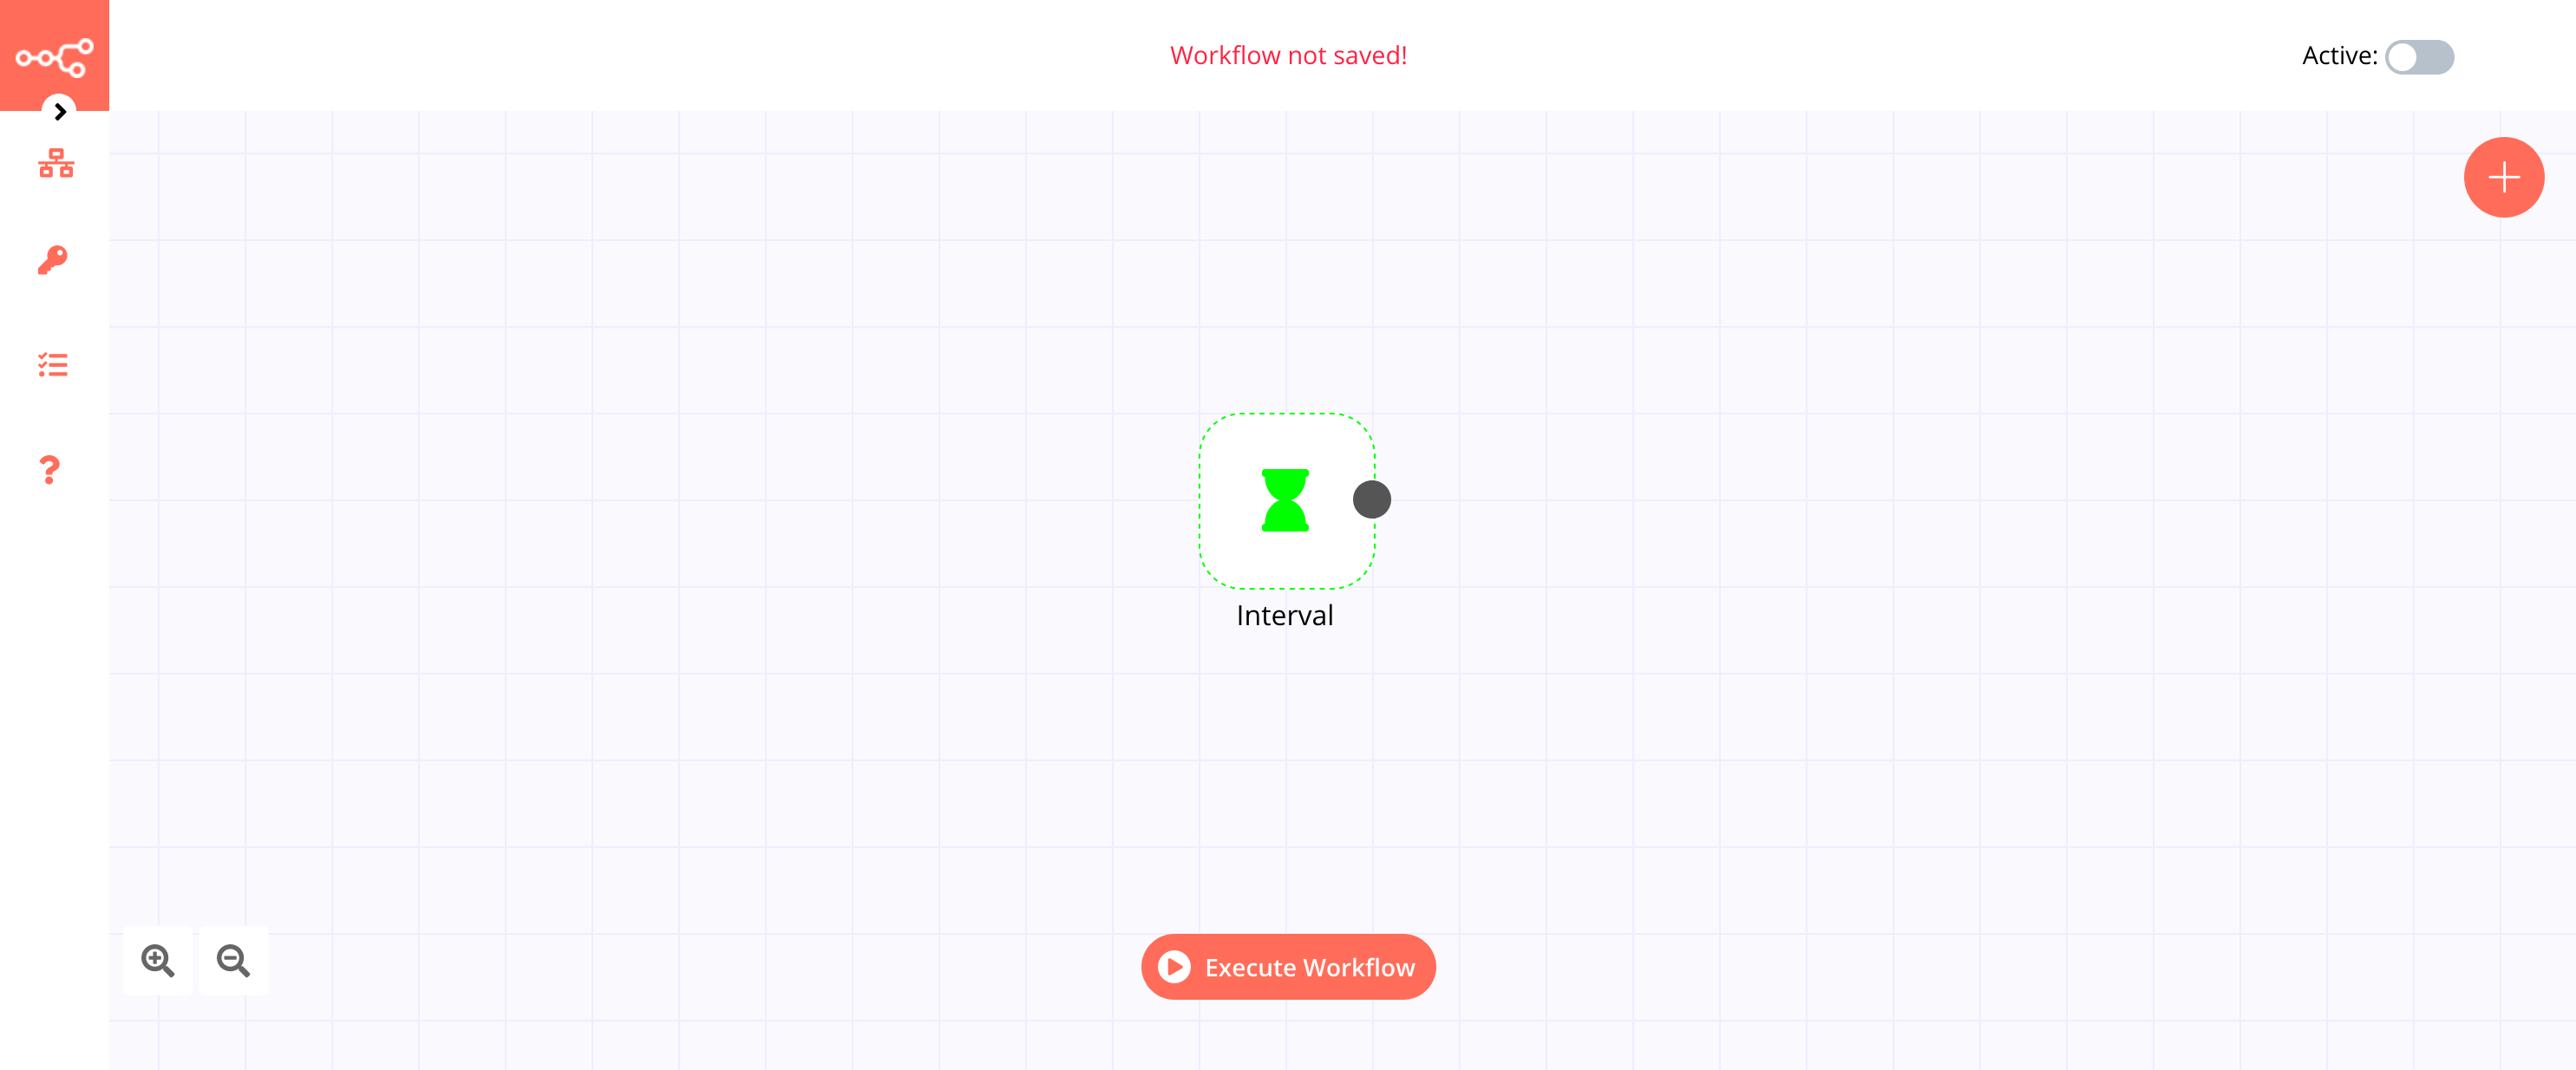
在這圖片上可以看到一個類似流程圖的序列,這就是一個工作流。每個工作流都有一個 Start 的節點,它是工作流的起點,當你按下畫面下方的 Execute Workflow 按鈕後,工作流就會從它開始啟動。
節點 & 連結
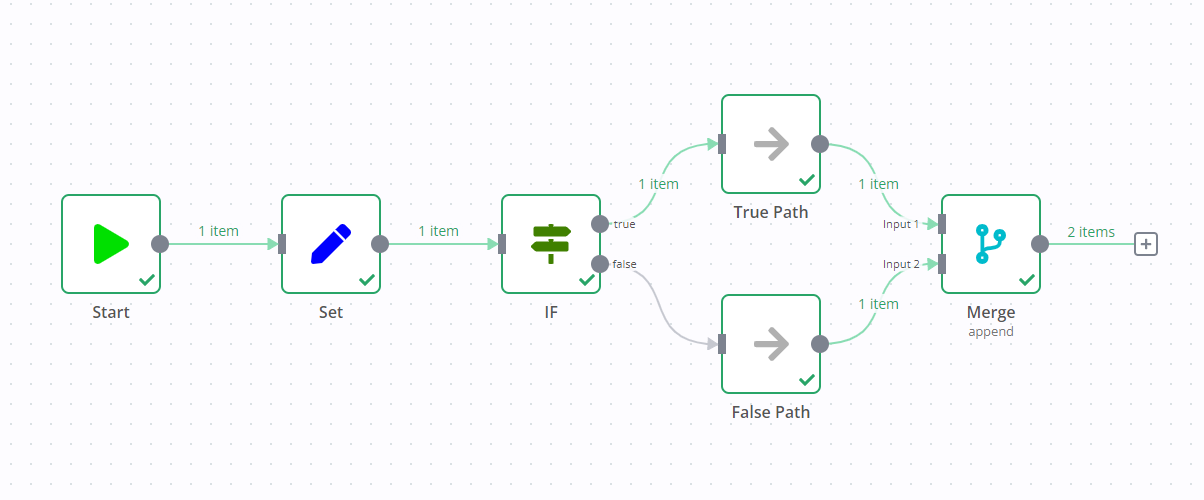
圖上的每一個方框就是一個節點,每個節點代表會執行的操作。而連結方框之間的線條就是連結,整個工作流會照著線條上箭頭的方向順序執行。當然這個工作流程出了順序執行外,也支援迴圈、錯誤處理、分支選擇的功能,想了解的話可以參考這兩篇官方文件,本文就不贅述了。
資料
在整個工作流程中,每個工作節點它可能是呼叫外部 API 取得資料,也可以是依賴上一個或是上上步驟的資料輸出做處理並往後面的工作流傳遞,甚至是對資料做轉換、分支選擇。整個 n8n 就圍繞著工作流程觸發、資料輸入、資料轉換、呼叫第三方整合,來達成強大的功能。

例如在這個範例工作流的第一個 Customer Datastore 節點中,這個節點實際上就是從官方提供的範例顧客資料中取出資料,可以看到畫面的右邊是具體取得的資料輸出內容。資料會用表個的方式做展示,可以按 JSON 的按鈕可以看到原始資料。
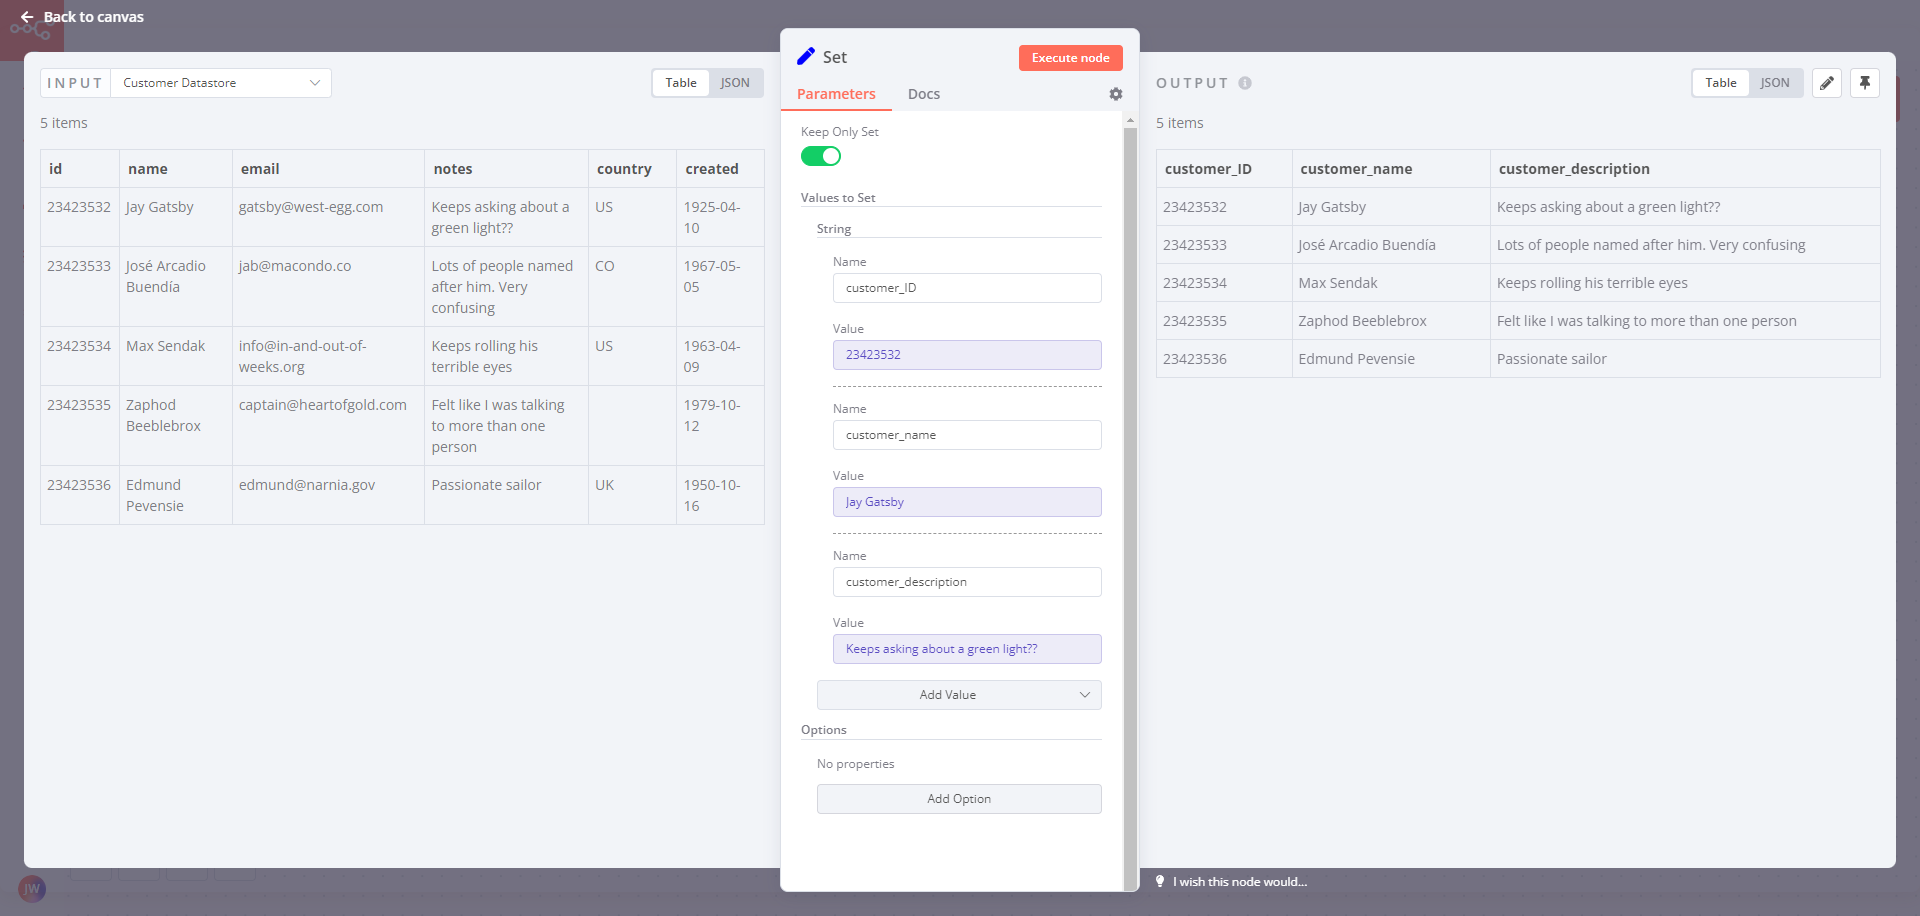
接著我們來看範例中的第二個 Set 節點,可以看到右邊窗格顯示的是上一個步驟的輸入,然後中間窗格可以去設定要從輸入資料的哪個欄位取資料,然後輸出的欄位是甚麼。
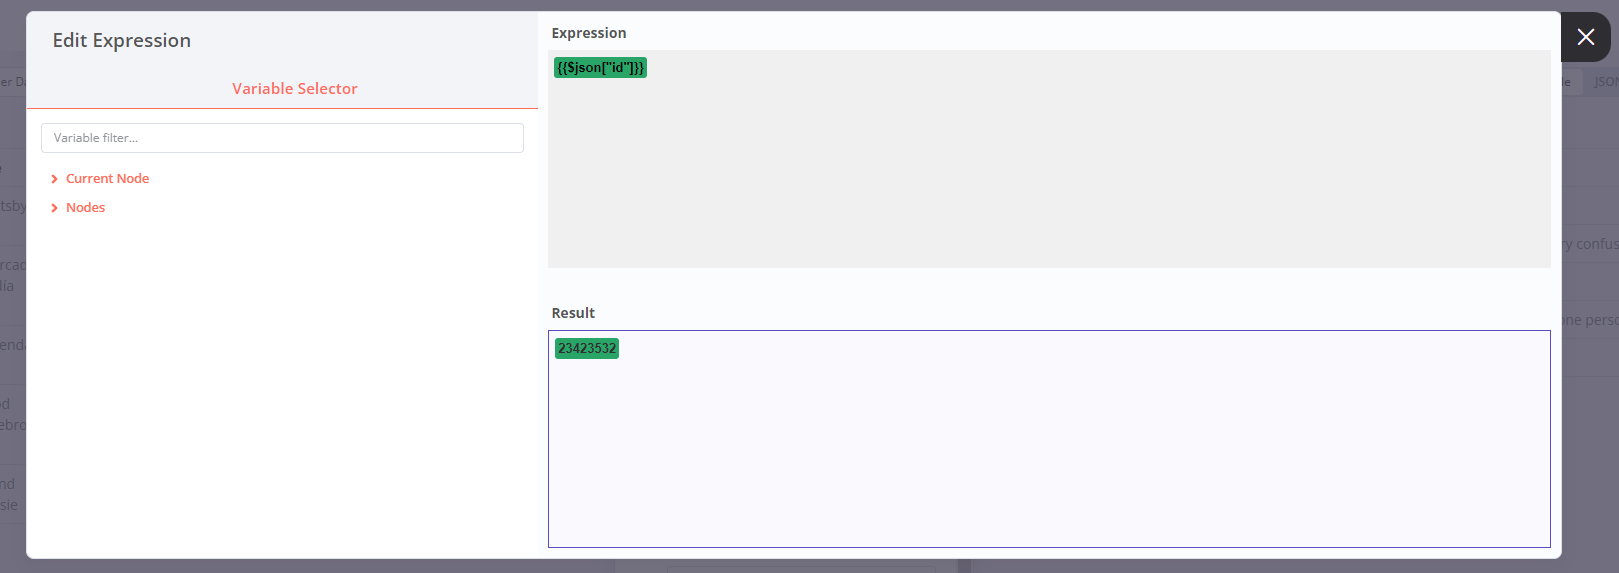
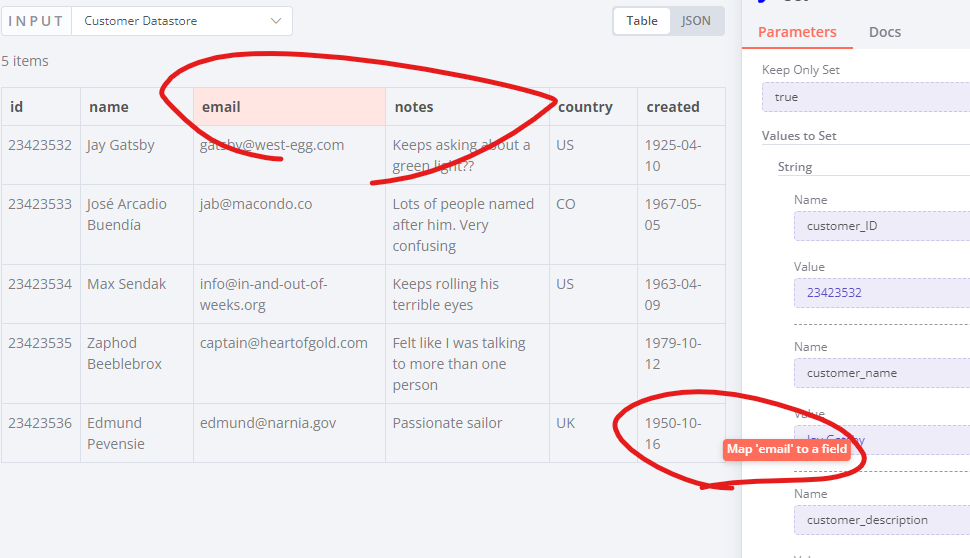
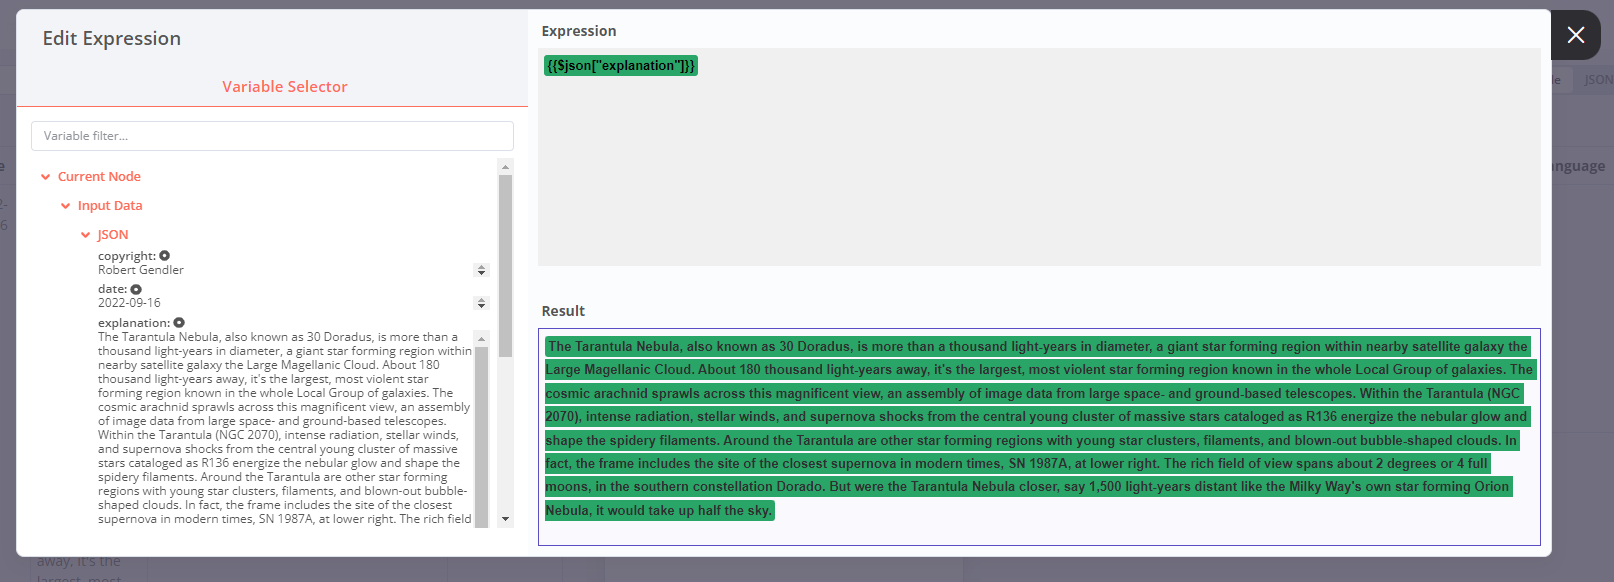
在 Value 欄位中,可以支援表達式的寫法,具體可以看上面的文件,基本上可以對 JSON 做查詢跟轉換再輸出。不會寫的也可以在介面上直接從表格拖曳要的值就會自動生成表達式,非常方便。
一個實際的例子
有了上面的基本概念後,我們來做一個實際的例子,這個例子是從官方第二個範例修改過來的。
流程
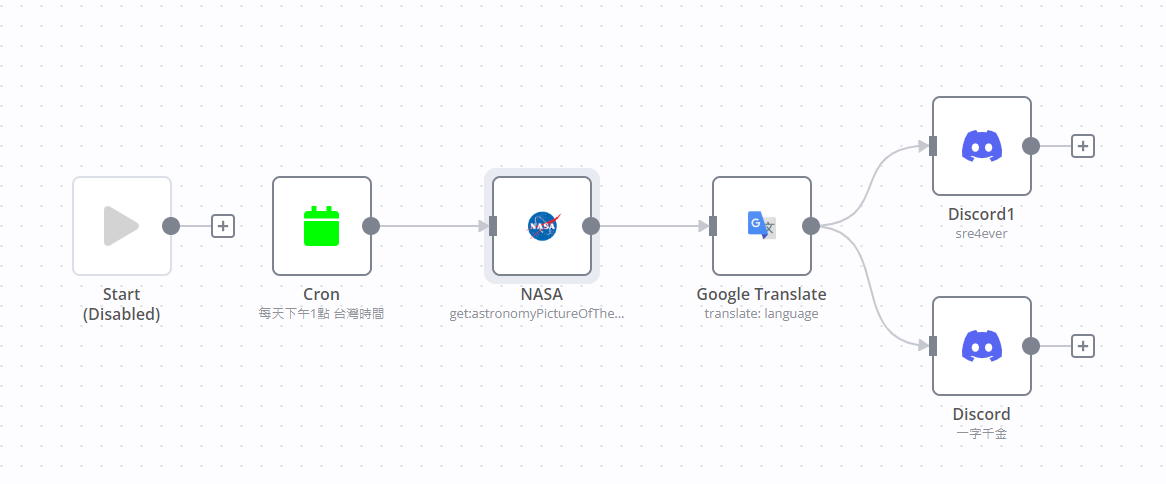
- 每天觸發一次
- 呼叫 NASA Astronomy Picture of the Day API 取得當天的天文照片
- 呼叫 Google 翻譯 API 把照片的描述翻譯成中文
- 發送照片到 Discord 群組分享給朋友
以下就會針對每一個節點它們的設定做說明。
Cron 節點
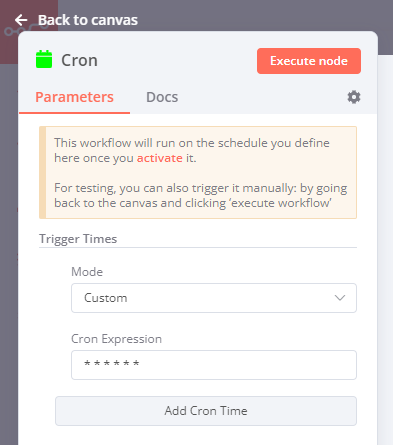
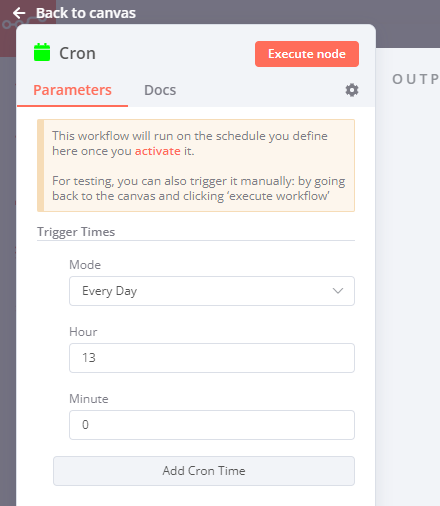
這個節點其實就一個定時任務,支援從下拉選單選擇每分鐘、小時、天,或是直接輸入 Crontab 表達式來指定時間。
NASA 節點


這個節點其實就是呼叫 NASA 的 Open API 來取資料。
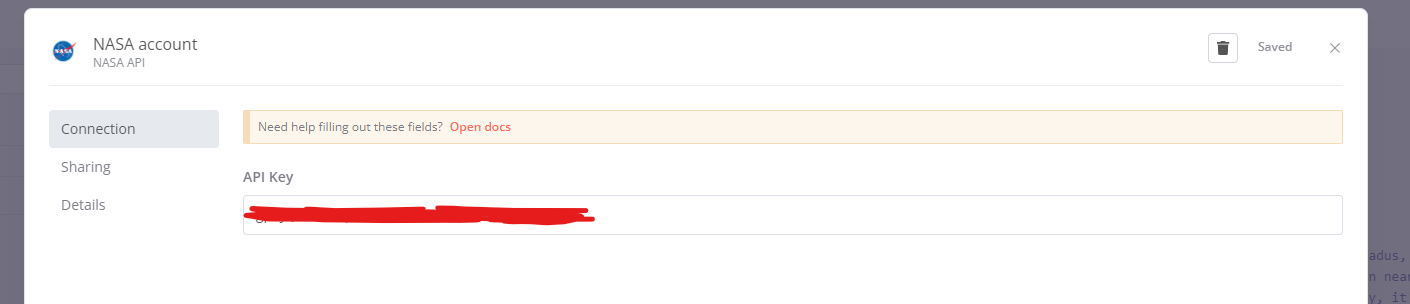
要使用之前記得到下面這個網站去註冊 API Key 貼到上面的 Credentail 視窗裡就可以使用。
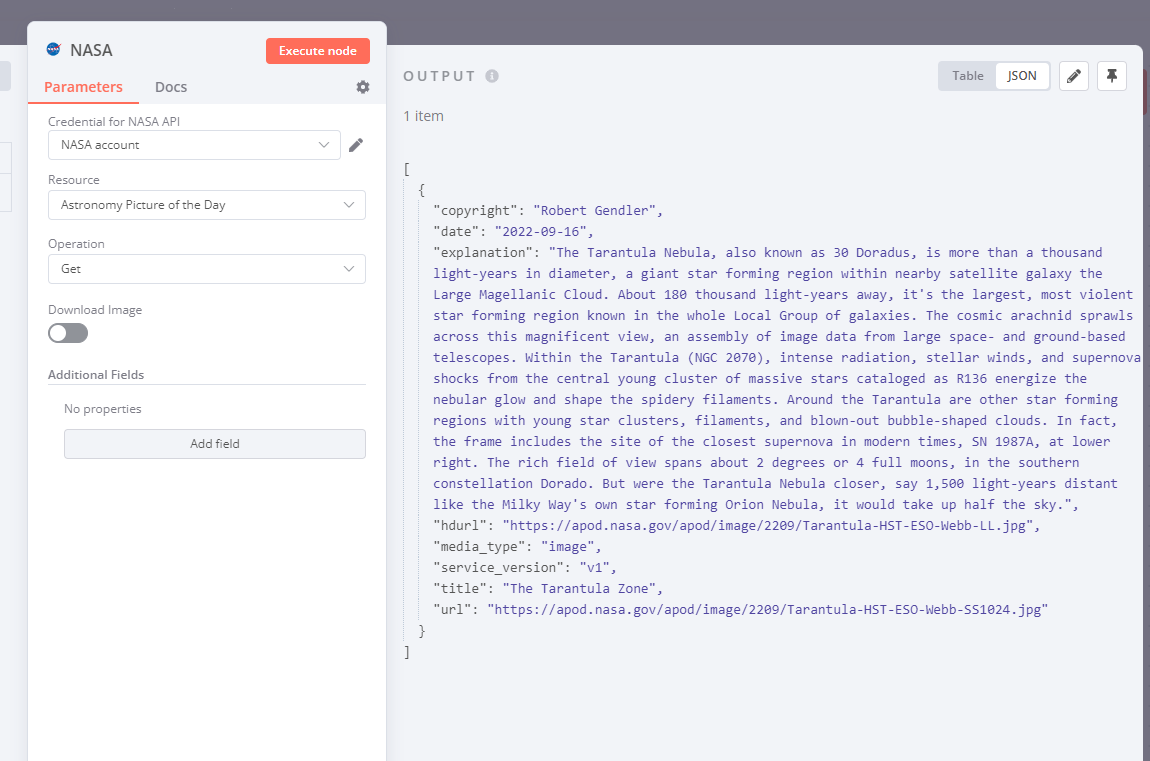
呼叫完成後會輸出你呼叫的 API 回傳的結果,以這個 Astronomy Picture of the Day API 為例,會有每天照片的標題、描述、跟不同畫質的照片網址。
Google Translate 節點

這個個節點也是很簡單,它可以幫你呼叫 Google 翻譯 API 去把一串文字翻譯成你要的語言。

使用這個節點會稍微麻煩一點,要先照這篇文章的內容註冊好 GCP 帳號開好 Oauth 認證跟開啟 Google Translate API 權限。
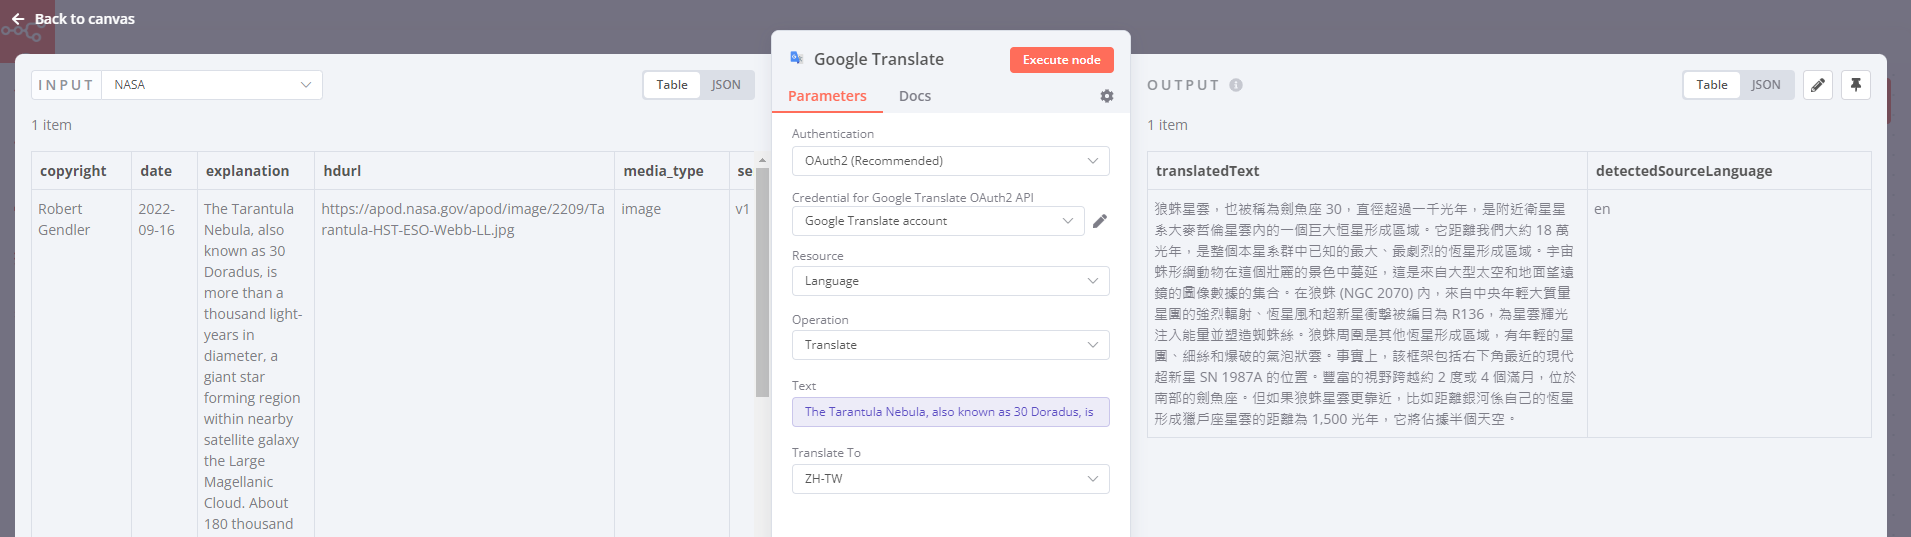
前置作業完成後就照圖片上的設定,從前一個步驟抓取照片的描述,然後選擇要翻譯的語言代號,按一下 Execute Node 就可以看到翻譯完成的結果。
Discord 節點

很簡單,往 Discord 伺服器的頻道裡發訊息。
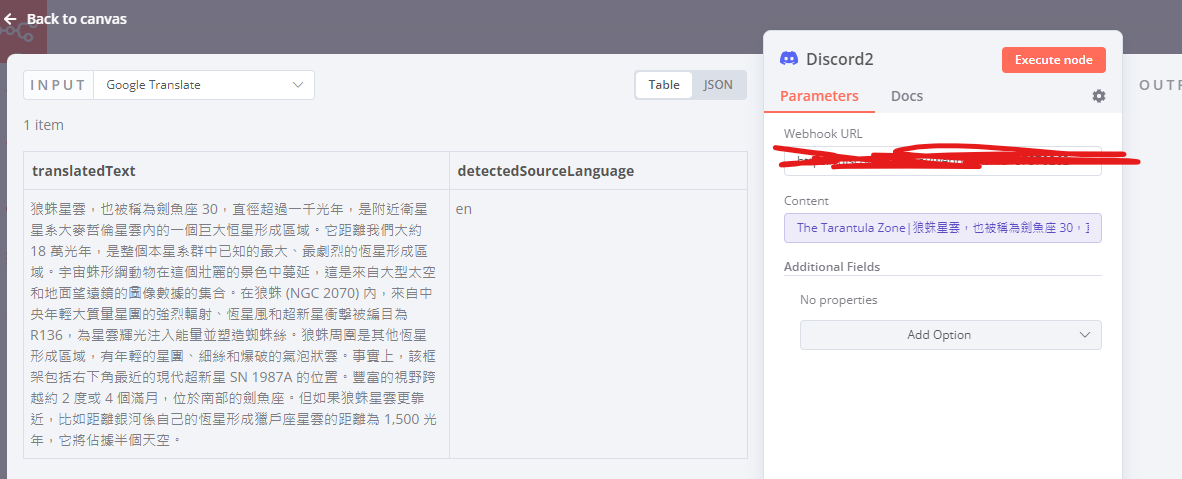
一樣照這篇文件裡的步驟,取得你自己 Discord 伺服器的 Webhhok 網址。設定在紅筆塗掉的地方。
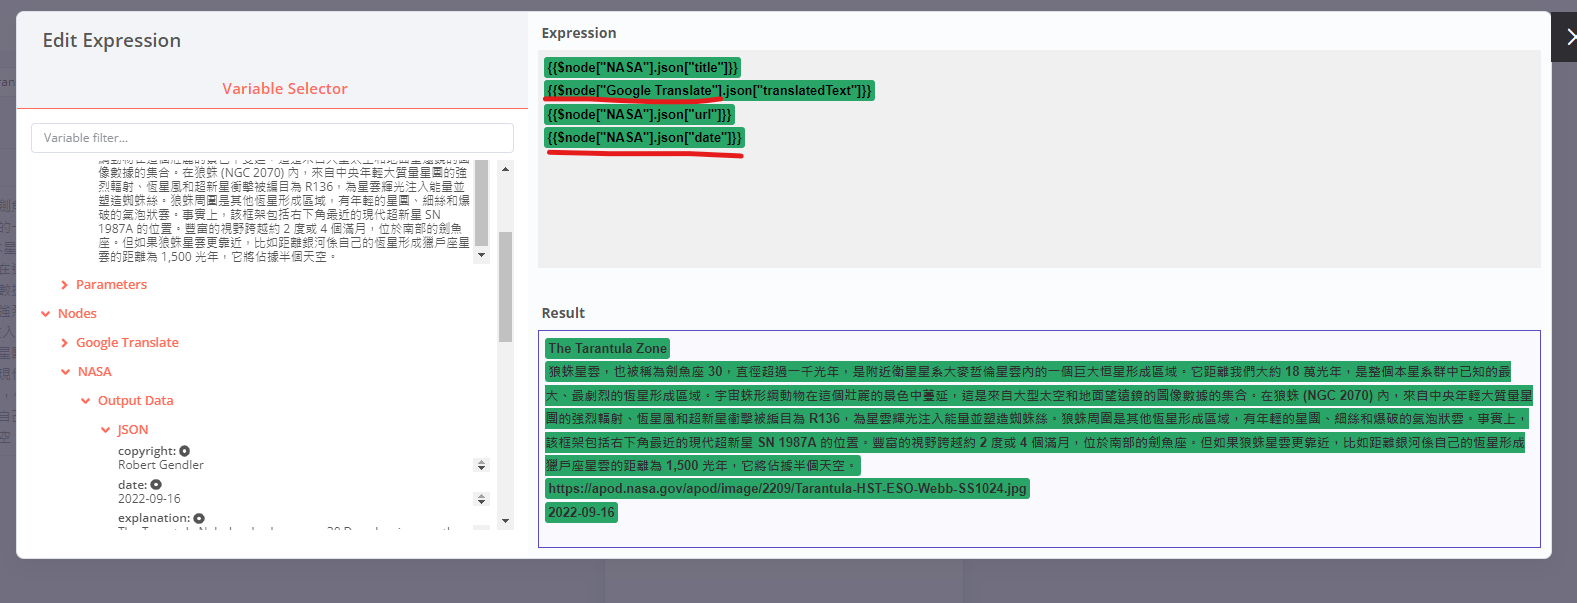
值得注意的是,你編輯要發送的消息一樣支援表達式之外,它不僅可以取上一個節點的資料,還能拿任意一個節點的資料。例如在這個例子裡,照片的標題跟網址都是取 NASA 節點的資料,而描述就是拿 Google Translate 節點的資料。
測試
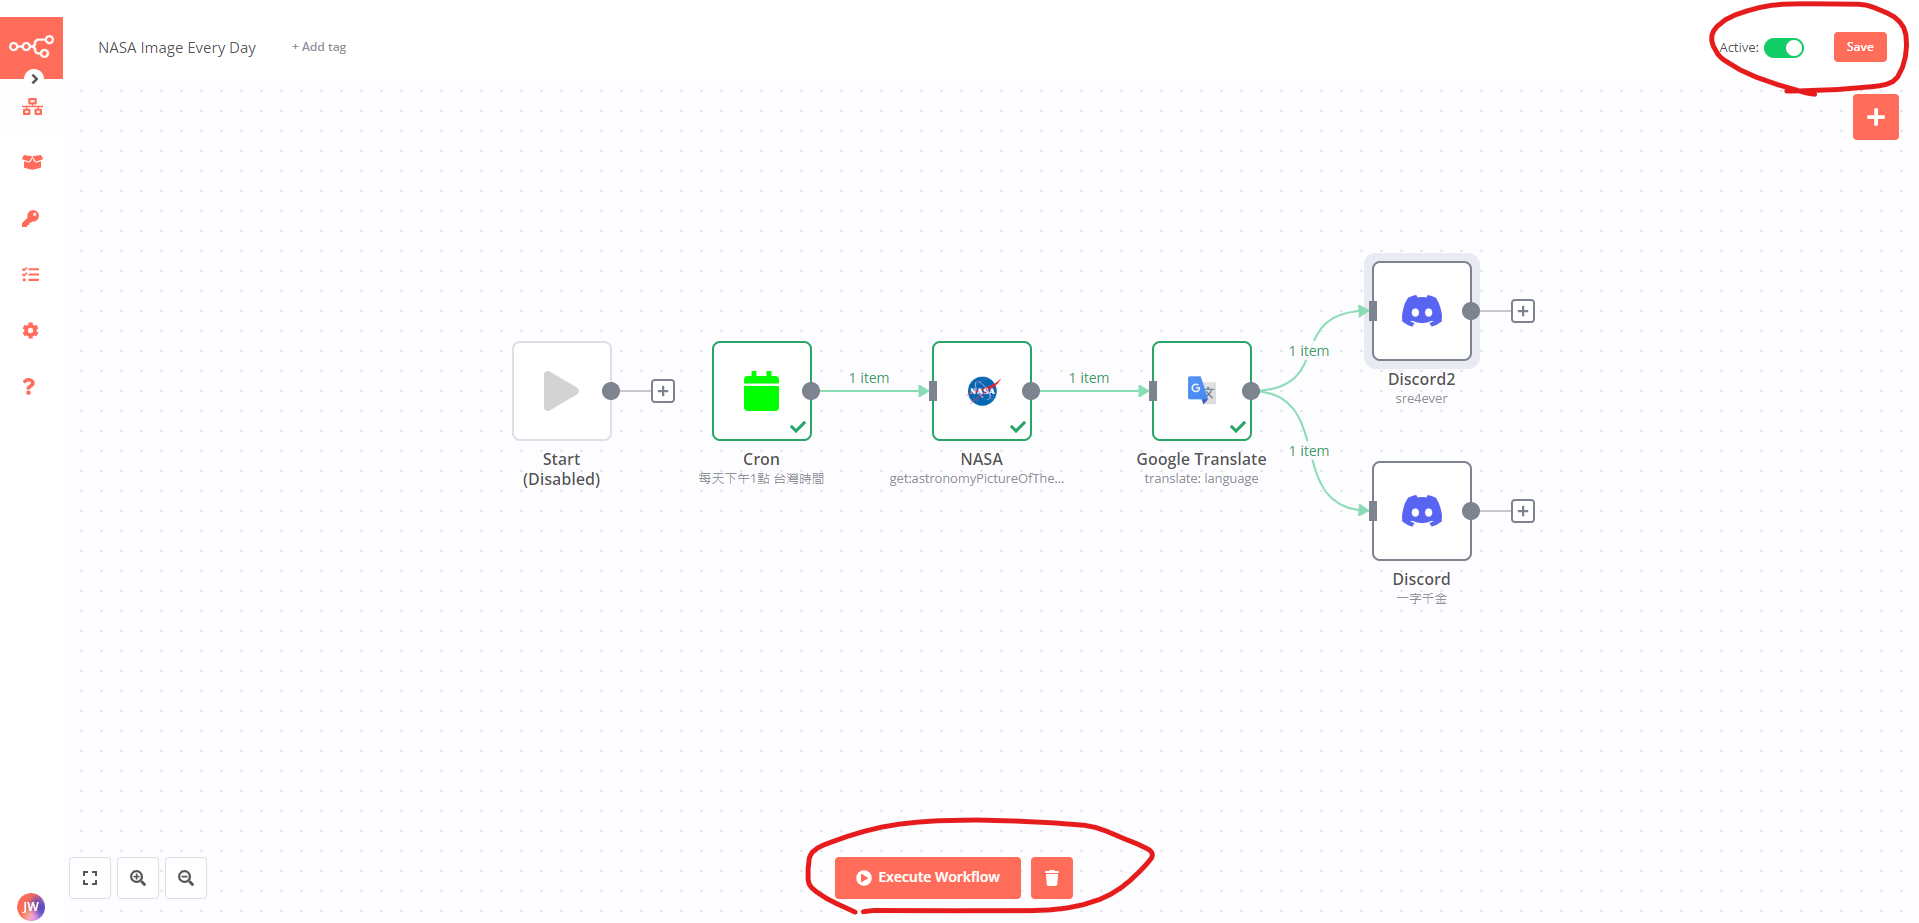
最後我們記得按下面 Execute Workflow 可以測試執行,測試完沒問題後按右上角存檔,並且把 Active 開關打開,這個工作流程就會在你設定的時間每天自動執行。
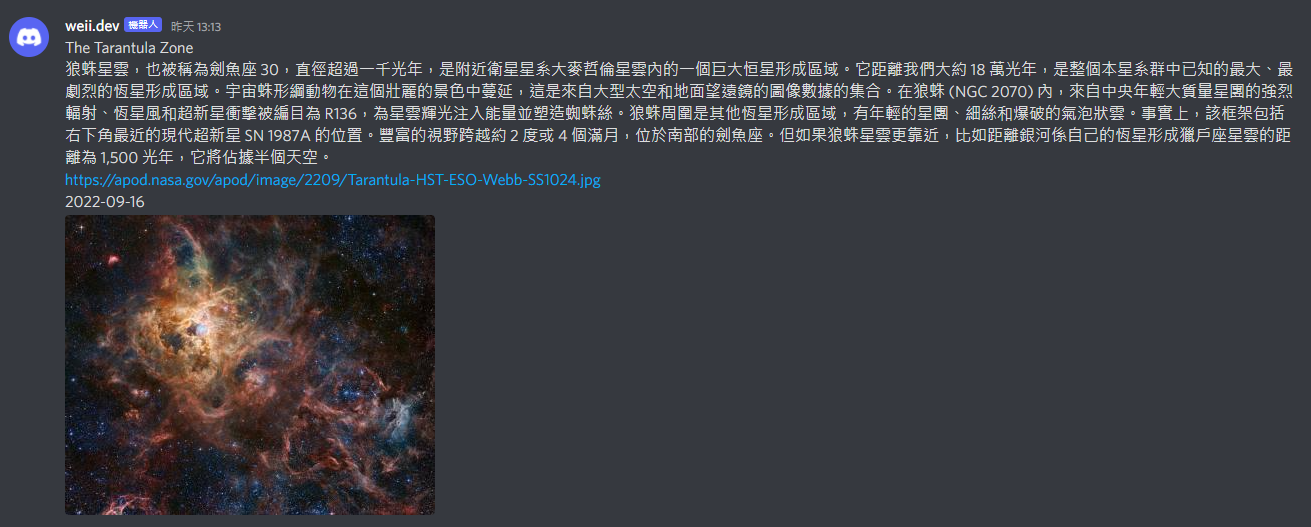
大功告成!!!
可能性
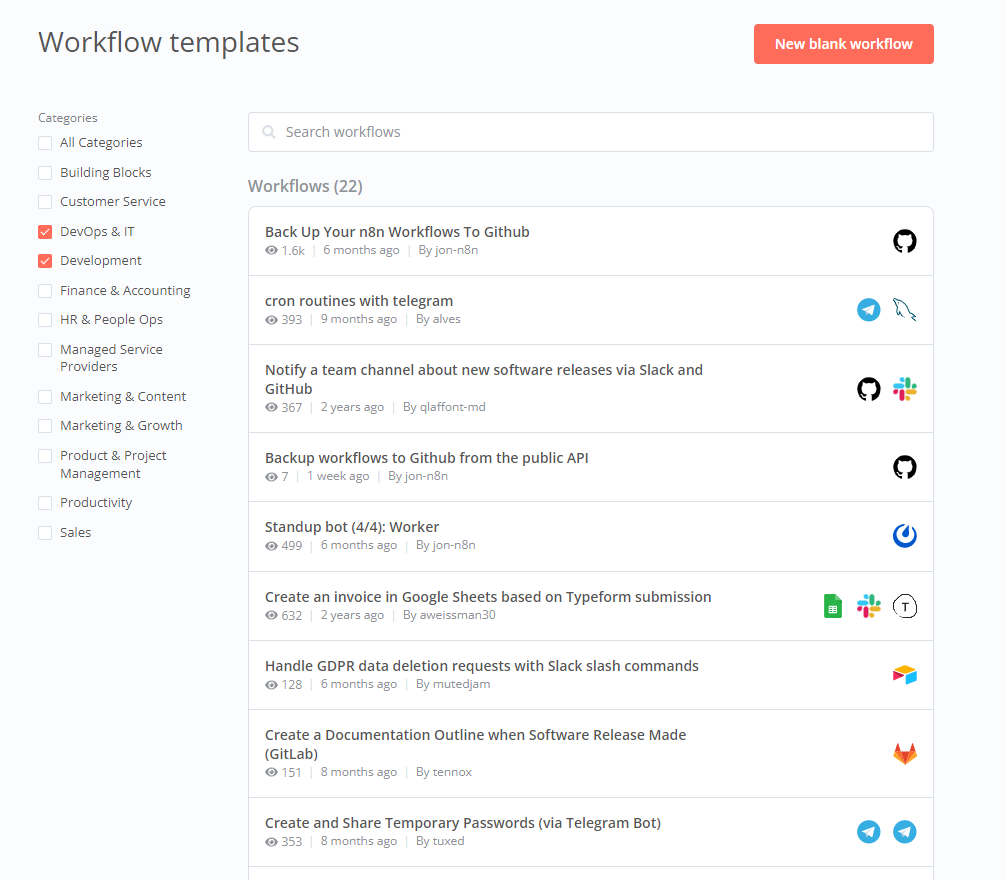
大家不妨可以到 n8n 介面上的 Templates 選單看看官方內建的一些範本,可以發現其實不僅僅是向上面範例發發通知簡單的事,甚至是做 CI/CD的範例,或是自動生成 Google Sheet 做報表,抑或是線上環境有事故的時候,做自動診斷恢復流程都是可以用這個東西來搞。以下是一些我覺得 n8n 內件一些我覺得非常有用的節點可以給大家參考。
執行類


這個 Wait 蠻屌的,它可以暫停流程並提供一個繼續的 Webhook 讓觸發繼續,如果流程中需要卡審核可以用這個辦到。
觸發類


輸出類


結語
這套工具我覺得最棒的就是它對不同平台的支援做得很好,基本上只有你想不到,沒有串不起來的東西,就算有它也開放了可以自己擴充節點的方式來解決。
整體而言我讀完文件把整個流程串起來只花了不到半小時就搞定可以說是開發非常快速,也不用寫程式碼。
大家可以去參考這邊有 n8n 支援整合的完整列表。
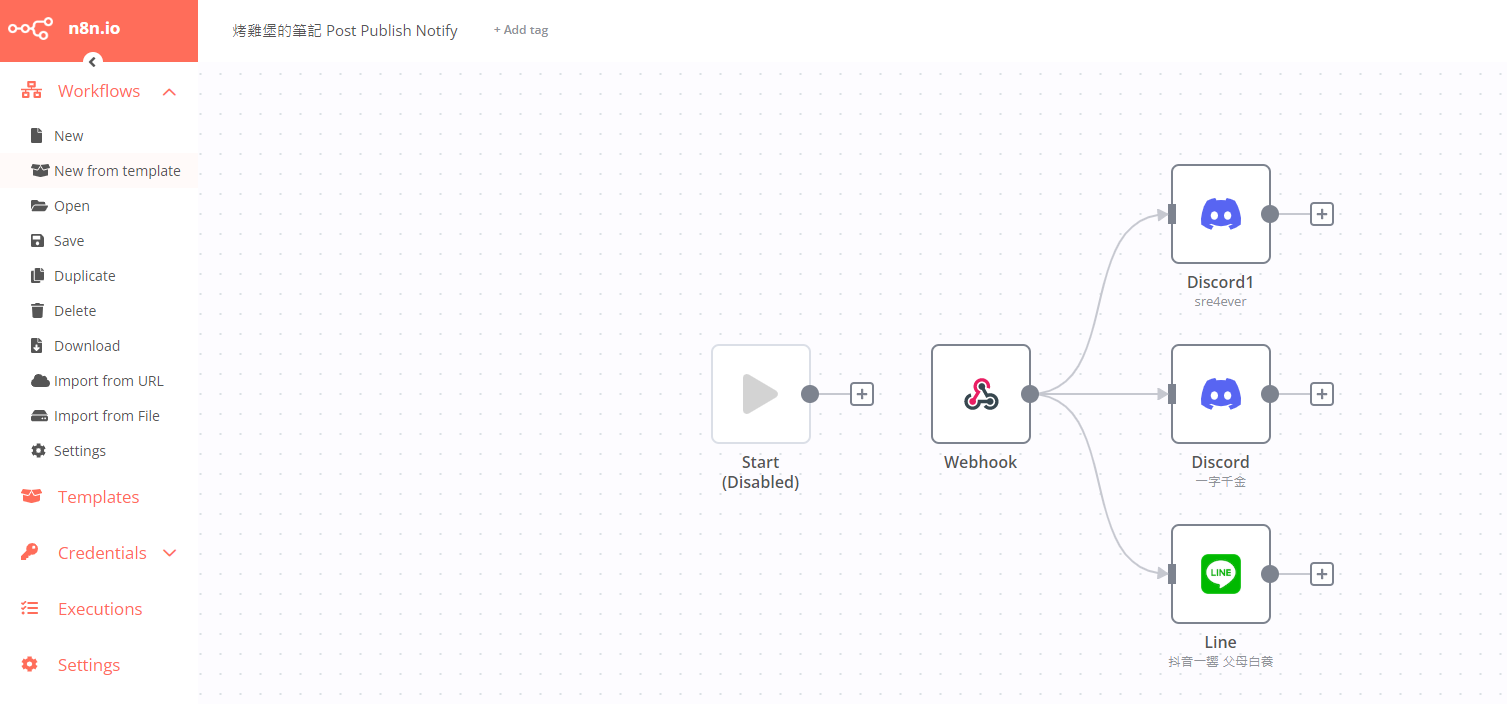
最後我又額外搞了一個這個部落格網站只要有發文就會自動發送通知到朋友群組的工作流,貼給大家參考看看。剛好在這篇文章發布的時候可以測試 :))))))))